Incident Reports
The Incident Reports web app and Field Reports mobile app are an extensions of the Incident Reporting module in Fire Station. You can collect notes in the field and upload them for filling out NFIRS reports. Additionally, you can quickly enter NFIRS reports— or save them to be finished later.
Getting Started
Summary
The Field Reports app is a tablet app that allows you to take notes while responding to an incident even if you do not have an internet connection. Once you have returned and have an internet connection, you can upload these notes to the Fire Station platform where they can be used while completing an NFIRS report with the Incident Reports web app. The web app allows you to save and validate your report at any time and submit it to Fire Station Desktop when the report passes validation.
Requirements
- Field Reports Tablet App - In order to use the app, you must have an Android device with:
- An OS version of Android Marshmallow (2015) or higher
- A modern web browser with connection to the internet
- This is required to sign in or upload reports
- An active license for Incident Reporting and CDH
- An FSSID linked to your personnel record from the Fire Station Desktop
- Incident Reports Web App - In order to use the web app, you must have:
- A computer, tablet or mobile device with a modern web browser and connection to the internet
- An active license for Incident Reporting and CDH
- An FSSID linked to your personnel record from the Fire Station Desktop
You need one of the following permission on your FSSID:
- Field Reports User
This permission allows you to use both apps.
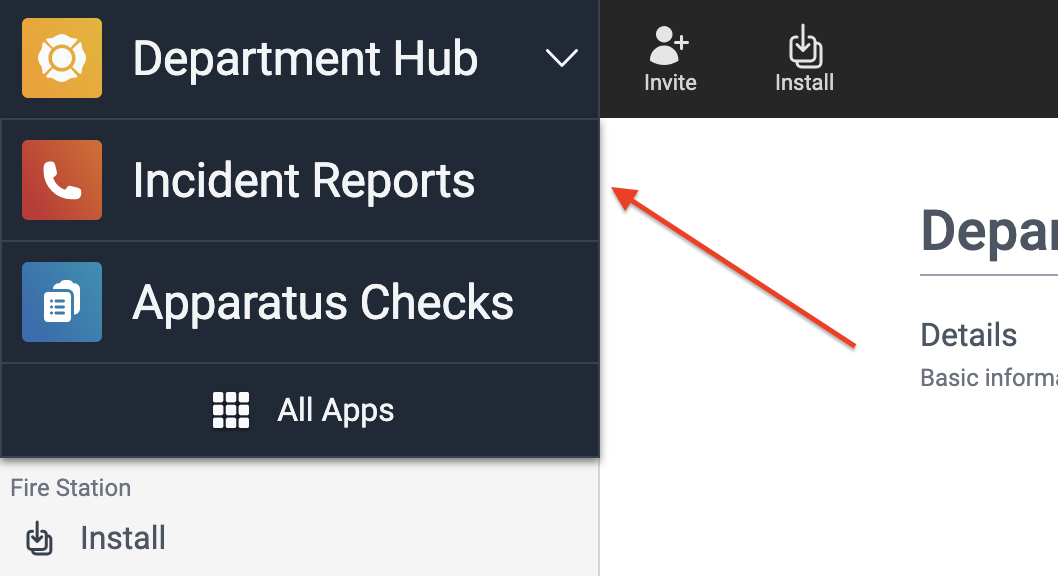
You can manage your registered tablet devices in the Department Hub. You need Field Reports Manager permissions to make these changes.
Create a Field Report
Install the App
- On your tablet, open a browser and go to https://hub.firestationsoftware.com.
- In the left menu, select Settings in the Fire Station+ group.
- Scroll down to the Mobile Apps section and tap the the "Download" button on the right side of the Field Reports box.
-
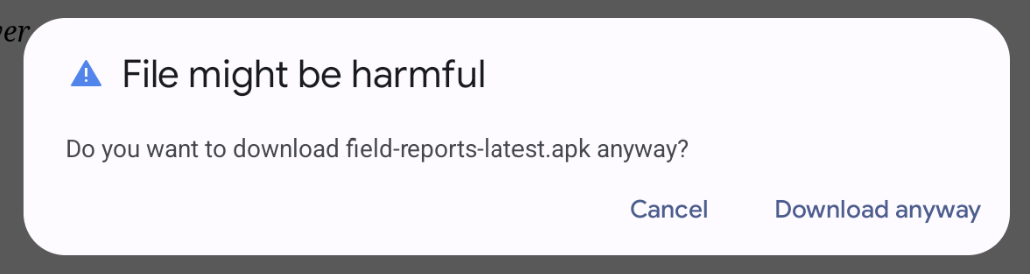
Tap "Download Anyway" if presented with a "File Might Be Harmful" popup window.

- Open the APK file to begin installation.
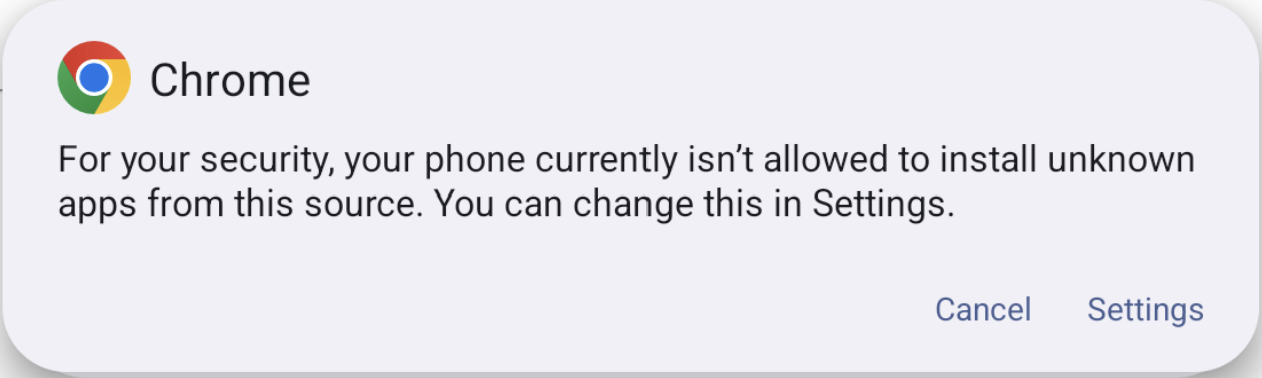
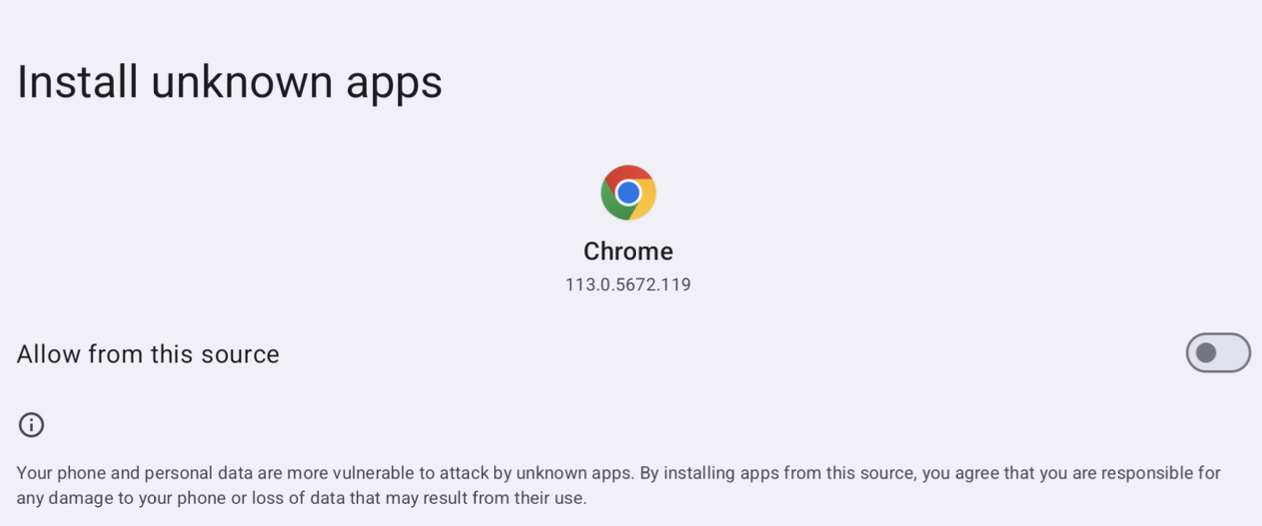
- If presented with a security popup, tap the "Settings" button and toggle "Allow from this source".


-
Tap the "Install" button.
- If presented with a Play Protect warning, tap “More Details > Install Anyway” to complete installation.
Register Your Device
You must have Field Reports User permissions to make these changes.
- Launch the Field Reports app while connected to the internet.
-
If the app asks if it should be sent to Google for a security review, tap the "Don’t
Send" button.
-
- Fill out the form with your FSSID email and password, and enter a recognizable name for your device.
- Tap the "Register Device" button.
File the Report
You can collect notes in the field while responding to an incident:
- Conduct the Report
Gather notes while in the field, even without an internet connection. - Upload the Report
Submit your Field Report to the Fire Station platform to reference when creating an Incident Report.
Create an Incident Report
Open the App
There are two ways to access the Incident Reports web application:
- Go to the application directly
- On a browser, go to https://field-reports.firestationsoftware.com.
- Launch the application from the Department Hub
- On a browser, go to https://hub.firestationsoftware.com.
- In the top left, click the Department Hub app name to open the app shortcut menu.
- Select Incident Reports from the menu, or click "All Apps" and select Incident Repots from the App Launcher.

Enter a Report
- Create an Incident Report
This screen allows you to enter NFIRS report information. - Submit an Incident Report
This screen allows you to upload field reports to Fire Station Desktop.
Enter a Field Report
Open a Report
You do not need an internet connection to open reports and collect notes.
To open a field report:
- Launch the app.
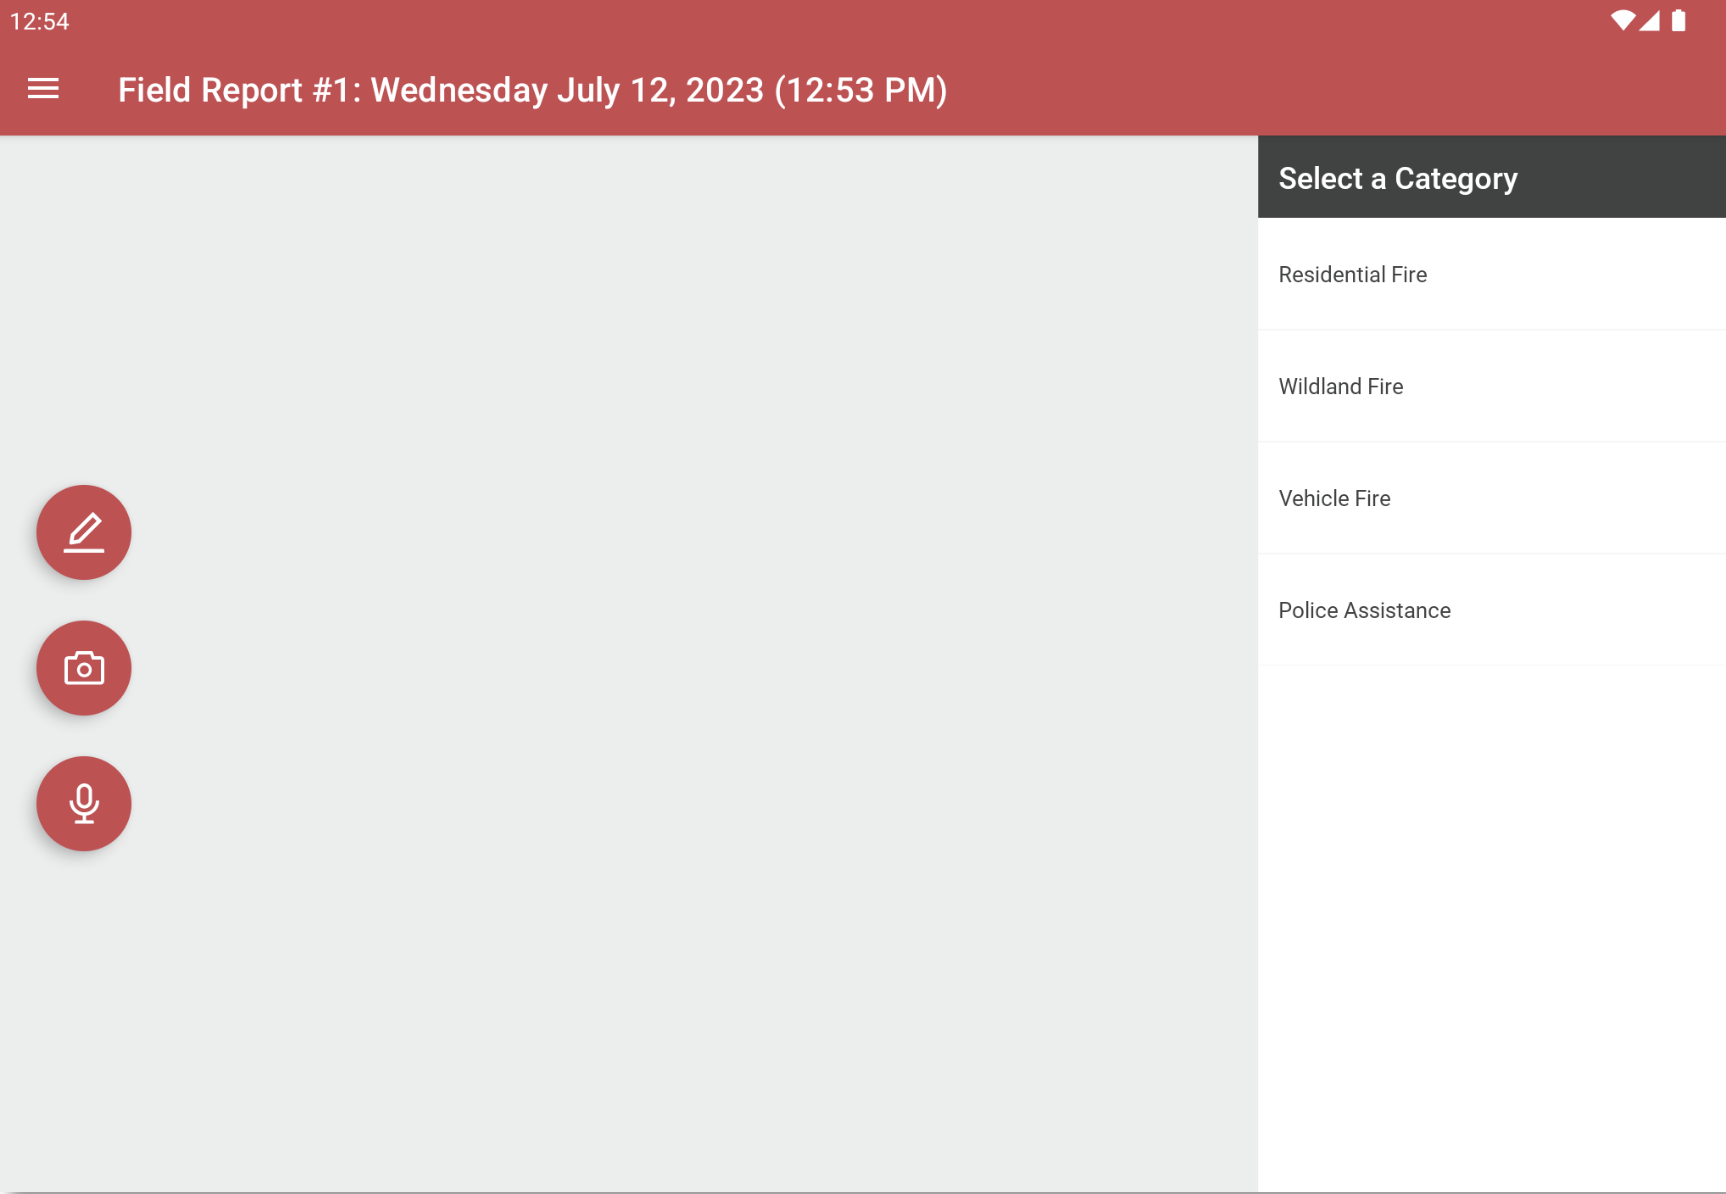
- From the main menu, select "New Field Report". If you want to continue a report, select "Pending Field Reports" and then select it from the list.
- Select a category on the right side of the screen. A list of goals will appear so you know what notes need to be taken.

|
|
|
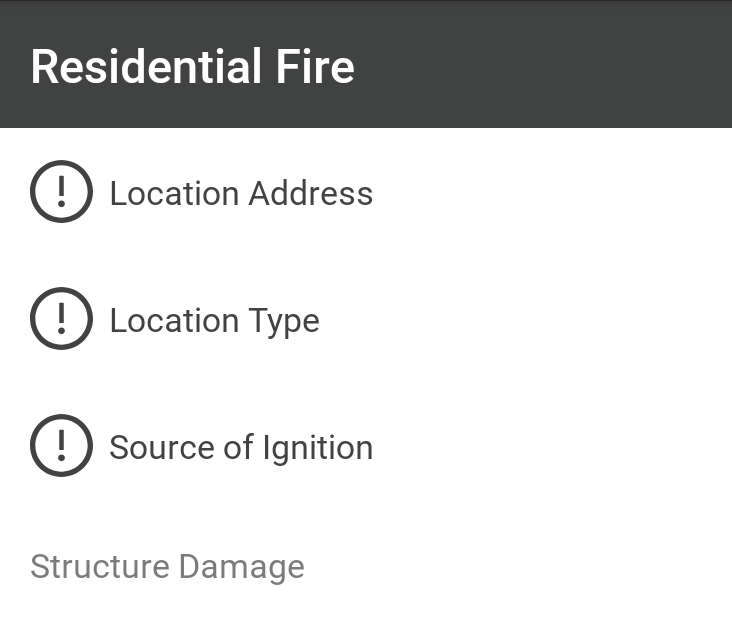
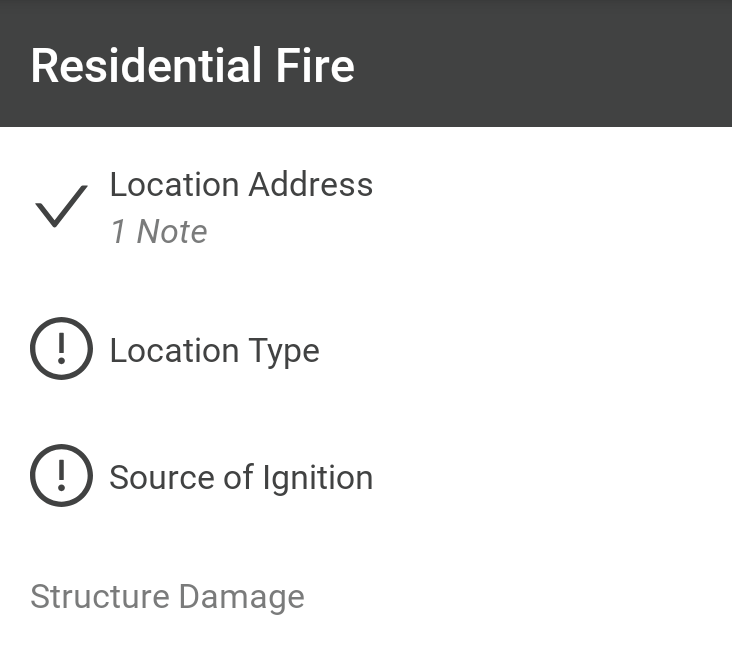
As you collect notes, you can link them to goals. Doing so will show that that goal has been met. Goals with an exclamation mark icon are listed as required, but that is only a suggestion. You do not need to take notes for every goal in order to save or submit a field report.
Collect Notes
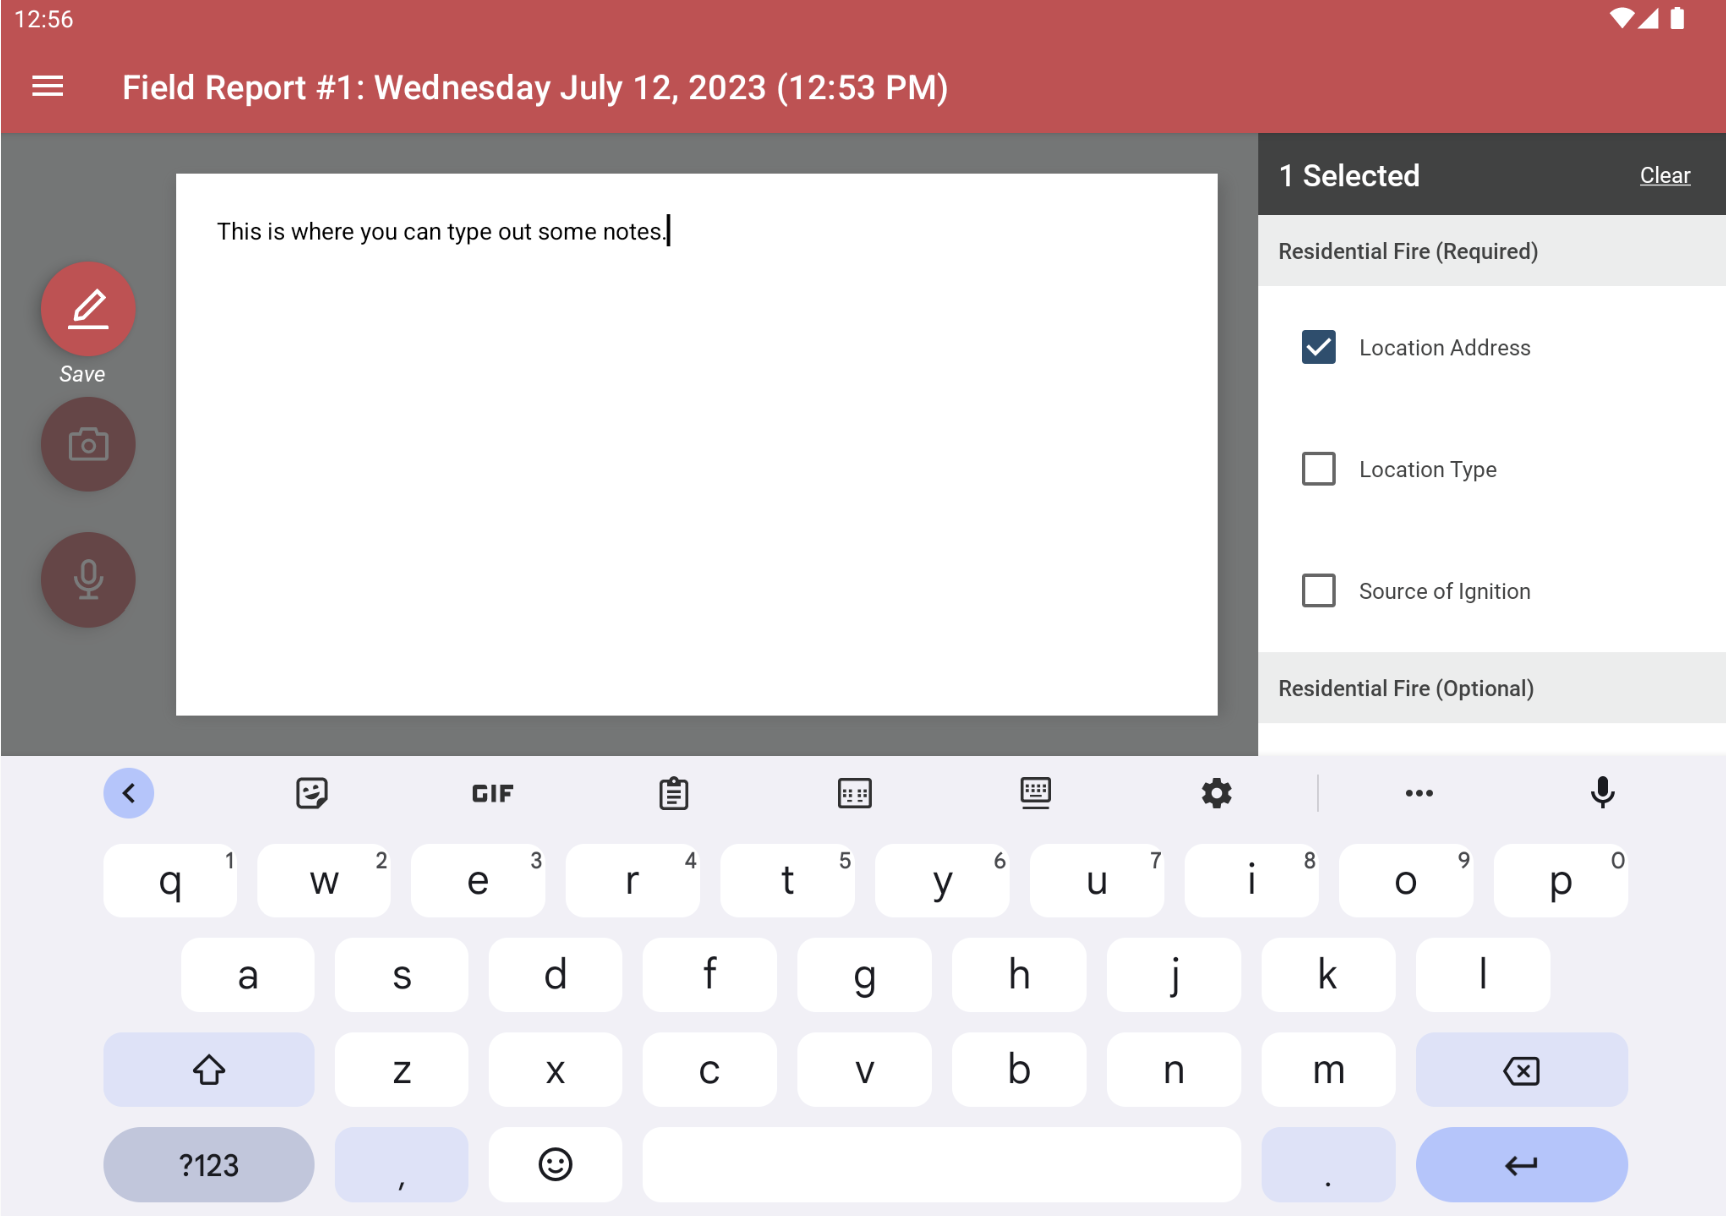
A field report is a collection of notes. You can enter three types of notes:
- Text
- Pictures
- Recorded Audio
Add a Note
- Select the corresponding button on the left side of the screen.
- Record the note using the controls that appear.
- If you want the note to complete a goal, check off the goal(s) on the right menu.
- Tap the same note button again to save the information.
Edit a Note
- Tap the note to open it.
- Make any modifications.
- Tap the note button on the left to save the changes.
Delete a Note
- Tap and hold a note.
- Select "Delete Note' from the popup menu to confirm.
Close a Report
You can stop working on a report and return to the main menu:
- Tap the icon in the top left of the screen to open the menu.
- Select "Close Report".
You can reopen a report from the main menu.
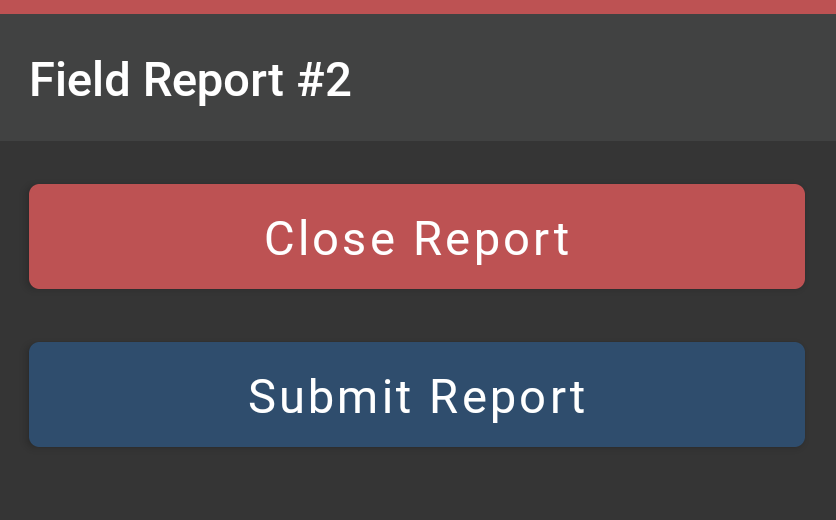
Upload a Report
After you have saved notes to a report, you can submit it to the Fire Station platform:
- Tap the icon in the top left of the screen to open the menu.
- Select "Submit Report".
- Select "Submit" to confirm.
You cannot reopen a Field Report that has been submitted.

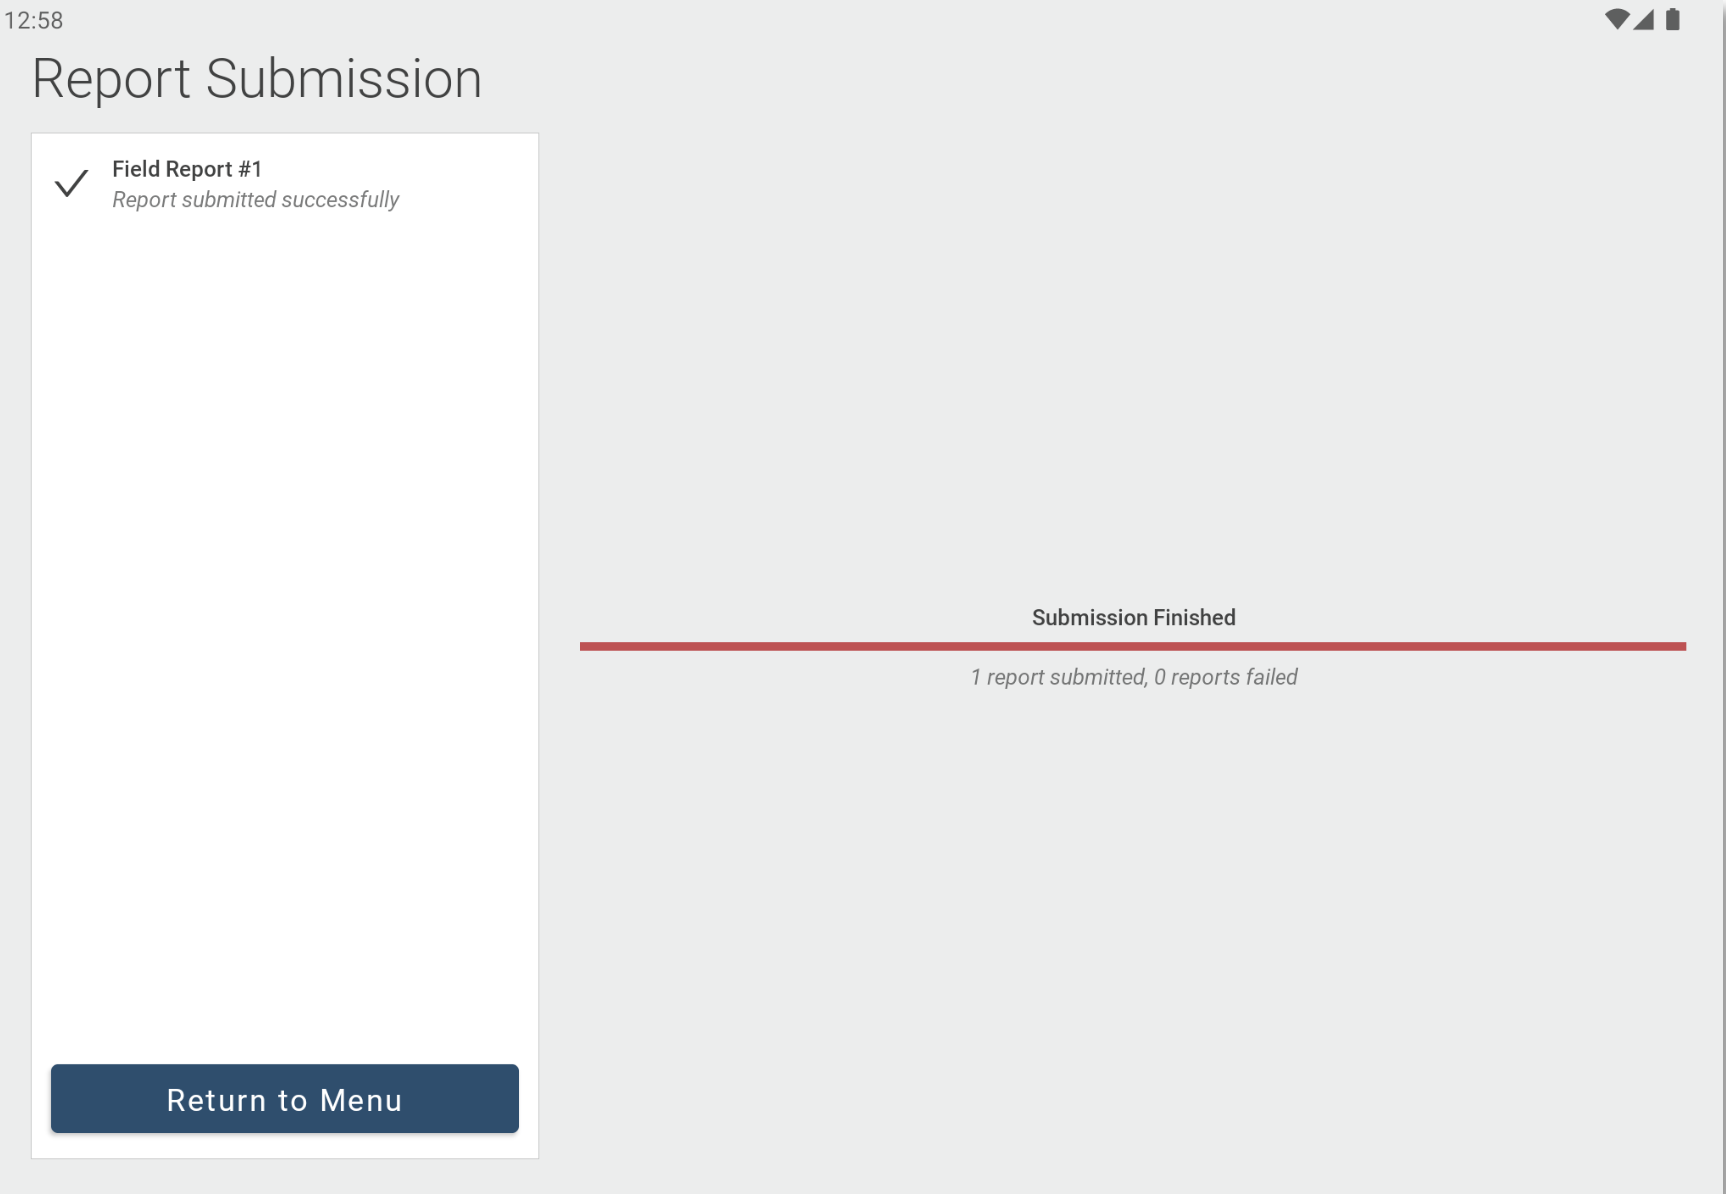
Upload All Pending Reports
You can upload multiple reports at the same time:
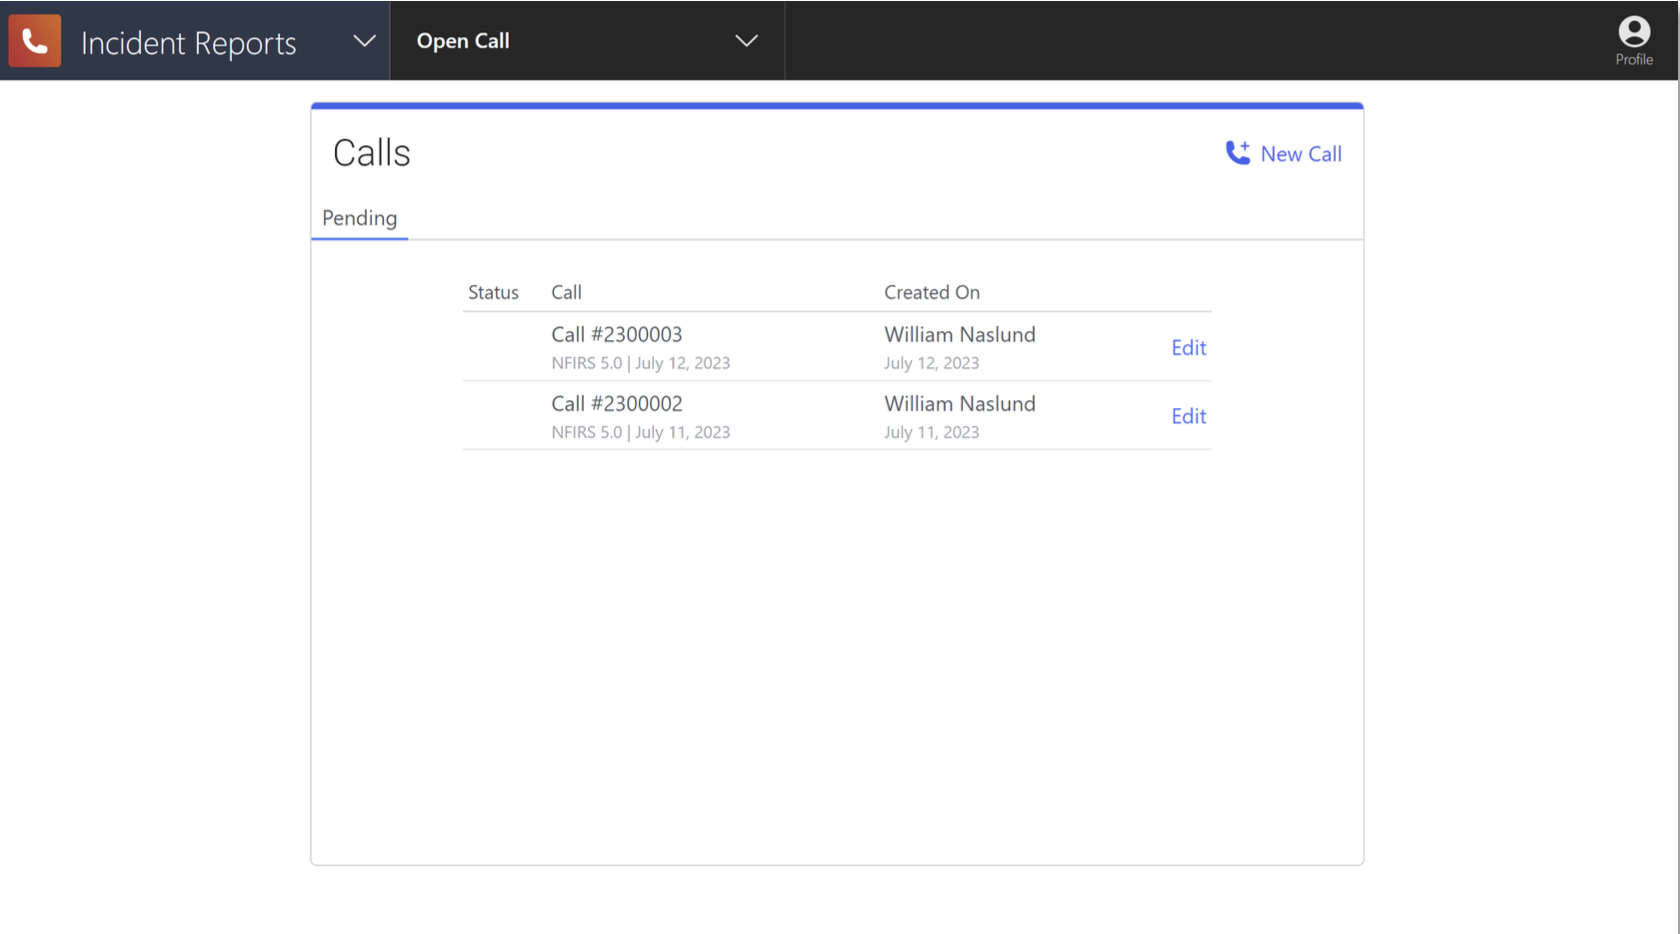
Enter an Incident Report
Open a Call in the Editor
You must have Field Reports User to make these changes.
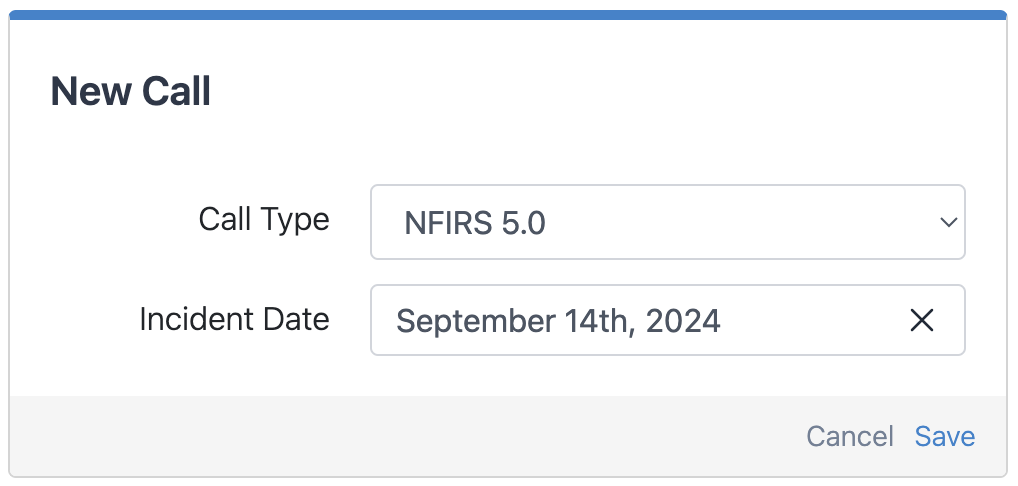
To enter an incident report for a new call:
- On a browser, go to https://field-reports.firestationsoftware.com. You may need to sign in.
- Click the "New Call" button on the top right of the Calls list.
- Select an Incident Date and click "Save" at the bottom of the form.
To edit a report for an existing call:
- On a browser, go to https://field-reports.firestationsoftware.com. You may need to sign in.
- Click the "Edit" link to the right of a pending call.
Use the Call Editor
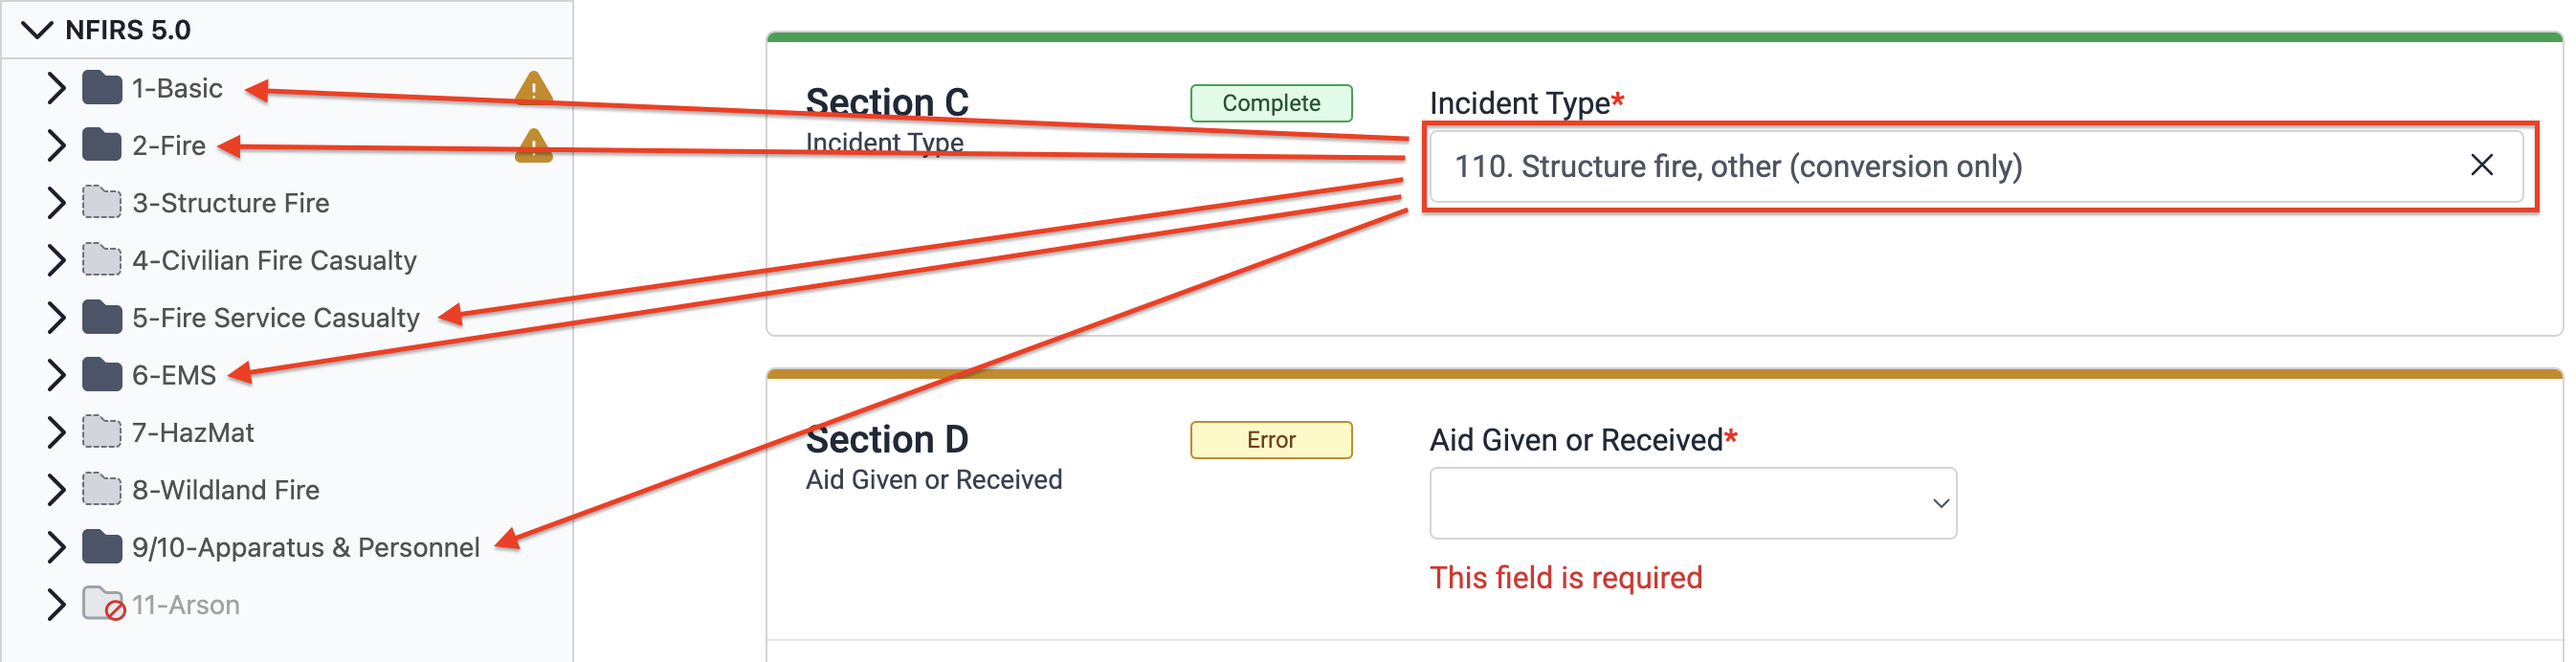
There are four areas on the call editor screen.

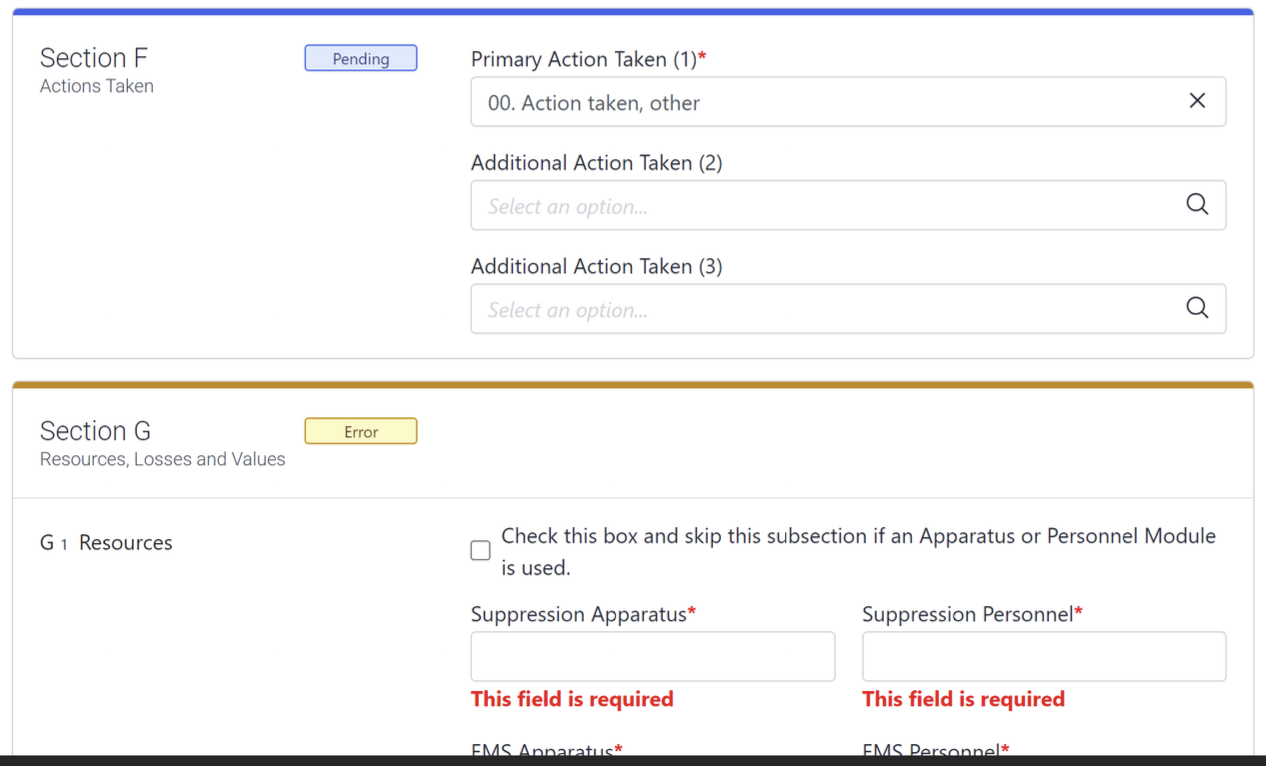
Form
The center of the page shows the selected form. The validation status is indicated on each form to match the status in the left navigation menu.
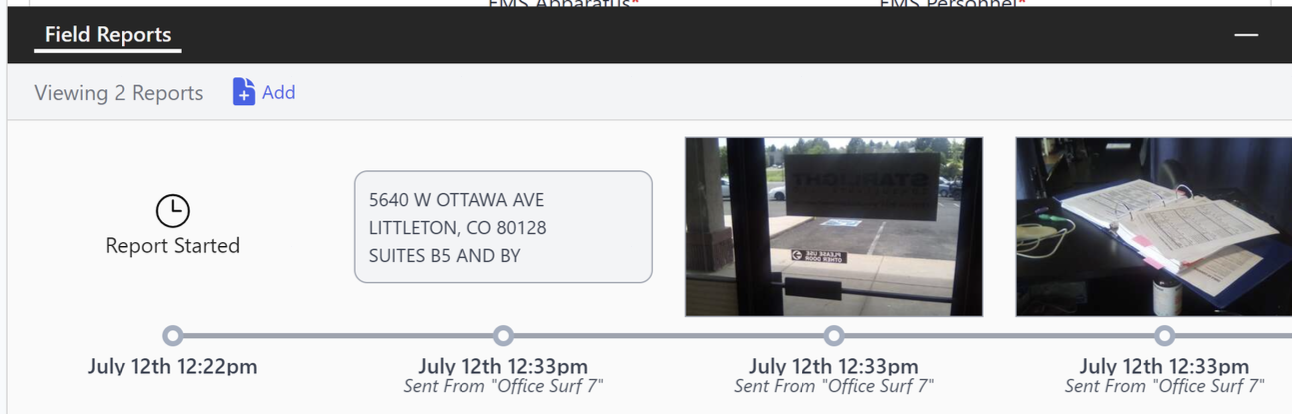
Field Report Tray
The field report tray appears at the bottom of the editor. It shows notes from any field report linked to the call. The tray can be collapsed to show more of the selected form.
Save and Validate
You can save the report at any time by clicking the "Save" button at the top of the page. When saved, the entire report is checked and validated based on the NFIRS 5.0 specification (link). Any changes to the form are saved even if the report has validation errors.

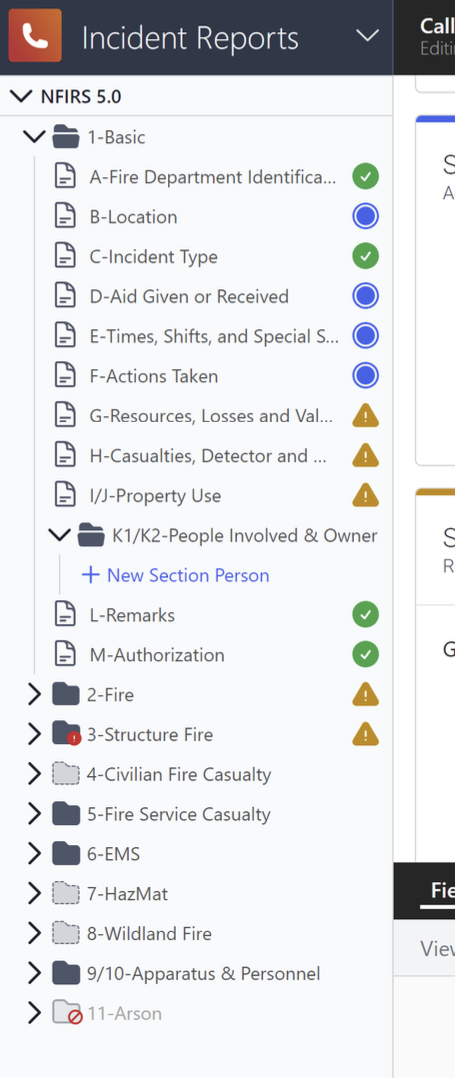
Form/Folder Types
Forms are grouped into folders that represent NFIRS modules and module sections. There are three types of folders and they indicate which forms need to be completed. The NFIRS Incident Type in (1-Basic > Section C) primarily controls which forms must be filled out.
Required Folders
Forms in required folders must be completed and pass validation.

Optional Folders
Forms in optional folders do not need to be completed, but can be. By default, forms in optional folders are opted out of validation upon saving.

If you want to fill out an optional form section and validate the information, check off the opt-in checkbox at the top of the form. This changes the icon for the folder and it will behave like a required folder.


Disabled Folders
Forms in disabled folders do not need to be filled out and will not be validated.

Form/Folder Statuses
Forms and folders have a status that indicate which ones need to be completed. Each status has a symbol and an associated color. When you click the "Save" button at the top of the page, the entire report is checked and the status for each form is updated.
Complete
A green checkbox is displayed for forms that are filled out and valid. Once all required and opted-in forms are completed, the report can be exported.

Error
A yellow exclamation triangle is displayed for required or opted-in forms that are incomplete or invalid. These forms must be completed or corrected.

Pending
A blue circle is displayed for forms with pending changes that need to be saved.

Optional (Opted-Out) and Disabled
These statuses have no corresponding icon and will not change if information is entered and the report is saved.


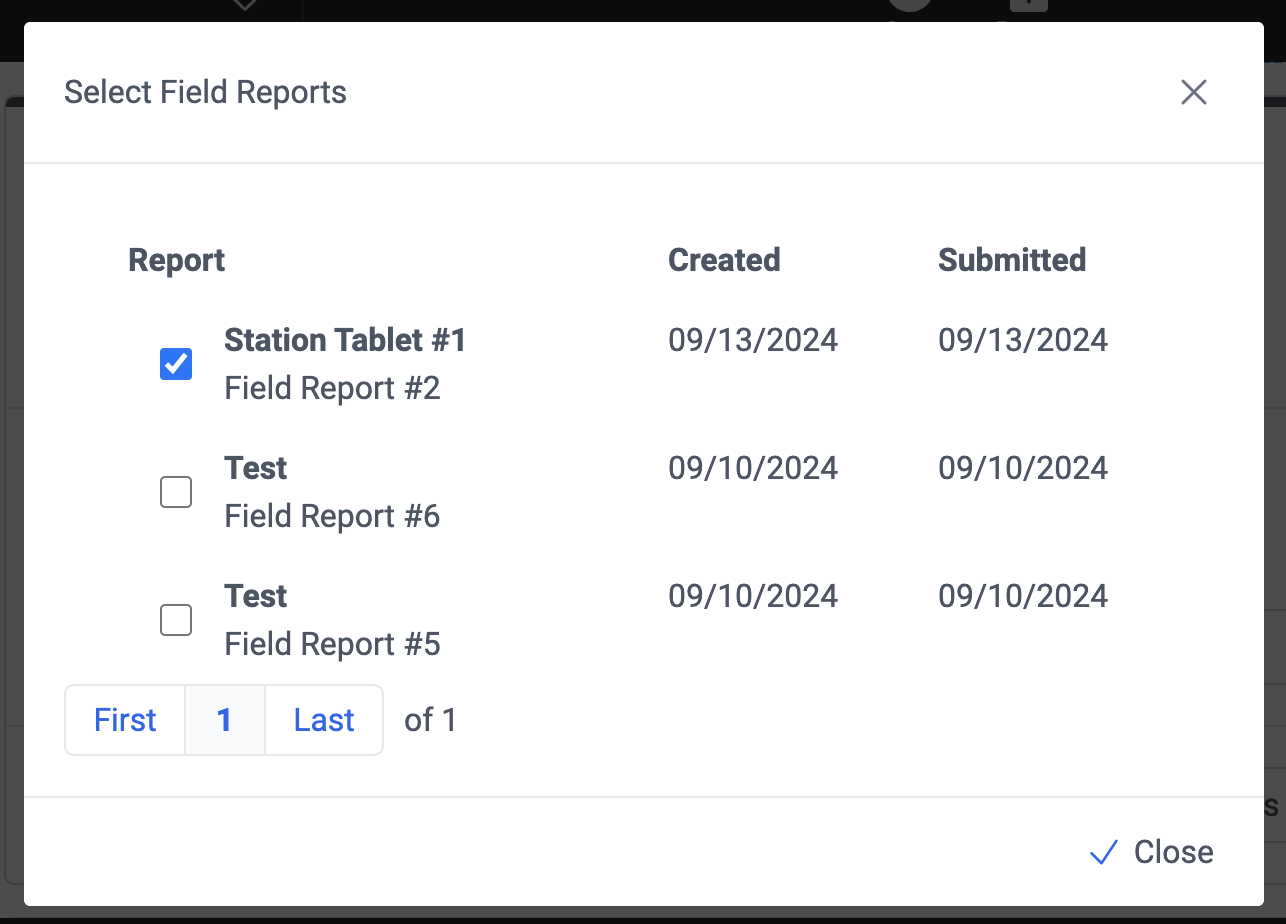
Link Field Reports
You can link one or more field report that has been uploaded from a tablet:
- Click the "Add" button on the top left of the field report tray. You may need to expand the tray by clicking the icon on the top right of the tray.

- Select any field reports you want to include.

- Click the "Close" button at the bottom of the modal dialog. The notes for the reports are displayed in a timeline in the field report tray.


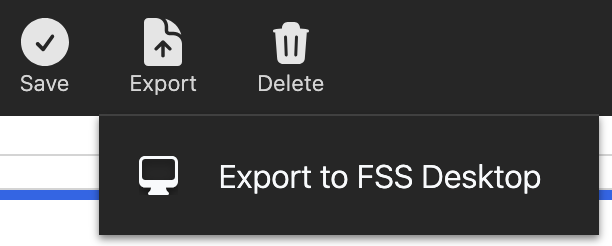
Export a Call
You can export a call to Fire Station Desktop:
- Click the "Export" button at the top of the page.
- Select "Export to FSS Desktop" from the menu.

- If there are any validation errors, you will see an error. Fix any errors in the call and and start from step 1. If the call is complete and there are no errors, click "Submit" to confirm.


Once a call has been exported to the Fire Station Desktop, you can edit it online, but it you cannot be export it again. If you want to edit a call further, you can edit it in Fire Station Desktop.
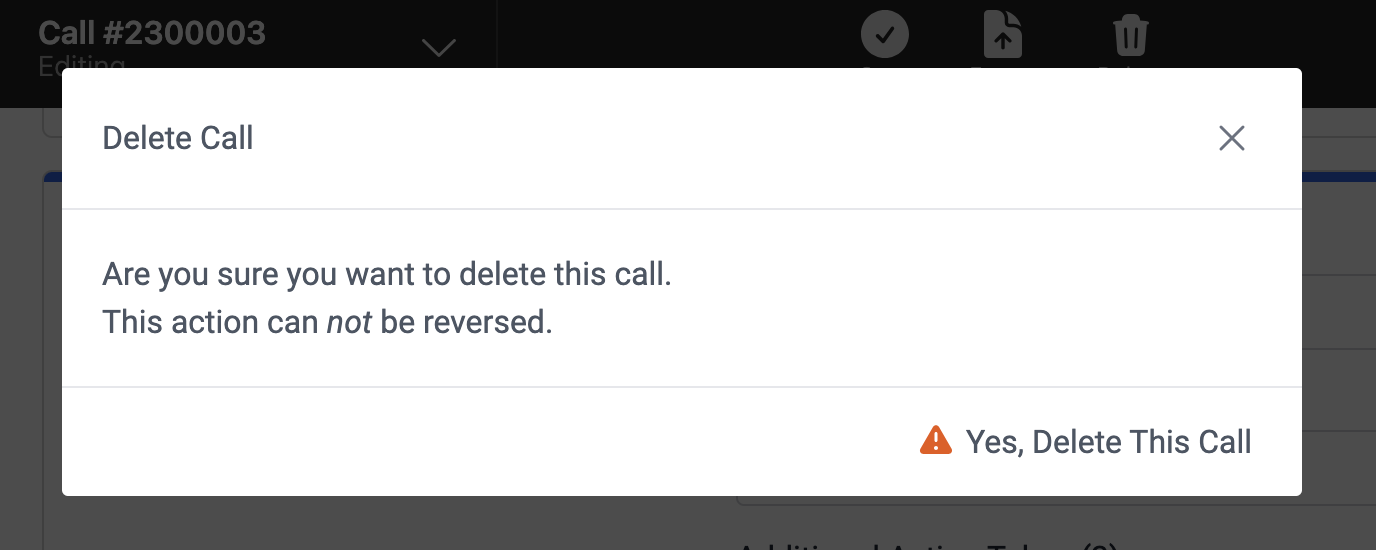
Delete a Call
You can delete a call that has not been exported to Fire Station Desktop:
- Click the "Delete" button at the top of the page.
- Click "Yes, Delete This Call" from the modal pop up screen.
When a call is saved, the next call number is reserved in Fire Station Desktop. When the call is deleted in Fire Station+, the call number is freed up in Fire Station Desktop.