For security purposes, Sign In with FSSID is required for departments using Cloud Data Hosting. After upgrading to the Fall 2023 release, departments using Cloud Data Hosting can still sign in using a Fire Station Desktop User for 30 days.
### Switch to Sign In with Fire Station Desktop User If your department allows signing in with a Fire Station Desktop User, you can switch to the Fire Station Desktop User Sign In screen by clicking the "Sign in With Fire Station Desktop User" link at the bottom of the screen. This option is available if Sign In with FSSID is **not** required for your department. ### Personnel FSSID Upgrade If you have a Fire Station Desktop User password that you used before the Fall 2023 release, and your personnel record is not already linked to an FSSID, you may upgrade to an FSSID using your Desktop User password. To upgrade to an FSSID: 1. Open the SignIn with FSSID screen *If FSSID Sign In is optional, use the "Sign In with FSSID" link to switch to this screen* 2. Select your personnel record from the "Name" list 3. Enter your **Desktop User password** *This is the password you have previously used to sign in to Fire Station Desktop* 4. If your personnel record is eligible for an FSSID upgrade, **follow the instructions** to upgrade your user [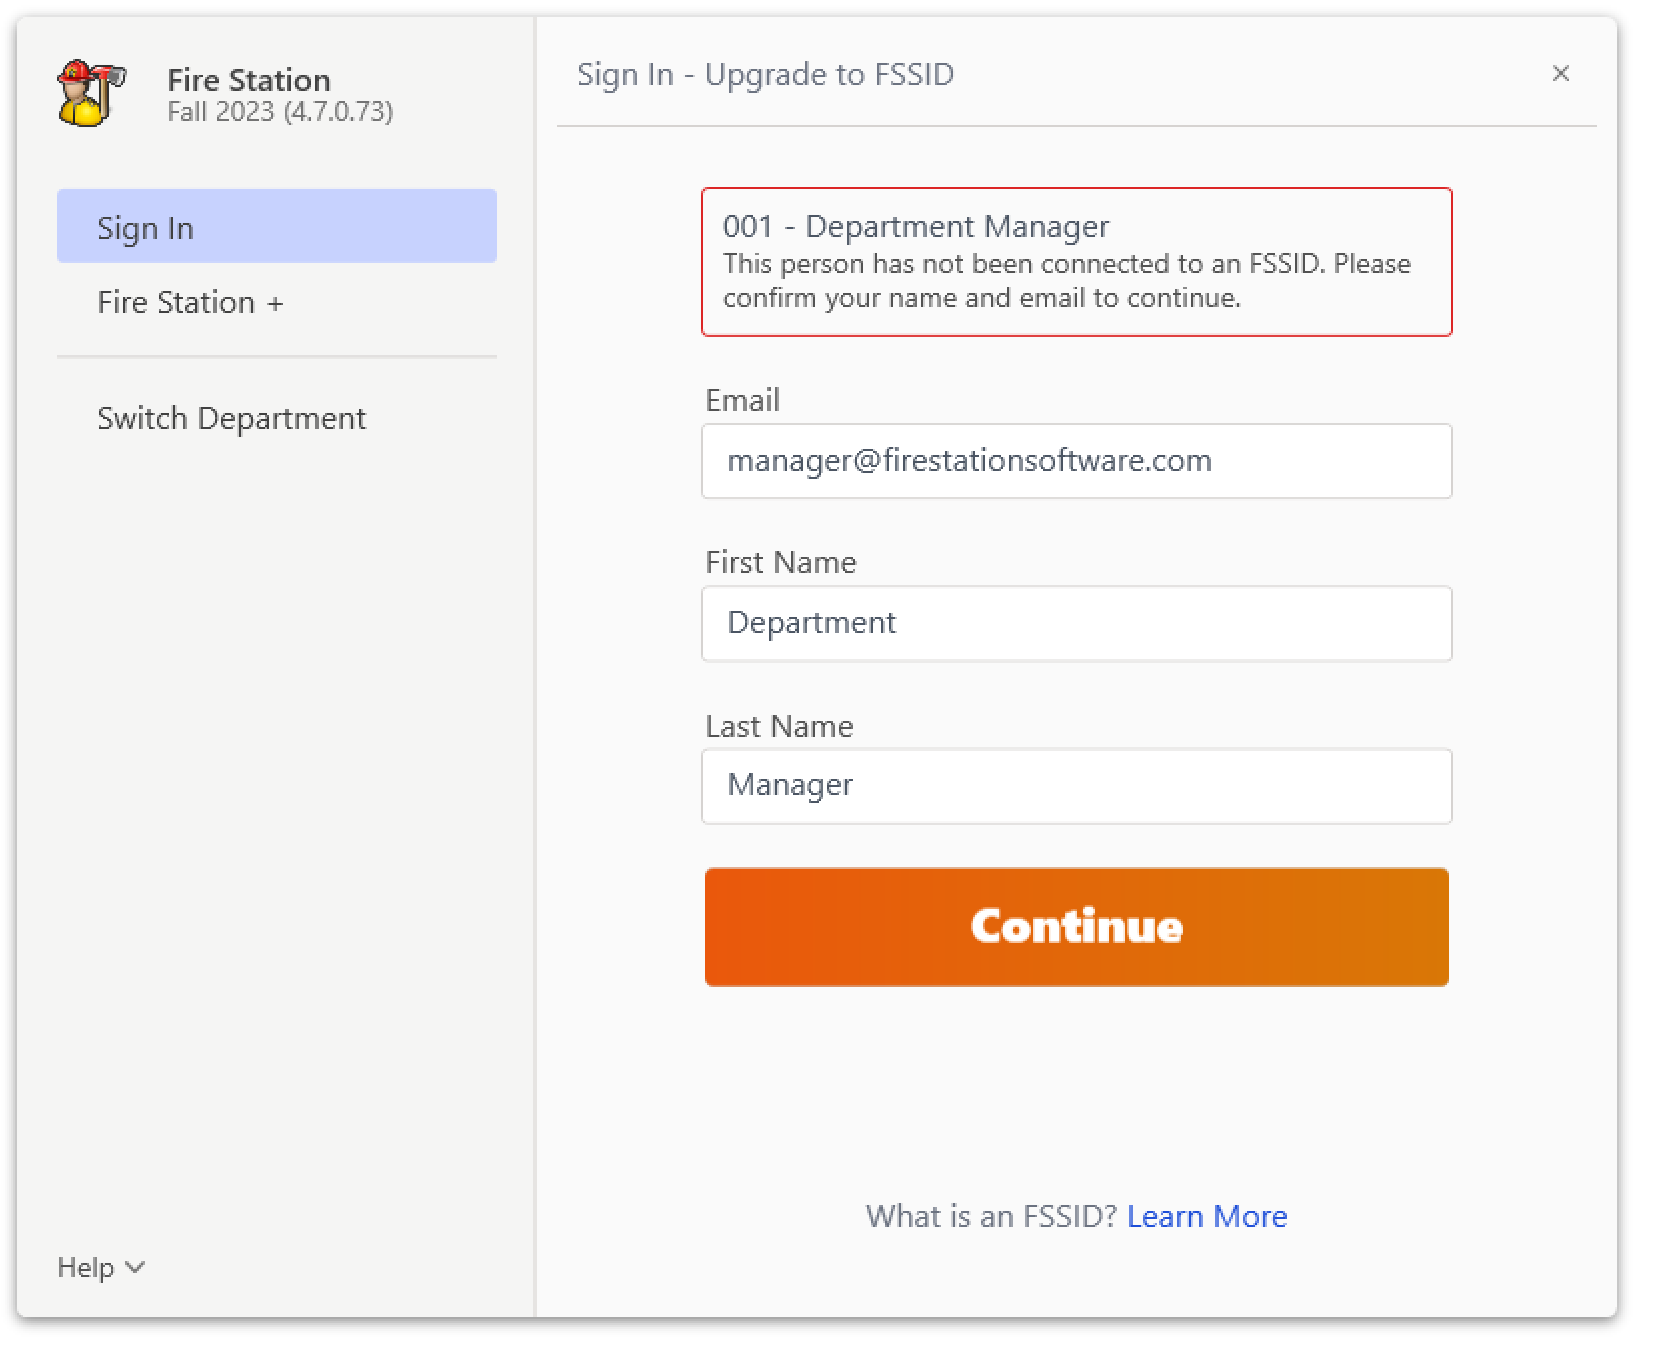](https://docs.firestationsoftware.com/uploads/images/gallery/2024-08/2-fssid-upgrade.png) 5. If your personnel record is **not** eligible for an upgrade, you will see the following message: [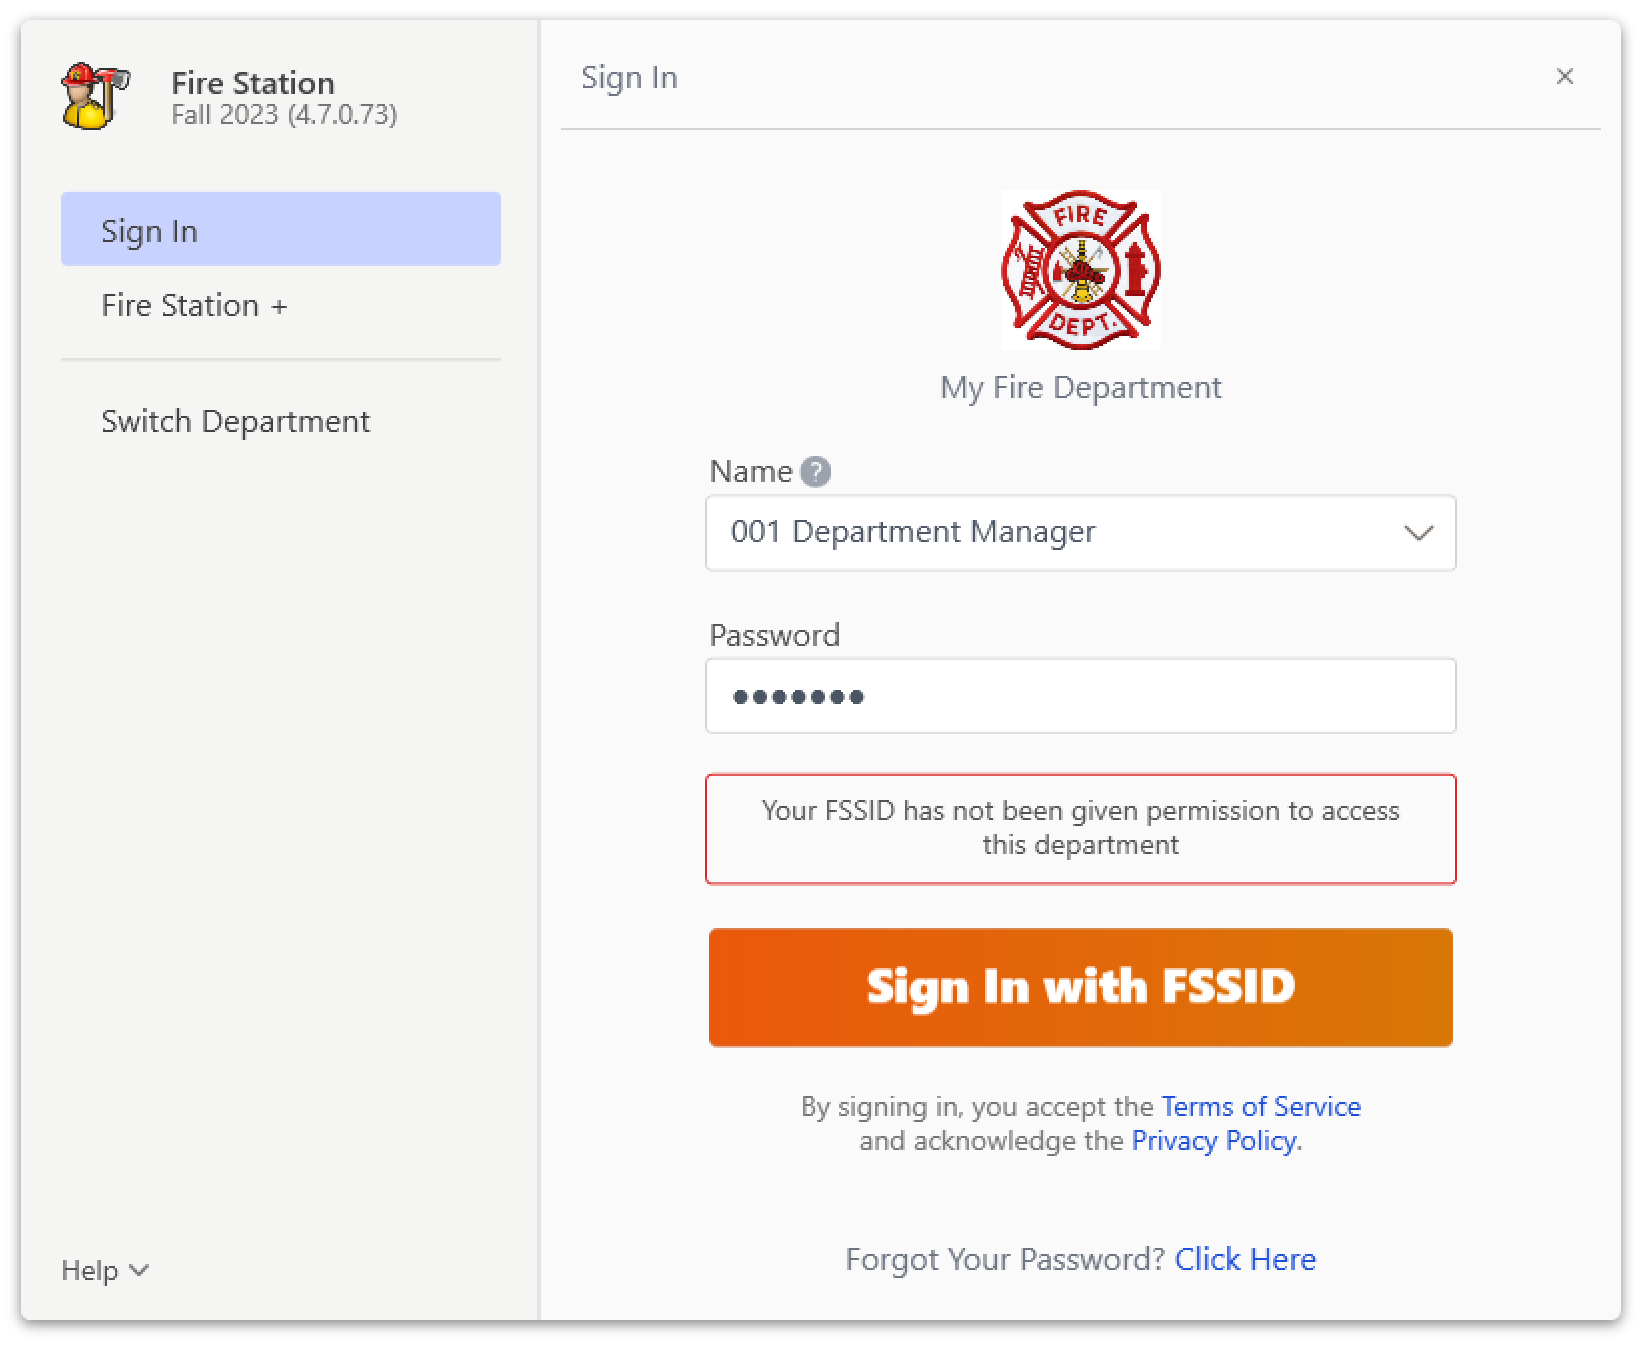](https://docs.firestationsoftware.com/uploads/images/gallery/2024-08/3-fssid-upgrade-not-allowed.png)Once you have upgraded to an FSSID, you may use the Sign In with FSSID option. If available, you may also continue signing in with your Fire Station Desktop User. Keep in mind that your FSSID password and your Fire Station Desktop user password may be different.
--- ## Sign In with Your Fire Station Desktop User If signing in with an FSSID is optional for your department, you will see the Sign In with Fire Station Desktop User after launching Fire Station Desktop. This screen lets you sign in using your Fire Station Desktop password and does **not** require an FSSID or internet access. To sign in using a Fire Station Desktop User, you must know your **Fire Station Desktop User password** or this must be the first time you are signing in with your Fire Station Desktop User.Your Fire Station Desktop User password may be different than your FSSID password.
[](https://docs.firestationsoftware.com/uploads/images/gallery/2024-08/4-database-user-sign-in.png) To sign in with your Fire Station Desktop User: 1. Select your personnel record from the "Name" list 2. Enter your **Fire Station Desktop User password** in the "Password" box *If this is your first time signing in, enter a new password* [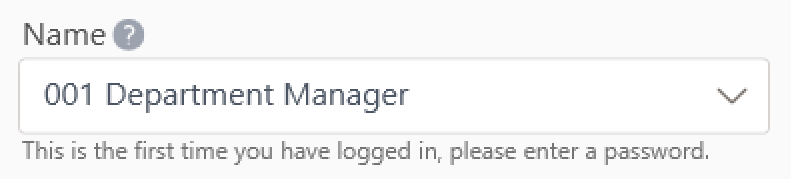](https://docs.firestationsoftware.com/uploads/images/gallery/2024-08/5-first-time-sign-in.png) 3. Click the "Sign In" button # Updating the Software Fire Station Desktop receives updates from your Department Hub. You will be notified of updates after signing in to Fire Station through a pop-up window.Summary: Click "Check for Updates" while using Fire Station to install updates. [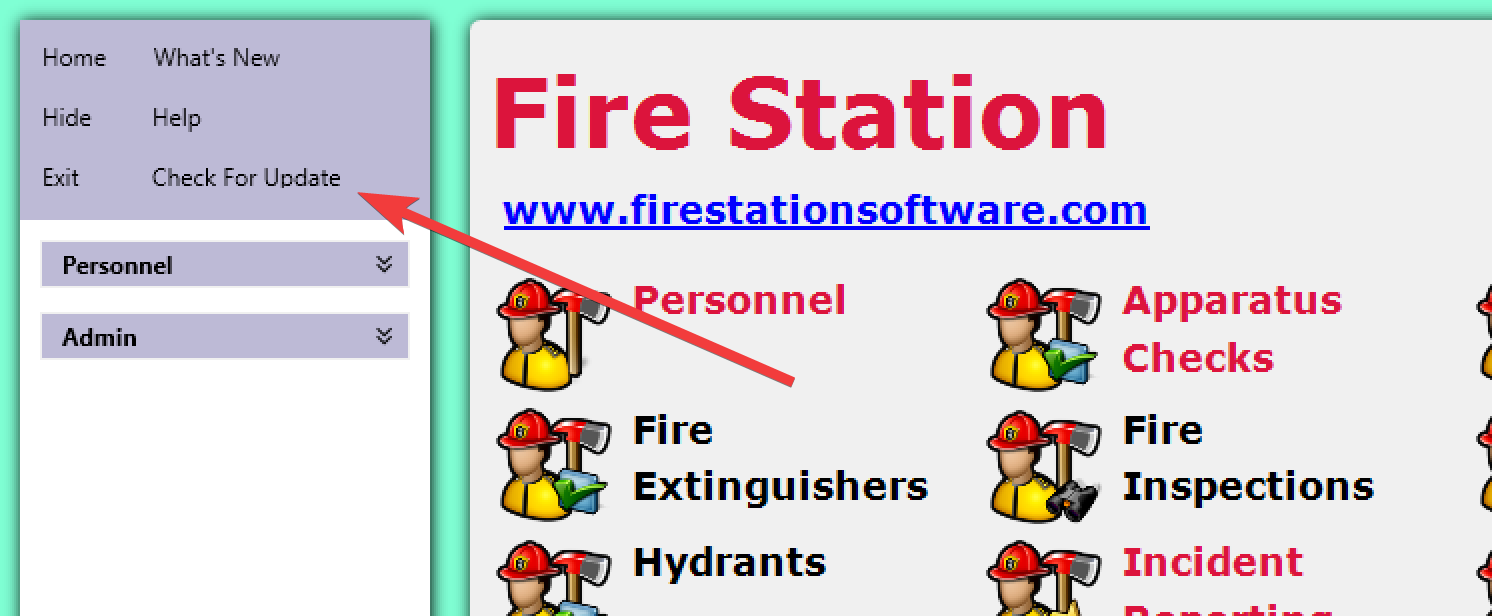](https://docs.firestationsoftware.com/uploads/images/gallery/2024-08/1-check-for-updates.png)
## Checking Your Software Version To determine which version of Fire Station you have installed, open the "Admin" menu and click the "About" link. [](https://docs.firestationsoftware.com/uploads/images/gallery/2024-08/2-check-version.png) The version number is displayed in the pop-up window. [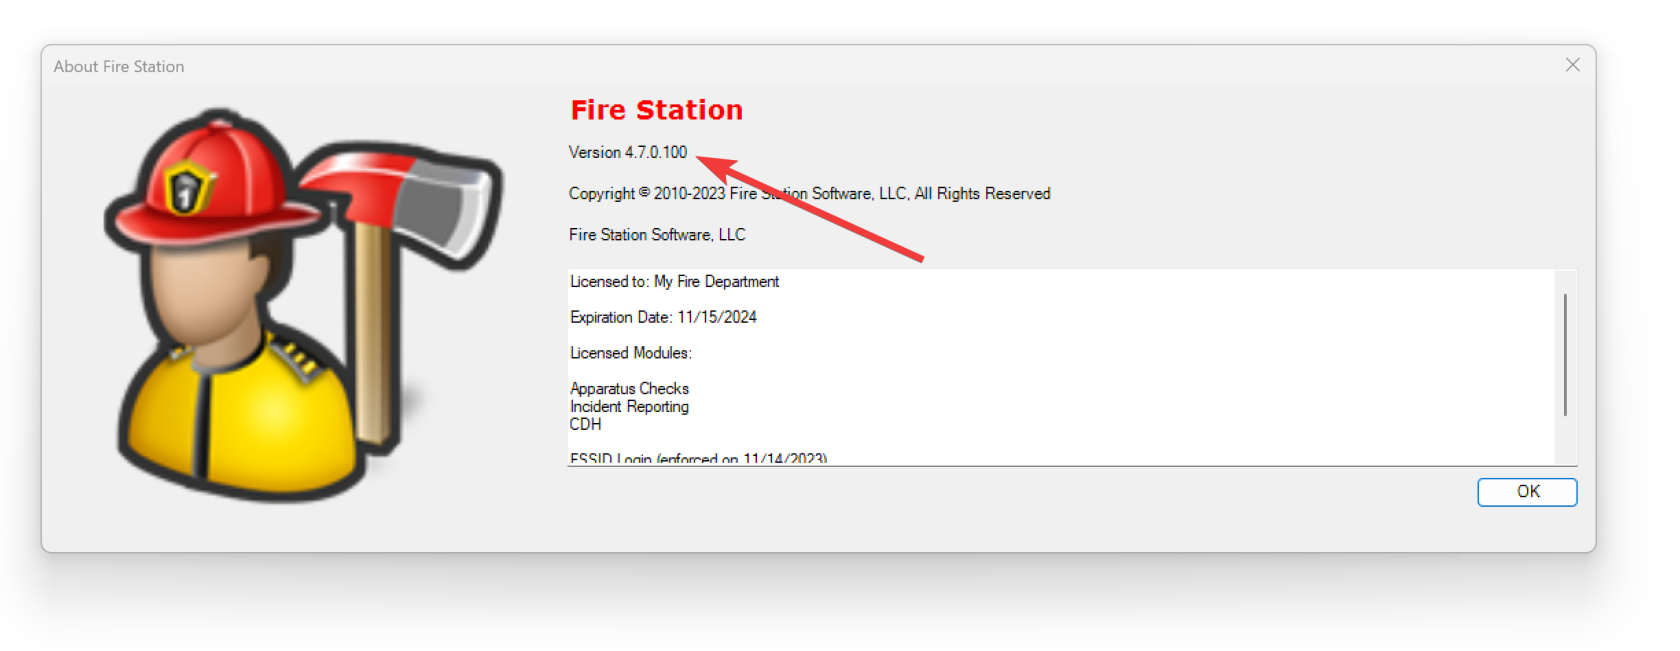](https://docs.firestationsoftware.com/uploads/images/gallery/2024-08/3-version-detail.png) --- ## Manually Running Fire Station Setup At times it may be necessary to start the setup program manually. This is typically caused by installation errors or other system configuration. To do this, open C:\\Program Files (x86)\\Fire Station Software, LLC\\Fire Station Setup v2 Then, double-click the Fire Station Setup application: [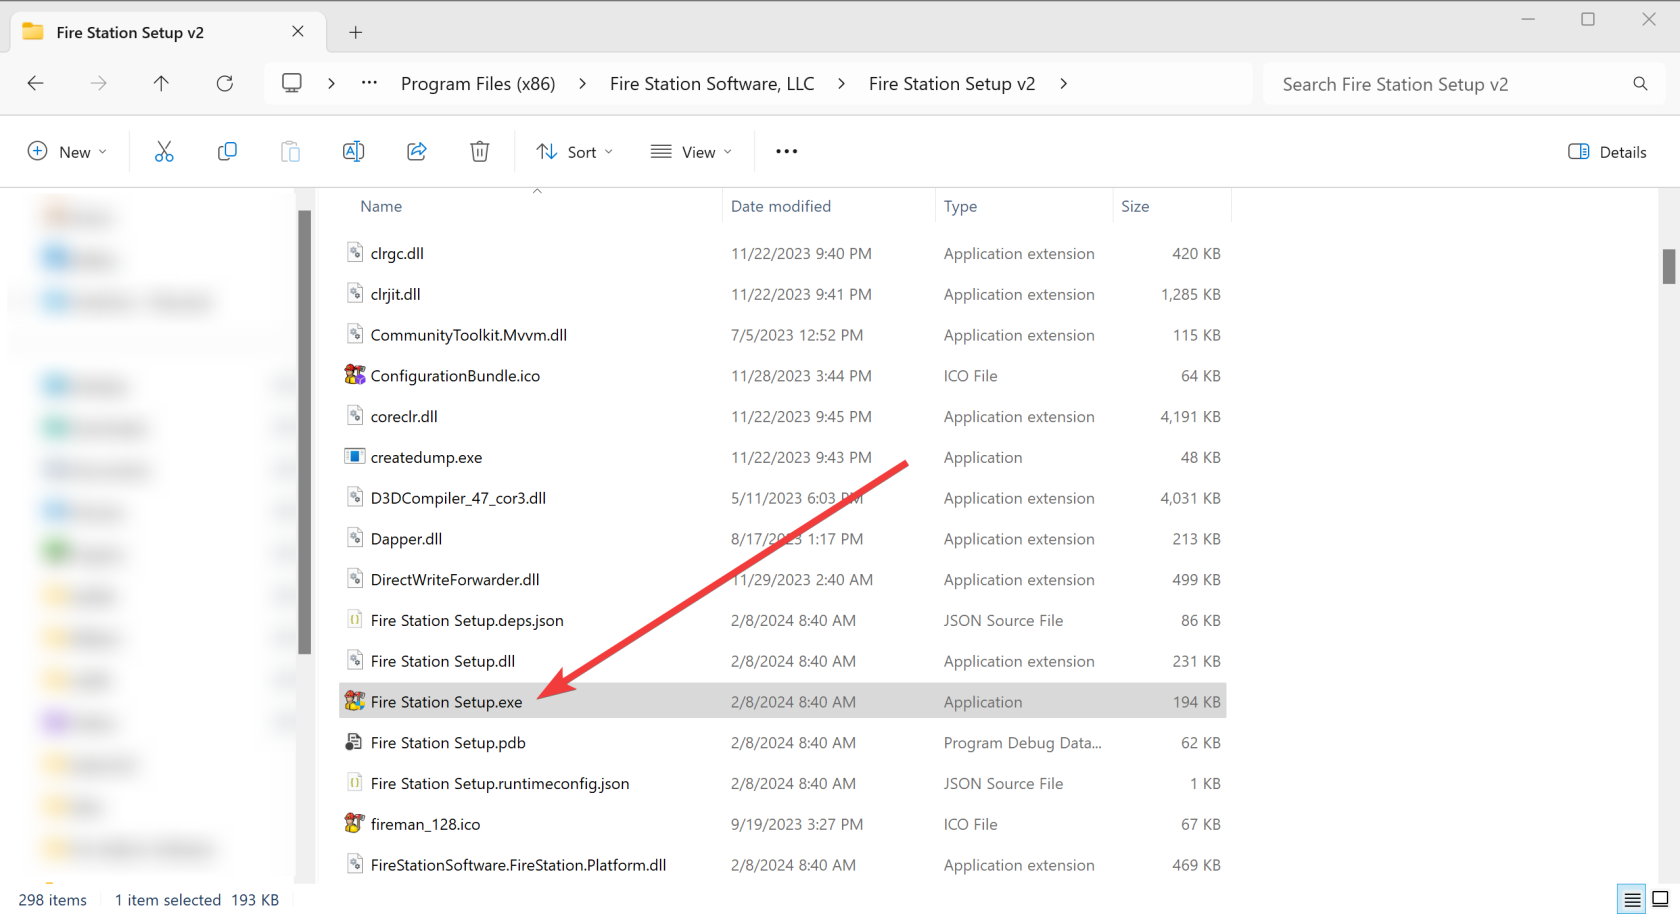](https://docs.firestationsoftware.com/uploads/images/gallery/2024-08/4-manually-run-setup.png) # Fire Station Software Getting Started Guide Personnel Module - Adding Ranks/Adding Personnel in the desktop software - Personnel -> Manage Ranks - Rank Field. Enter a new rank. - Set the ISO Rank, Officer in Charge and display order. - Save when complete. - Personnel -> Manage Personnel - Click the **+Add** button. - Add the Department ID, First Name, Last Name, Rank and Email Address. - Click OK when complete and click YES to confirm adding the personnel member. Apparatus Checks Module - Adding individual Apparatus - Click on Edit Inventory, click **+Add New Apparatus**. - From the pop up enter the apparatus Name, Type, Use and NFIRS ID. Click OK when complete. - Once added you will see a tree of your apparatus. You can now add Compartments and Items. - Click on an apparatus and click **New Compartments**, click Save. - Click New Compartment to add specific compartment of the apparatus, Save when complete. - The Compartment/s will now be displayed on the tree. - Click a Compartment from the tree to add then click **New Item**. A pop-up box will display where you can add multiple items that are in the compartment. - All apparatus, items and compartments of a compartment will display for Apparatus Checks in both the desktop and Apparatus Checks HUB feature to complete and submit checks. - The above completed details will display for conducting checks in both the desktop software and Apparatus Checks in the HUB. Permissions and inviting Personnel to establish FSSID Login Credentials All personnel/members will need to set up FSSID login credentials associated with their email address. Desktop Software - Permissions: - Go to Admin > Manage Permissions - Click on the personnel's name. A tab for each module you carry will display. Click each module tab and add a check mark for the permissions to give the personnel/member. Once complete click Save. HUB FSSID Invite and Permissions: - Click on Invite. Personnel with an email in the desktop software will show. Click the check box of each personnel and then at the lower page select permission level for the HUB. Send Invitation. - Permissions may vary between members so send separate invitations as needed. Fire Station Software Desktop and HUB Fire Station+ User Guide - [https://docs.firestationsoftware.com](https://docs.firestationsoftware.com) For any questions or additional assistance please contact : **FSS Support** Email:If your department uses Cloud Data Hosting, you may also link an FSSID using the Department Hub.
## Linking an FSSID To link an FSSID from Fire Station Desktop you must have the *Department Manager* permission in your department and **you must sign in to Fire Station Desktop using your FSSID**. You must also have *Can Manage Personnel* permission in Fire Station Desktop. Once you are signed in using your FSSID, follow these steps to link a personnel record to an FSSID: 1. Click "Personnel" > "Manage Personnel" to open the Manage Personnel screen [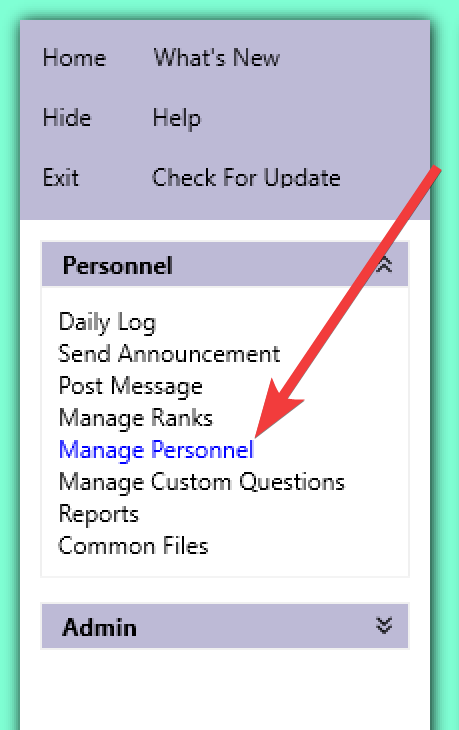](https://docs.firestationsoftware.com/uploads/images/gallery/2024-08/1-manage-personnel.png) 2. Select the personnel record you would like to link an FSSID to [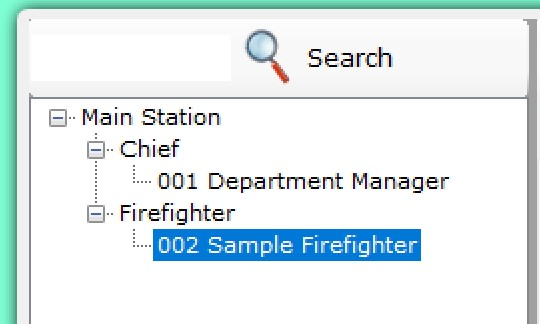](https://docs.firestationsoftware.com/uploads/images/gallery/2024-08/2-select-personnel.png) 3. Click the "FSSID" tab [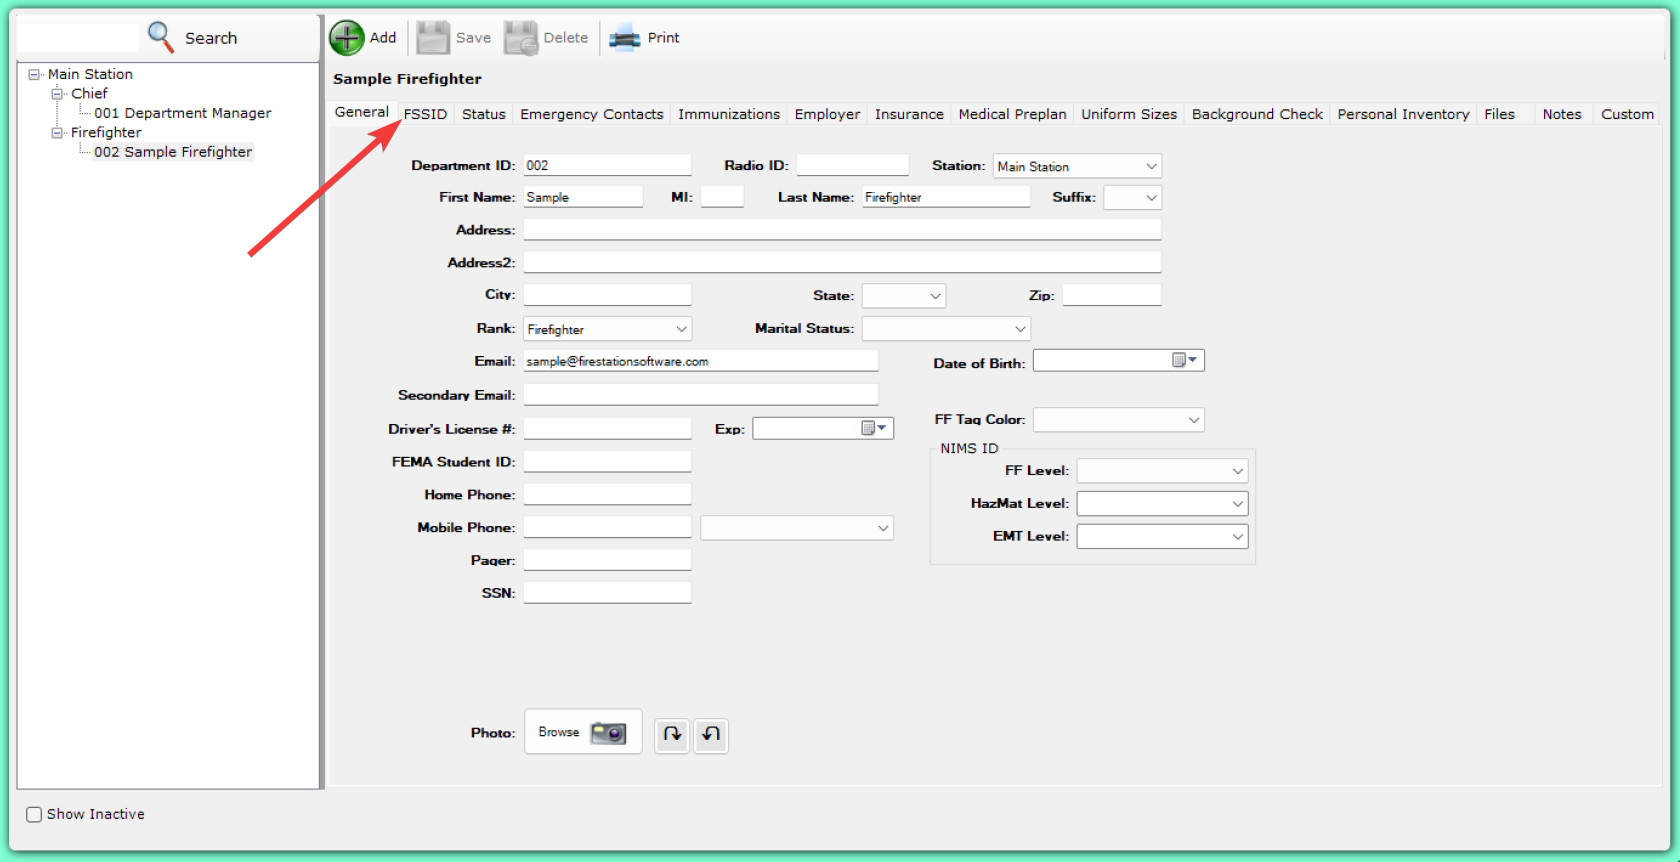](https://docs.firestationsoftware.com/uploads/images/gallery/2024-08/F2U3-fssid-tab.png) 4. Then follow the instructions to link an FSSID **1** *If the user's FSSID is already a member in the Department Hub, then select the FSSID from the drop-down list* * **2** If the user does **not** have an FSSID, or they are not a member in your Department Hub, click the "Send FSSID Invitation" button* [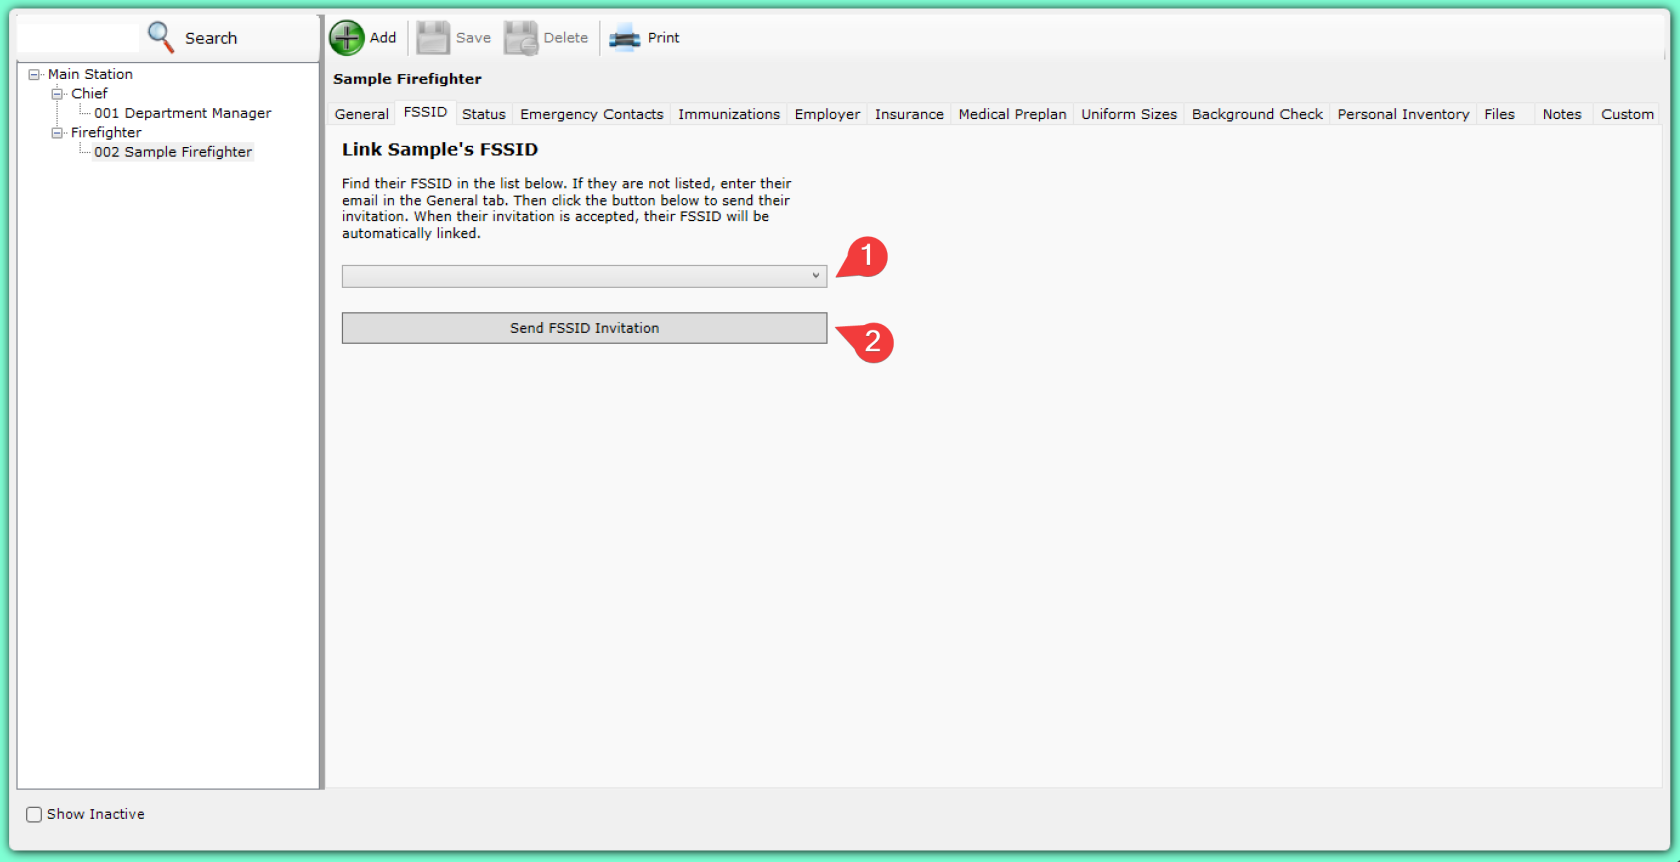](https://docs.firestationsoftware.com/uploads/images/gallery/2024-08/4-fssid-invitation.png) 5. Once the FSSID is linked, or once the user accepts the invitation, the linked FSSID will be displayed [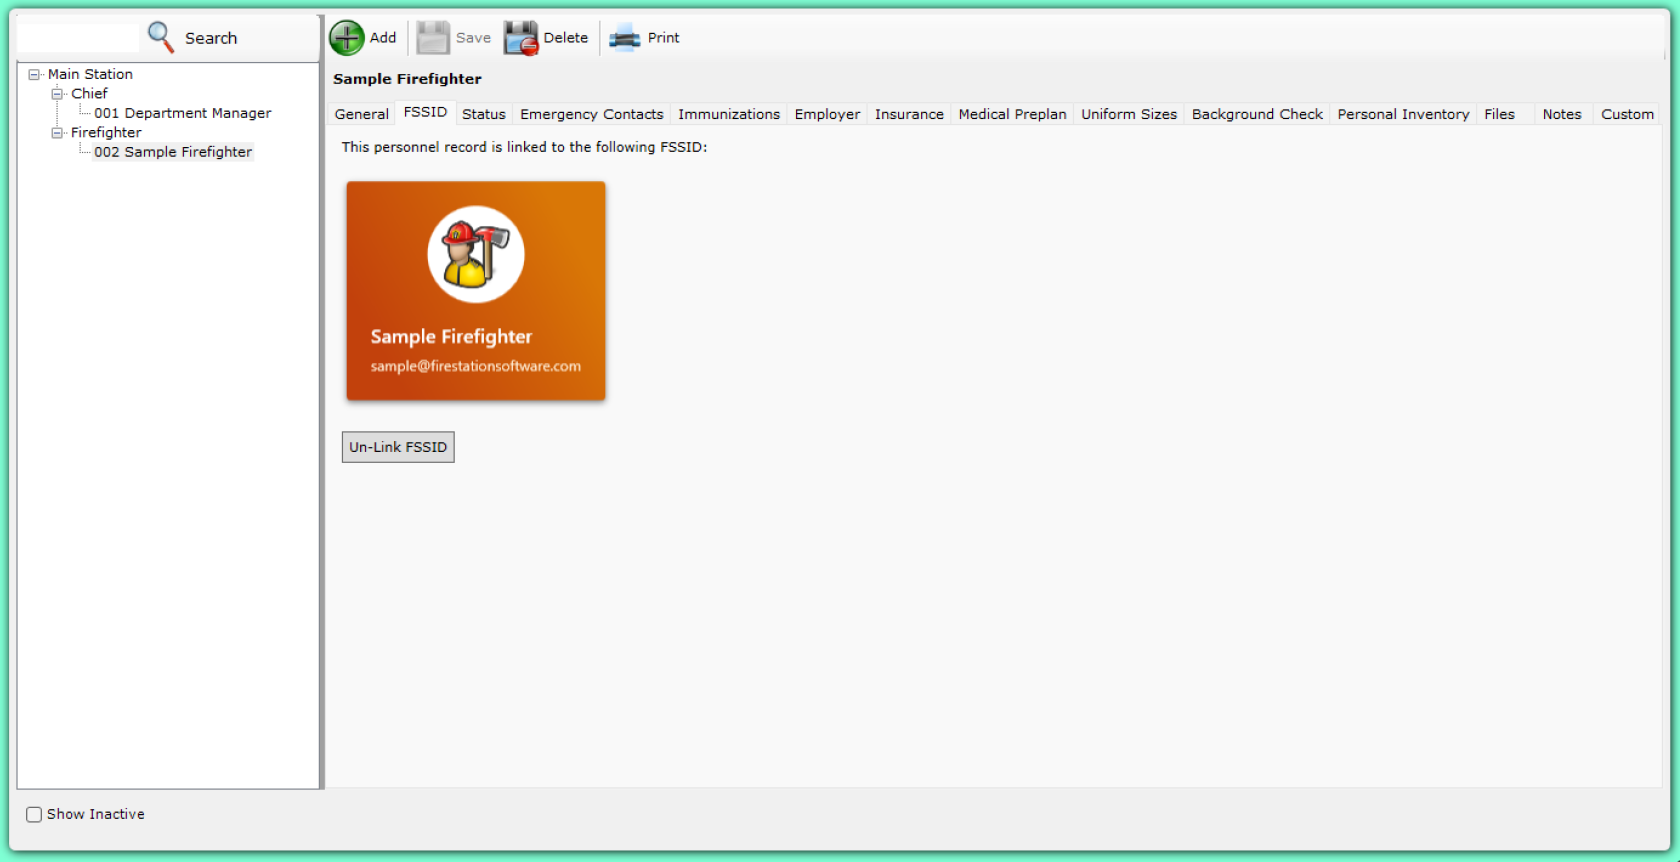](https://docs.firestationsoftware.com/uploads/images/gallery/2024-08/5-linked-fssid.png) # Incident Reporting Module # Fire Recovery USA Integration --- ## Getting StartedYou must be licensed for the *Incident Reporting* module to use this feature.
Fire Recovery USA ([link](https://firerecoveryusa.com/)) specializes in recovering the cost of your department's responses to motor vehicle collisions and fires as well as collecting payments for Fire & Life Safety Inspections and permit fees. To get started: 1. Sign up with Fire Recovery USA by sending an email toBy default, Fire Recovery USA only bills the following NFIRS incident codes. If you would like to bill other incident codes, please reach out to Fire Recovery USA and ask for additional codes to be enabled.
| Default Billed NFIRS Codes | ||||
| 100 110 111 112 113 114 115 116 117 118 120 121 122 123 130 131 132 133 134 | 135 136 137 138 150 151 152 153 154 155 160 161 162 163 200 210 211 212 213 | 220 221 222 223 231 240 241 242 243 251 322 323 324 340 341 342 343 350 351 | 352 353 354 355 356 357 360 361 362 363 364 365 370 371 372 381 400 410 411 | 412 413 420 422 423 424 430 431 451 460 463 480 481 900 |
| **Carrier** | **Format** |
| AT&T | <10 Digit Phone Number>**@txt.att.net** |
| Sprint | <10 Digit Phone Number>**@messaging.sprintpcs.com** |
| T-Mobile | <10 Digit Phone Number>**@tmomail.net** |
| Verizon | <10 Digit Phone Number>**@vtext.com** |
| All Tell | <10 Digit Phone Number>**@message.alltel.com** |
| Boost | <10 Digit Phone Number>**@myboostmobile.com** |
| Cellular South | <10 Digit Phone Number>**@csouth1.com** |
| Centennial Wireless | <10 Digit Phone Number>**@cwemail.com** |
| Cincinnati Bell | <10 Digit Phone Number>**@gocbw.com** |
| Cricket Wireless | <10 Digit Phone Number>**@sms.mycricket.com** |
| Metro PCS | <10 Digit Phone Number>**@mymetropcs.com** |
| Powertel | <10 Digit Phone Number>**@ptel.net** |
| Qwest | <10 Digit Phone Number>**@qwestmp.com** |
| Rogers | <10 Digit Phone Number>**@pcs.rogers.com** |
| Suncom | <10 Digit Phone Number>**@tms.suncom.com** |
| Telus | <10 Digit Phone Number>**@msg.telus.com** |
| U.S. Cellular | <10 Digit Phone Number>**@email.uscc.net** |
| Virgin Mobile USA | <10 Digit Phone Number>**@vmobl.com** |
NFIRS 5.0 only supports 7-digit incident numbers. For this reason NFIRS calls do not support the new 9-digit incident numbers. If you convert a quick call with a 9-digit incident number into a NFIRS call, the NFIRS incident number must be changed to 7-digits before the call can be validated.
[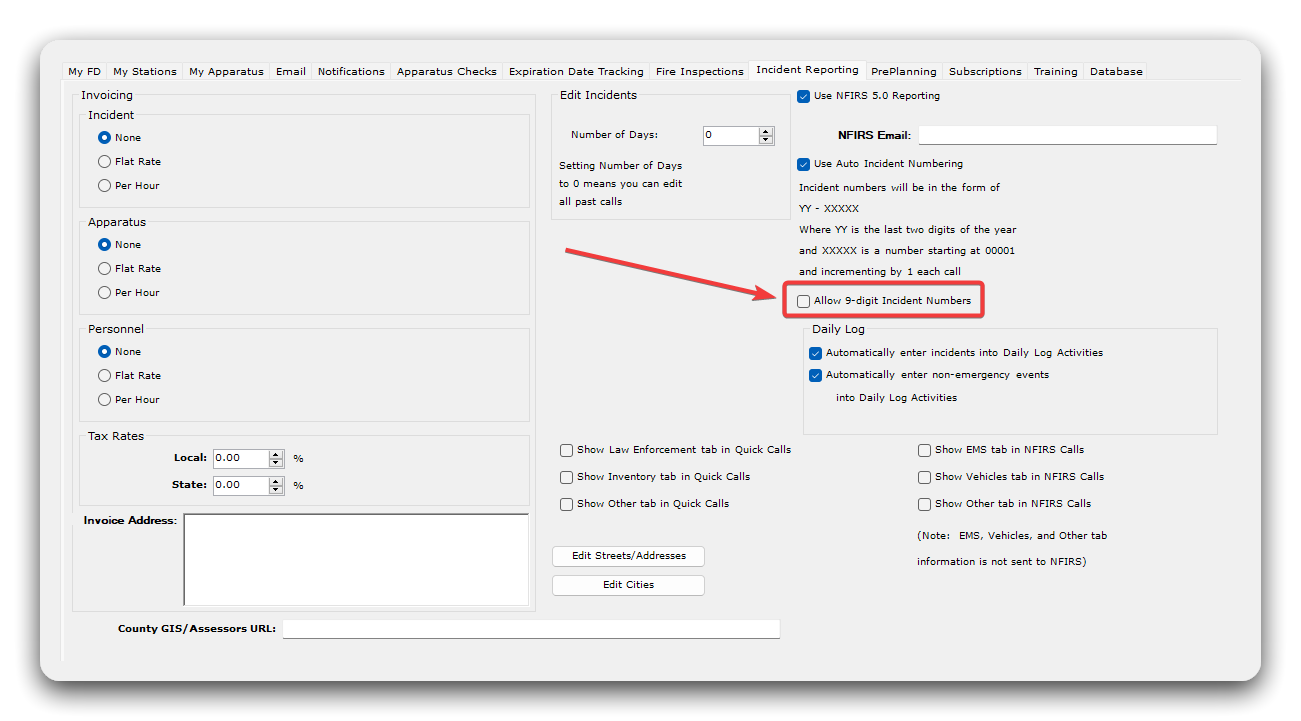](https://docs.firestationsoftware.com/uploads/images/gallery/2024-09/1-incident-numbering.png) # Active911 Integration The Active911 integration enables you to copy over alert information when creating or editing quick calls in Fire Station Desktop. # Configure the Active911 Integration --- ## Manage Your Active911 ConnectionYou must have *Department Manager* permissions to make these changes.
### Connect to Your Agency Before using the Active911 integration with Fire Station, you must connect your Active911 agency in the Fire Station Hub. Follow these instructions to complete this step. 1. Make sure you are currently signed in to Active911. You may sign in by going to [https://interface.active911.com](https://interface.active911.com). 2. After signing in to Active911, navigate to [https://hub.firestationsoftware.com](https://hub.firestationsoftware.com) and sign in with our FSSID. 3. Click "Integrations" on the left-hand side of the screen. [](https://docs.firestationsoftware.com/uploads/images/gallery/2025-05/cleanshot-2025-05-12-at-10-52-57-at-2x.png) 4. This screen shows the current status of your Active911 integration. If this is the first time you've come to this page, you will see the current status of the integration is "Not Connected". To connect to Active911 click the "Authorize" button. [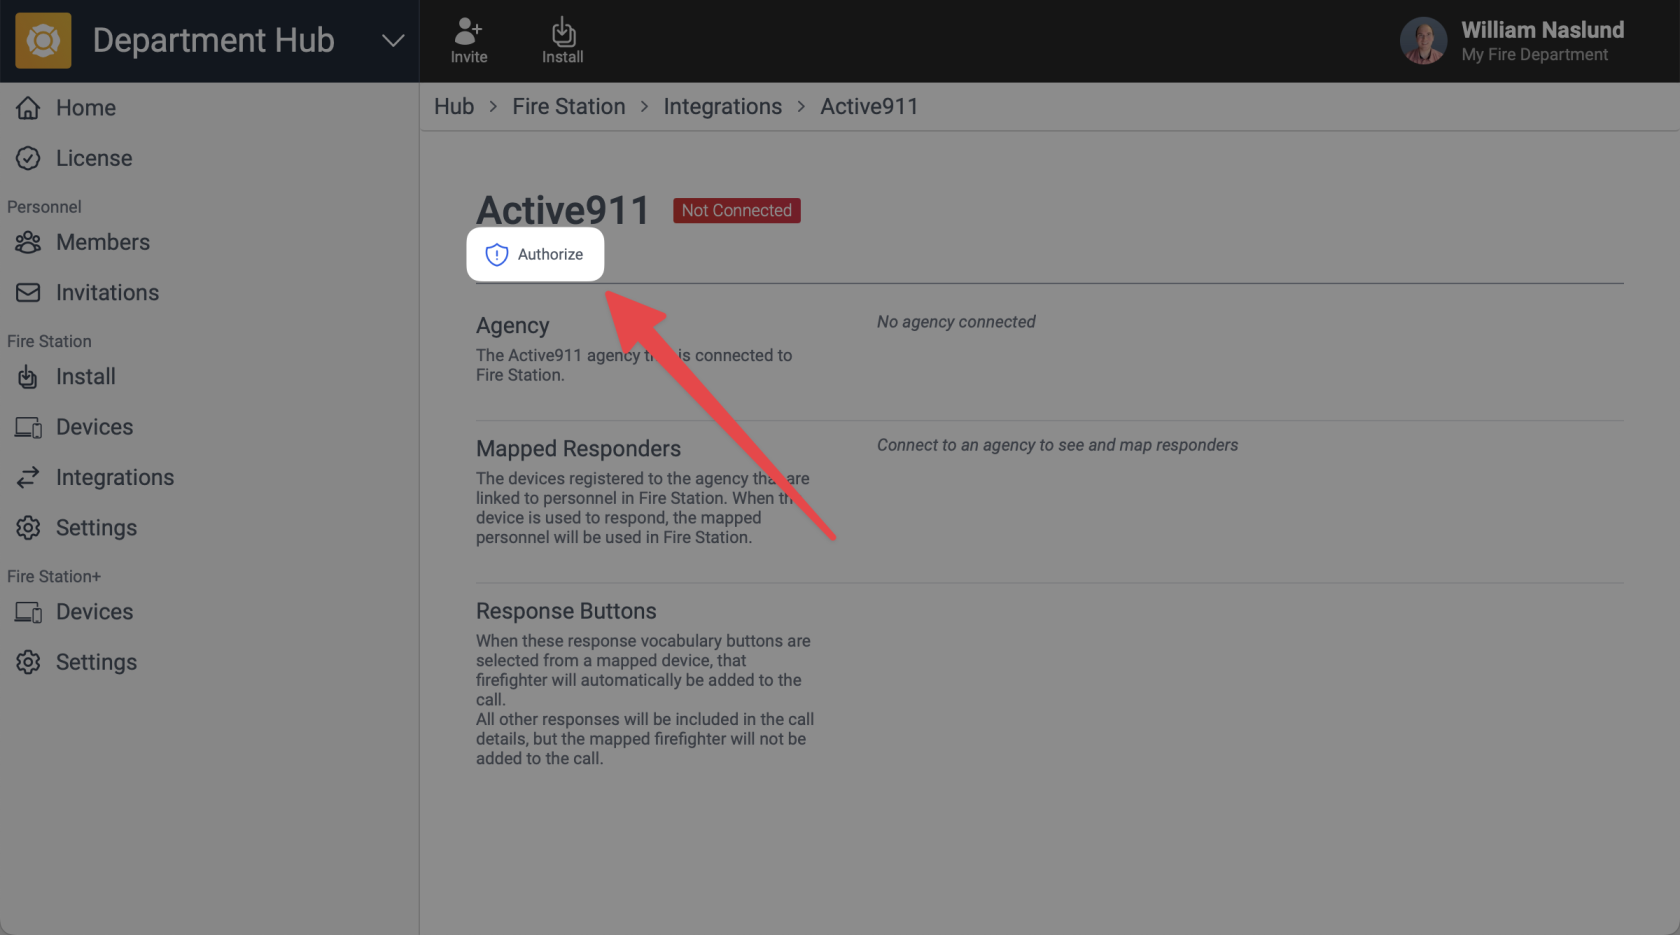](https://docs.firestationsoftware.com/uploads/images/gallery/2025-05/cleanshot-2025-05-12-at-10-54-56-at-2x.png) 5. Select the Active911 agency that you want to connect with Fire Station and click the "Submit" button. [](https://docs.firestationsoftware.com/uploads/images/gallery/2025-05/cleanshot-2025-05-12-at-11-20-23-at-2x.png) *If you see an error that says "You are not authorized to create oauth tokens for any agency" make sure you have signed in to Active911 first.* 6. Then click the "Yes" button to grant access for Fire Station to connect with your Active911 agency. [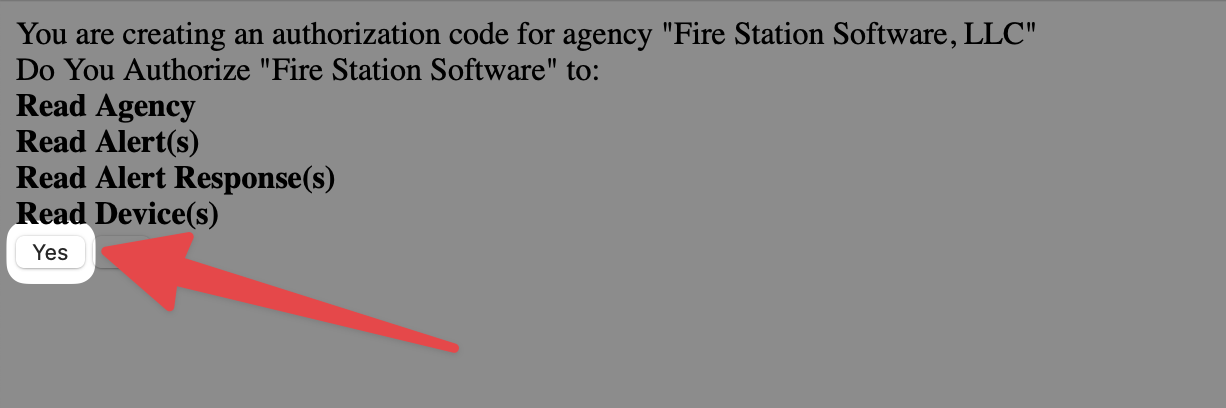](https://docs.firestationsoftware.com/uploads/images/gallery/2025-05/cleanshot-2025-05-12-at-11-25-11-at-2x.png) 7. You will be taken back to the Fire Station Hub integration page and you should now see a status of the Active911 integration as "Connected". [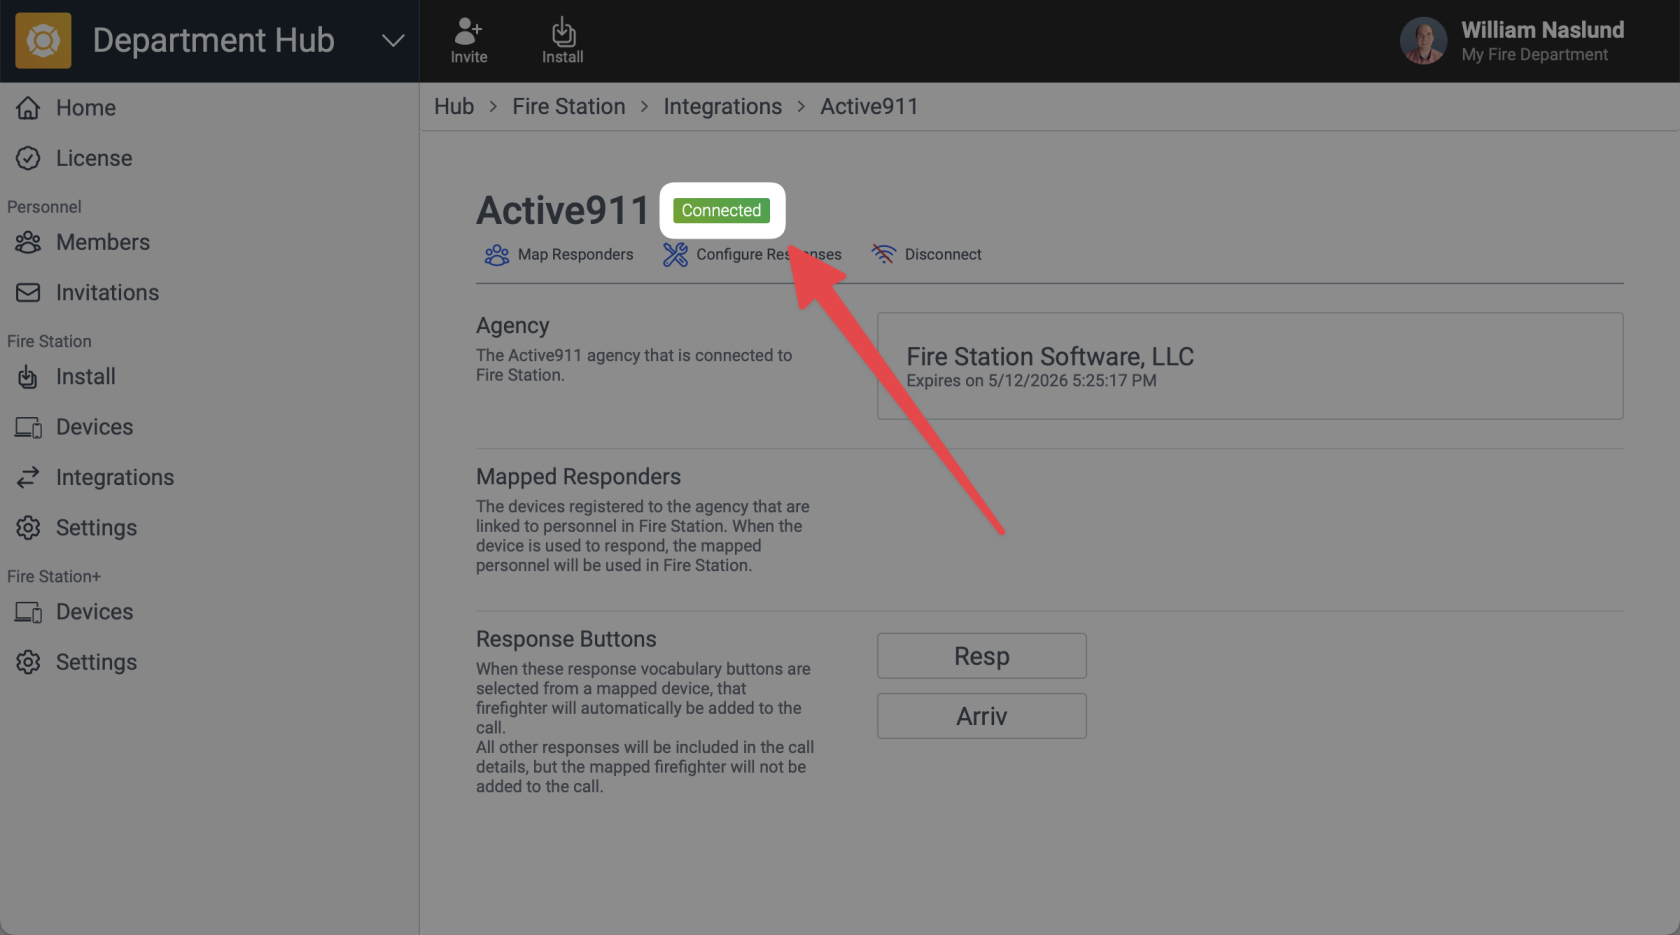](https://docs.firestationsoftware.com/uploads/images/gallery/2025-05/cleanshot-2025-05-12-at-11-36-05-at-2x.png) Active911 is now connected to Fire Station. The connection must be renewed every year. You can see the connection's expiration date from the Fire Station Hub or by viewing your agency in Active911. [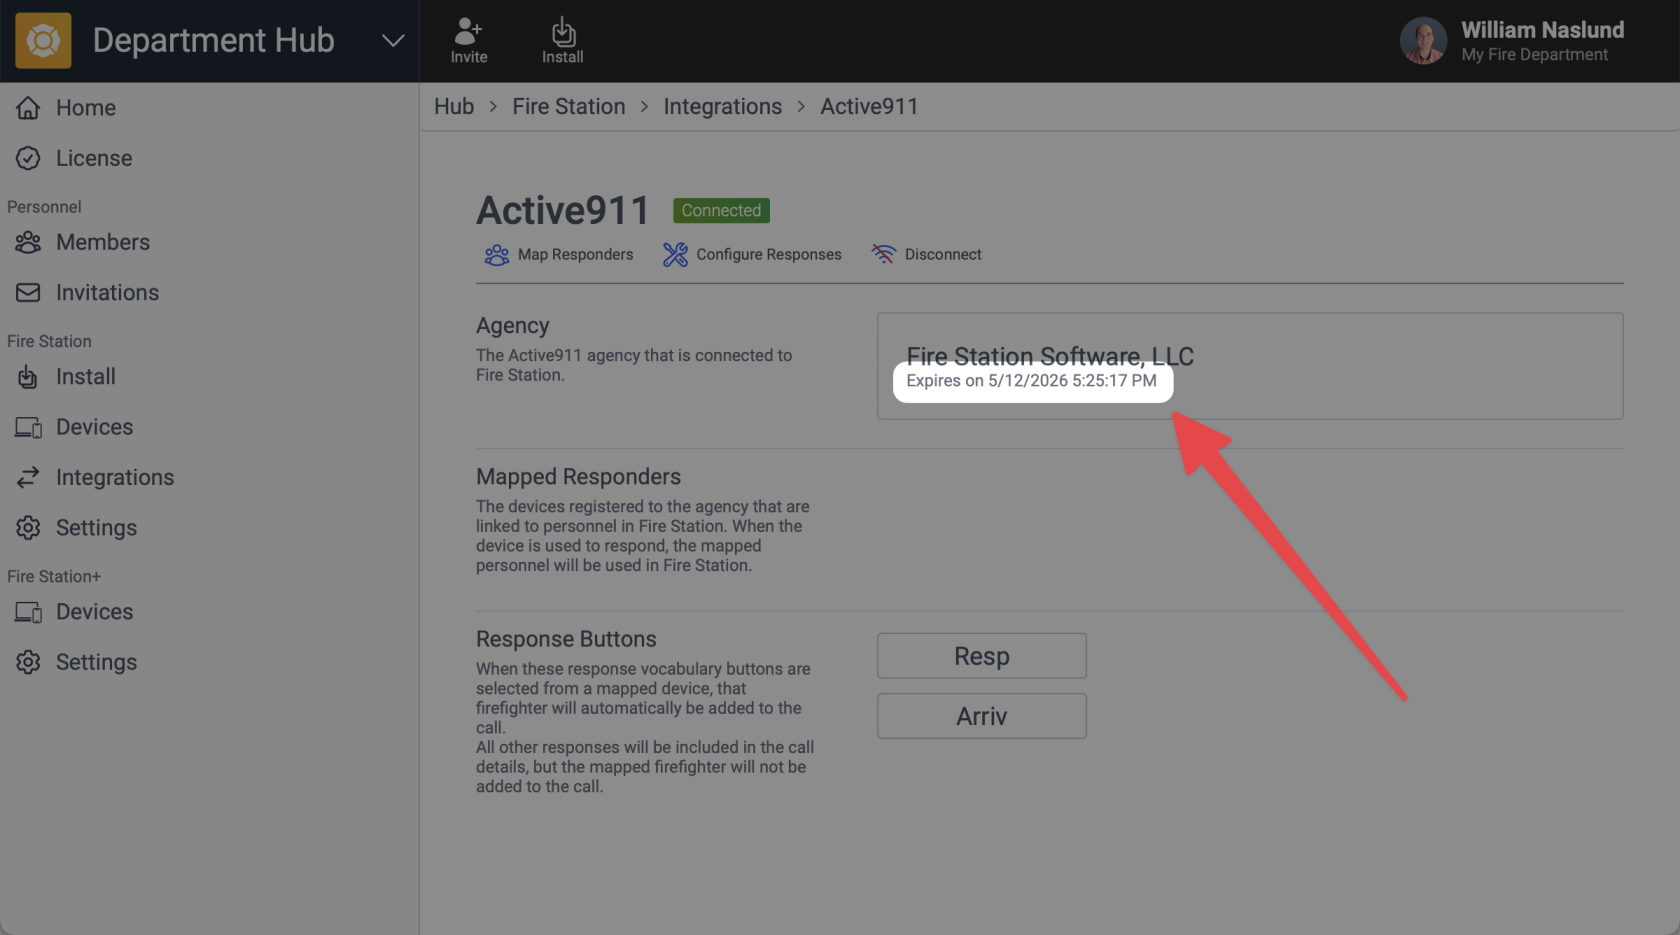](https://docs.firestationsoftware.com/uploads/images/gallery/2025-05/cleanshot-2025-05-12-at-11-43-22-at-2x.png)When the expiration date comes, simply sign in to Active911 first **then** come back to the Fire Station Hub and click “Authorize” again.
The next step is to map your Active911 devices to Fire Station personnel records. Follow the instructions below to finish the setup process. --- ## Map RespondersYou must have *Department Manager* permissions to make these changes.
You can link personnel records from Fire Station Desktop to your Active911 devices. Mapping a device responder means they will be added to the call if they respond to an alert in Active911 when you link that alert to call. 1. In a browser, navigate to [https://hub.firestationsoftware.com](https://hub.firestationsoftware.com) . You may need to sign in. 2. In the left menu select "Integrations". 3. Click the "Manage" button on the right side of the Active911 box. 4. Click the "Map Responders" button at the top of the page. [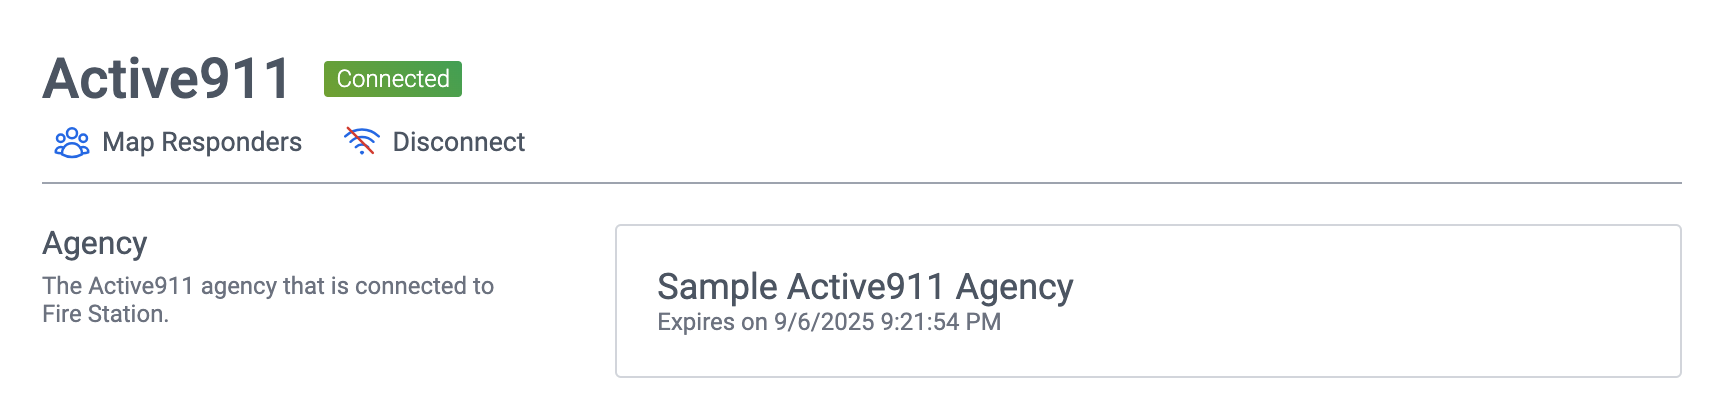](https://docs.firestationsoftware.com/uploads/images/gallery/2024-09/mSm2-disconnect.png) 5. You devices from Active911 will begin syncing if they have not already been synced. Click the "Sync Devices" button near the top of the modal dialog to refresh the list again. [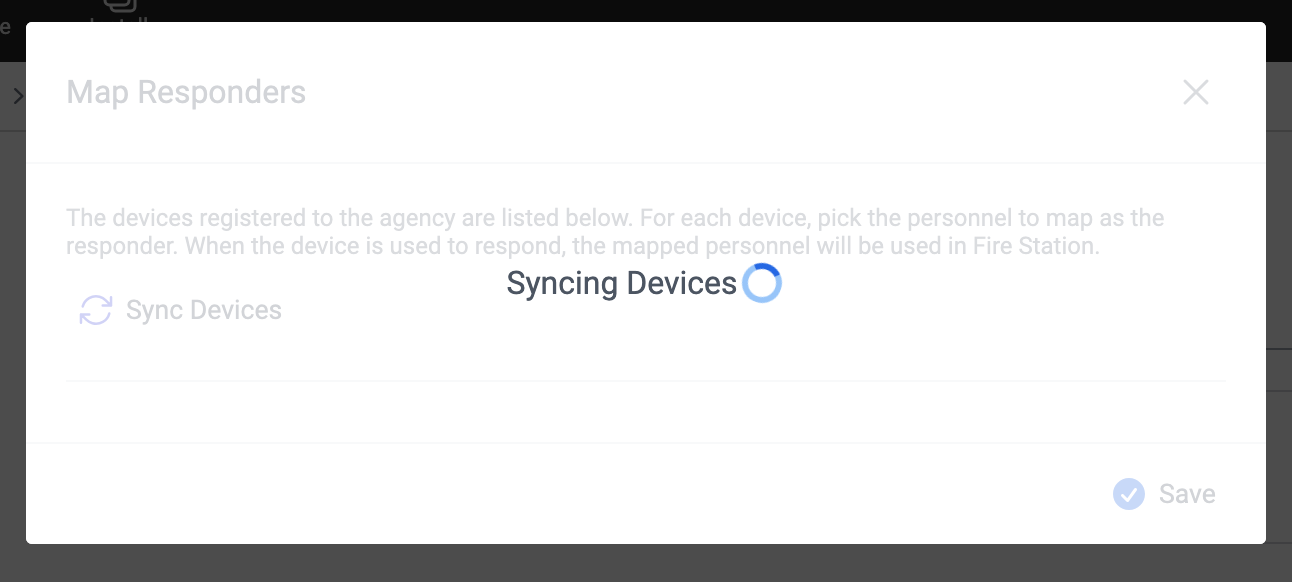](https://docs.firestationsoftware.com/uploads/images/gallery/2024-09/4-syncing.png) 6. For each device you want to map, select the personnel record you want to use as the responder. [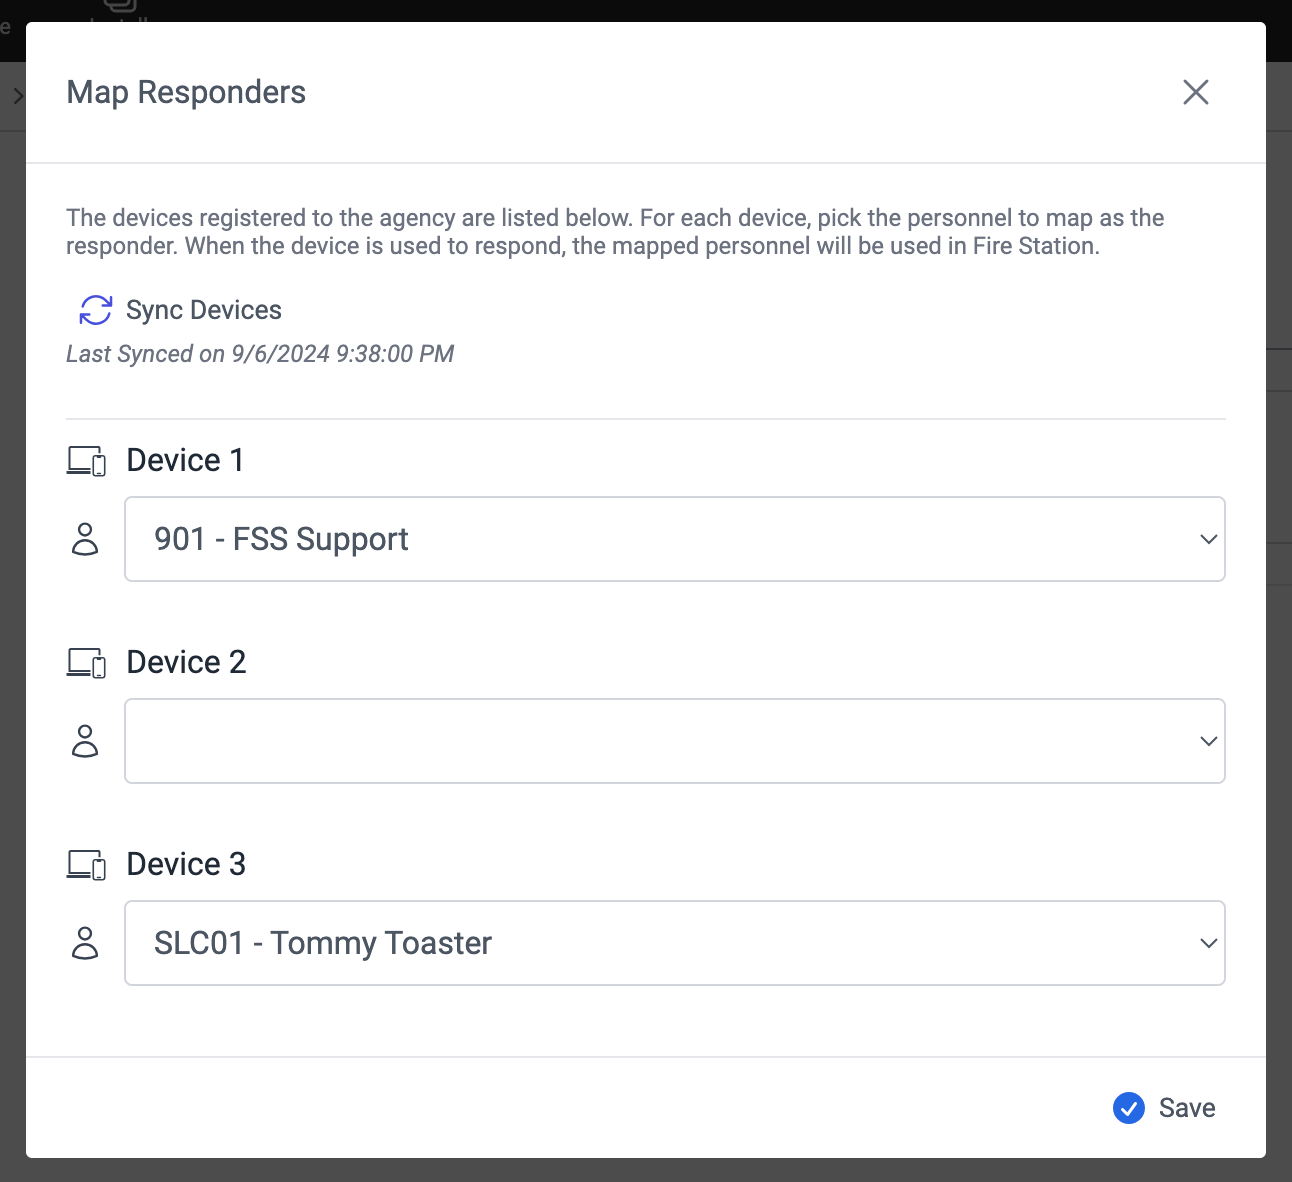](https://docs.firestationsoftware.com/uploads/images/gallery/2024-09/5-map.png) 7. Click the "Save" button at the bottom of the modal dialog.You do not need to map every device. You can also map the the same personnel record to multiple devices.
[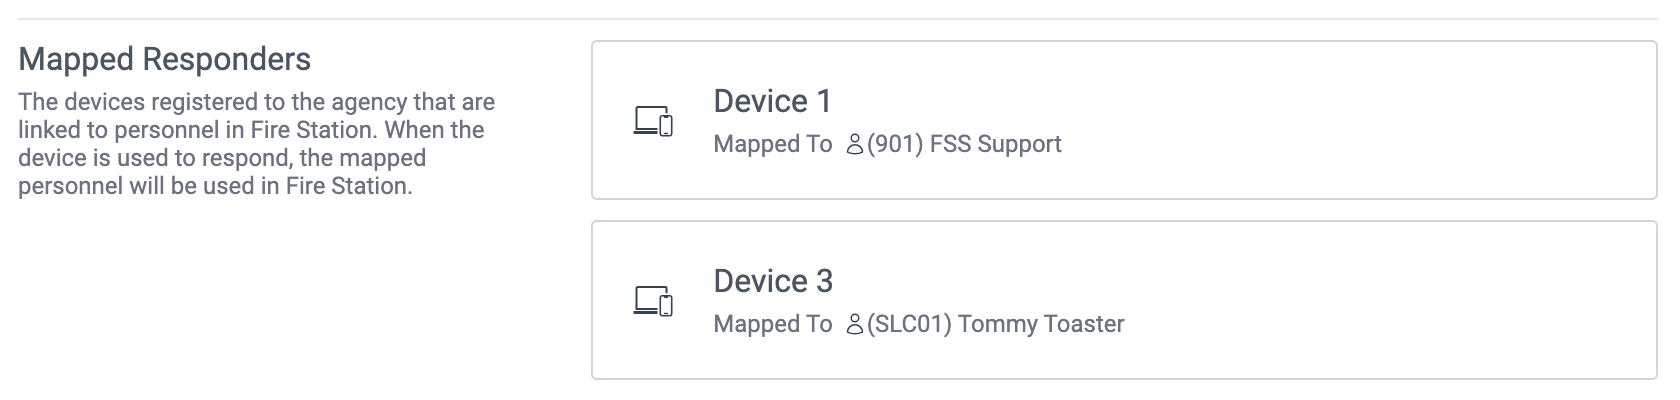](https://docs.firestationsoftware.com/uploads/images/gallery/2024-09/ubJ6-map-result.png) --- ### Disconnect Your Agency If you want to stop using the Active911 integration, you can disconnect your agency. 1. In a browser, navigate to [https://hub.firestationsoftware.com](https://hub.firestationsoftware.com) . You may need to sign in. 2. In the left menu select "Integrations". 3. Click the "Manage" button on the right side of the Active911 box. 4. Click the "Disconnect" button at the top of the page. 5. Click the "Disconnect" button at the bottom of the modal dialog to confirm your decision. [](https://docs.firestationsoftware.com/uploads/images/gallery/2024-09/2-disconnect.png) [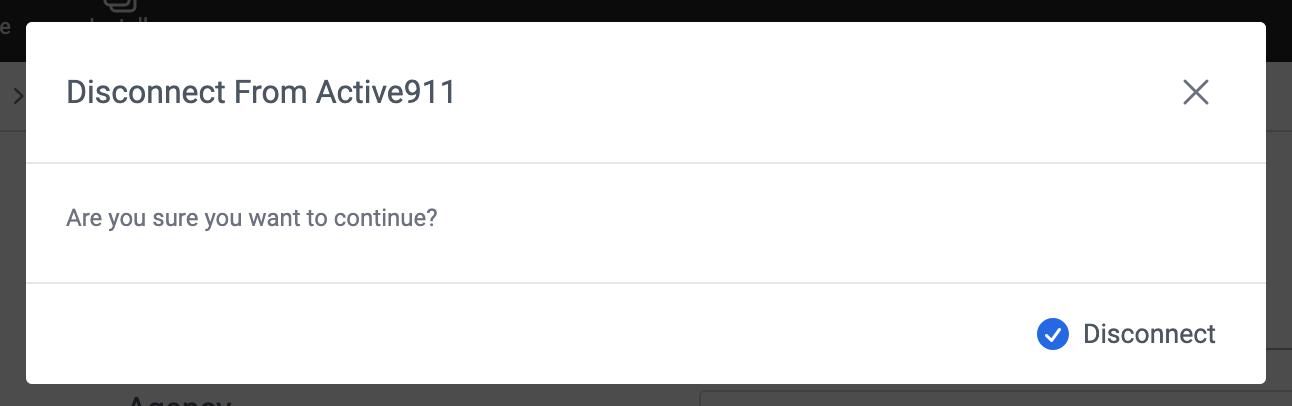](https://docs.firestationsoftware.com/uploads/images/gallery/2024-09/3-disconnect-modal.png) # Use the Active911 Integration --- Grant Permission to Link CallsYou must have *Can Manage Permissions* permissions to make these changes.
1. Sign in to Fire Station Desktop. 2. In the left menu, select *Admin* > *Manage Permissions*. 3. Select the name of the person you want to update. 4. Select the *Active911* tab. You may need to use the arrows on the right to scroll over to this tab. 5. Check off "Can Link Alerts to Calls". 6. Click the "Save" button at the top of the page. [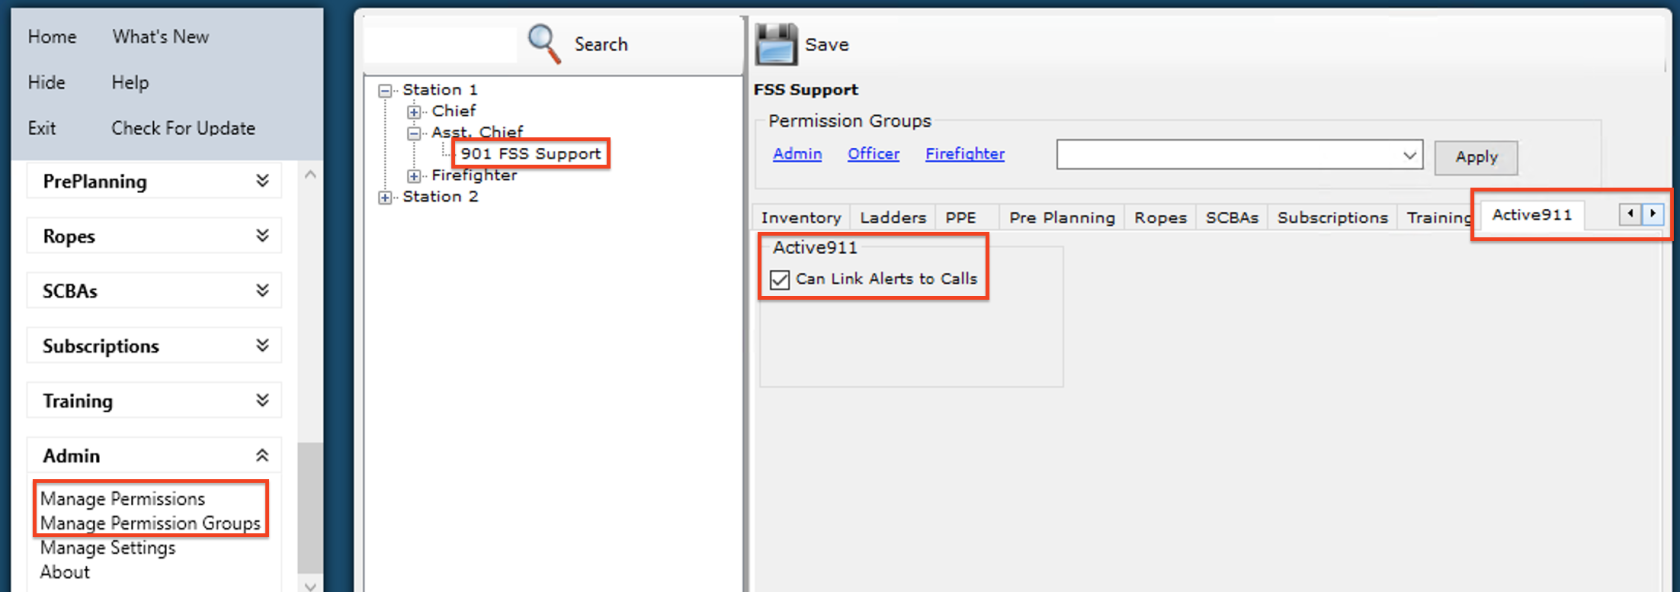](https://docs.firestationsoftware.com/uploads/images/gallery/2024-09/1-permissions.png) ### Link an Alert to a Quick CallYou must have *Can Link Alerts to Calls* permissions to use this feature.
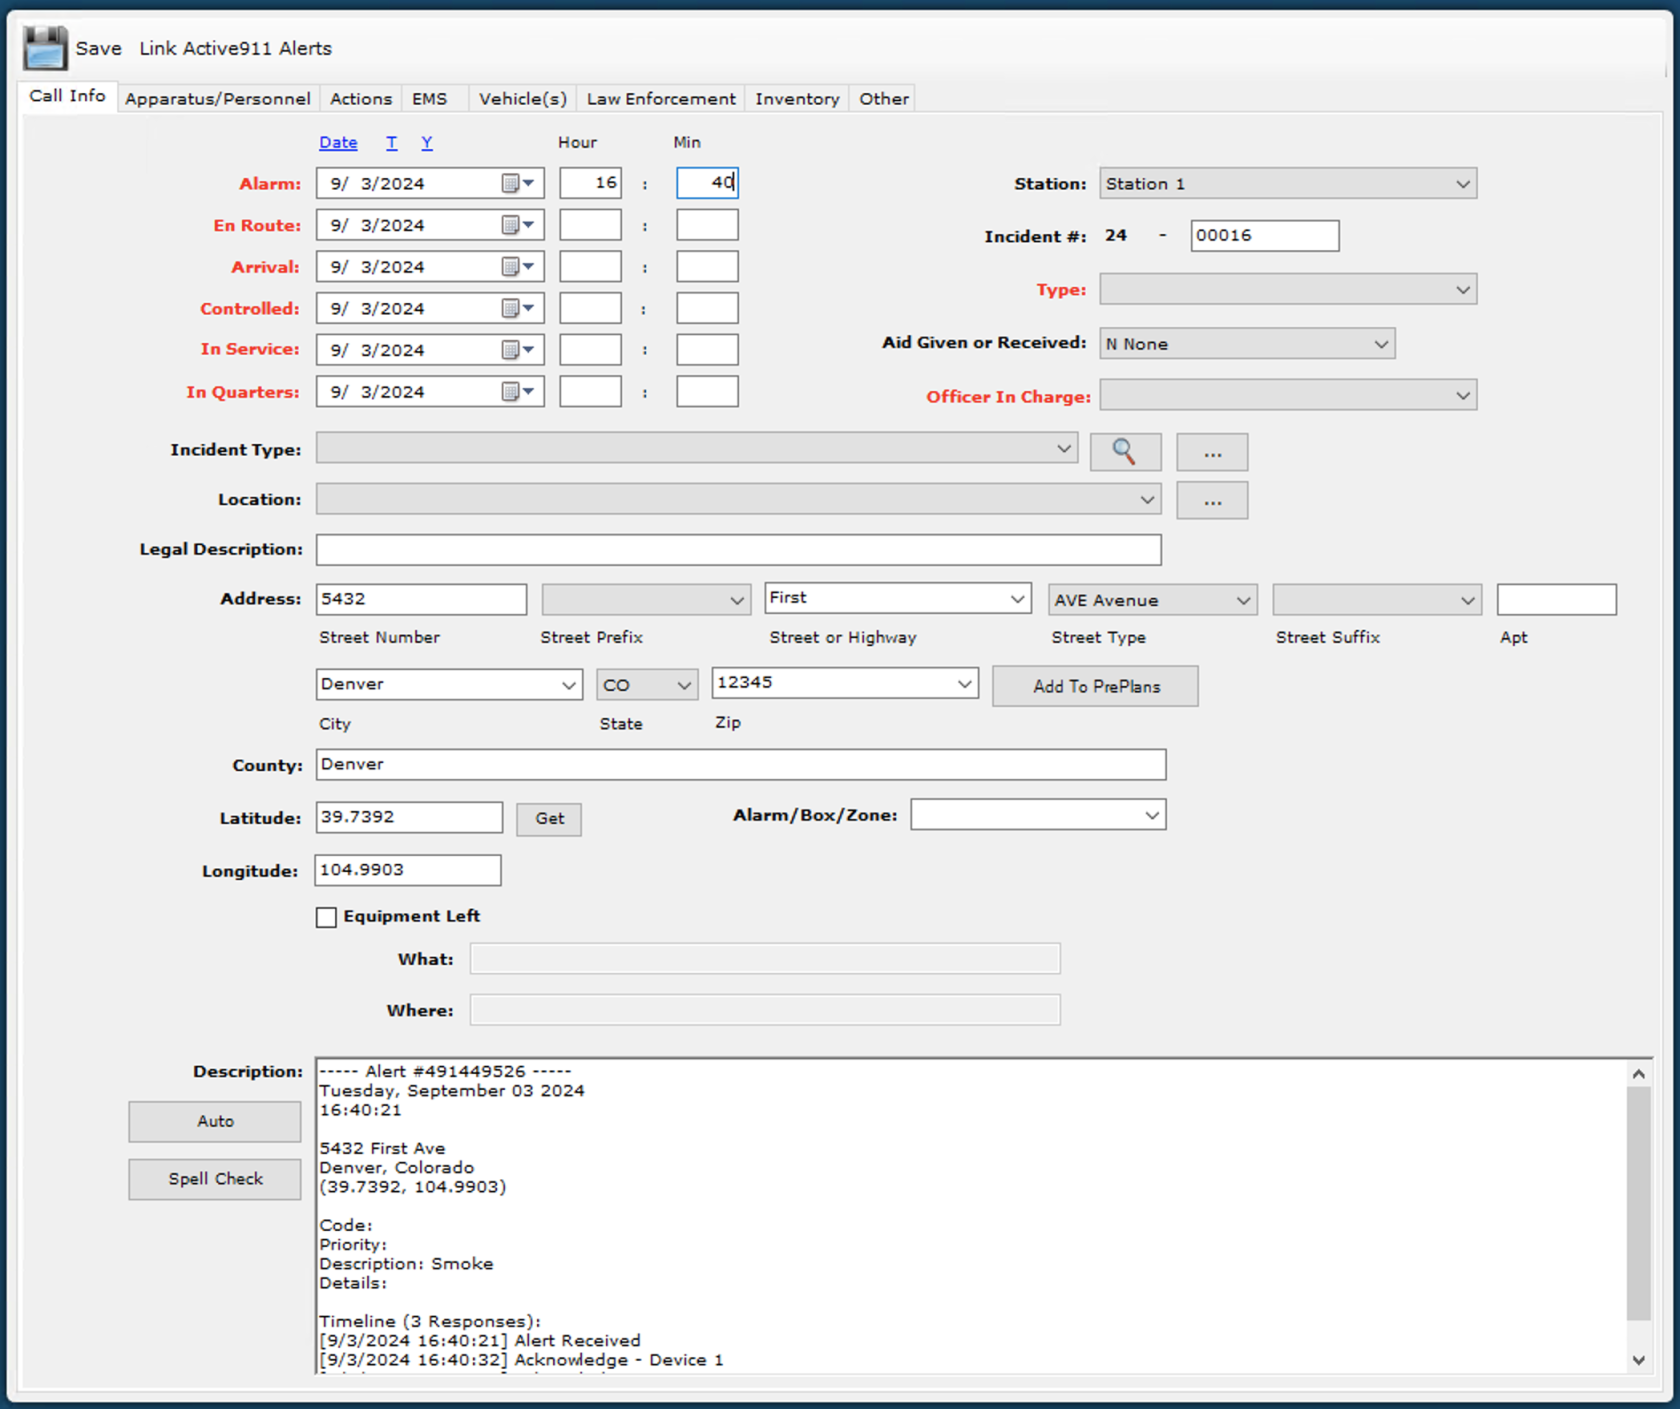
1. Sign in to Fire Station Desktop. 2. In the left menu, select *Incident Reporting* > *Enter New Quick Call*. - You can also link alerts to an existing quick call by selecting it from *Incident Reporting* > *Edit Entered Calls* 3. Click the "Link Active911 Alerts" button at the top of the page. Alerts for the last 30 days are displayed in the modal dialog. [](https://docs.firestationsoftware.com/uploads/images/gallery/2024-09/2-link-alerts.png) 4. Select an alert from the list to view the details from Active911. [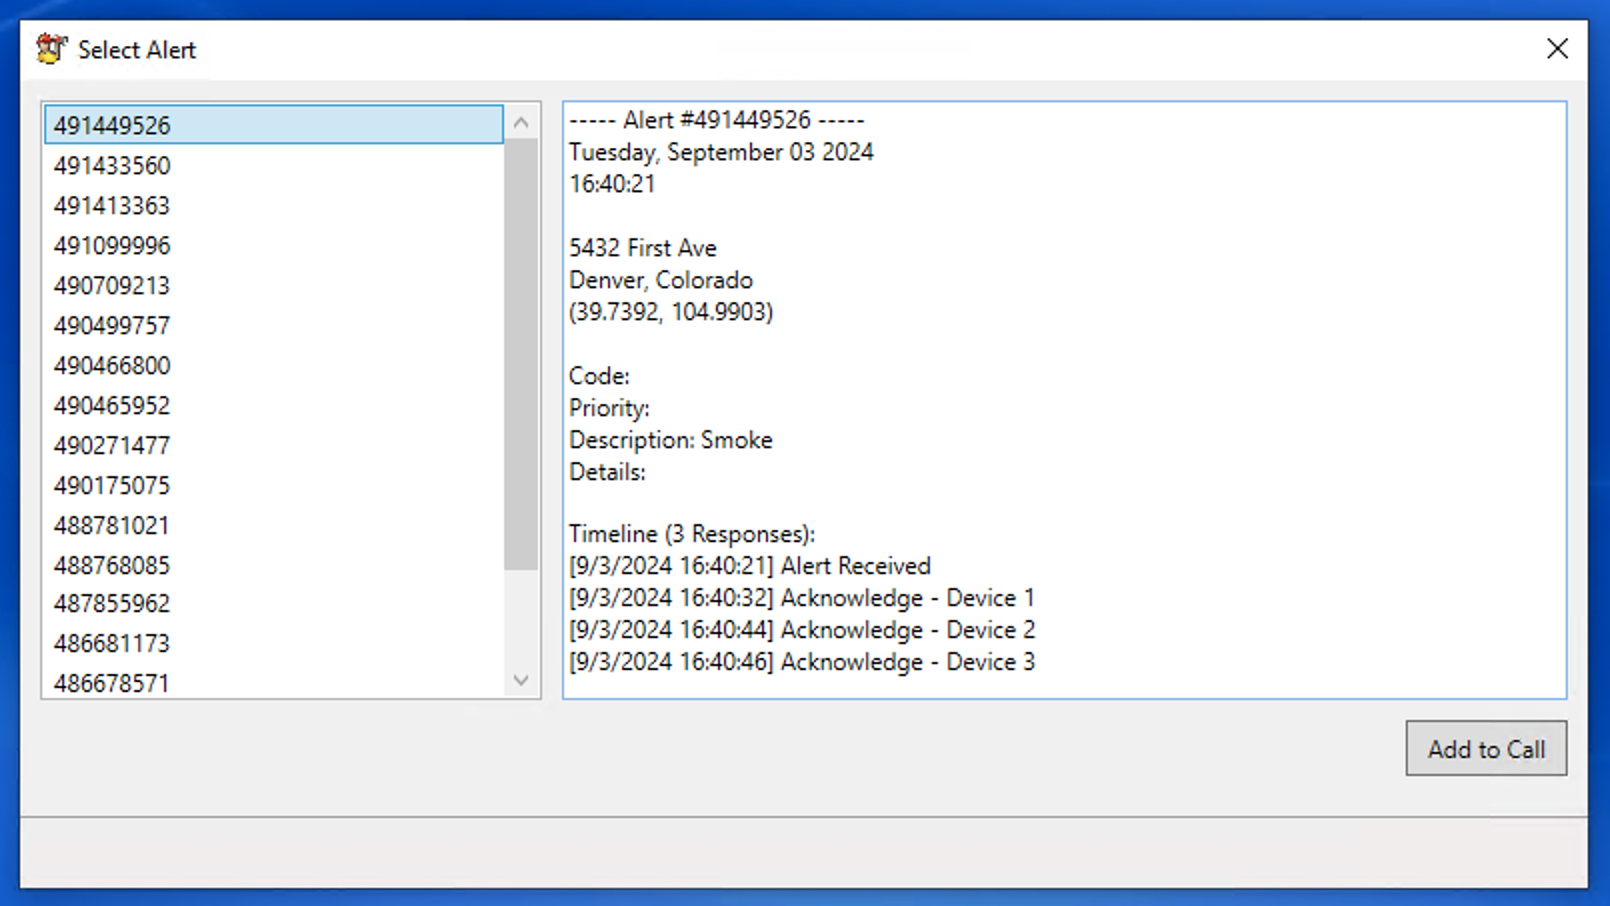](https://docs.firestationsoftware.com/uploads/images/gallery/2024-09/3-select-alert.png) 5. Click the "Add to Call" button at the bottom of the modal dialog. Alert information is copied to the *Call Info* tab: - The alert's date is copied to the call's alarm, en route, arrival, controlled, in service and in quarters dates. - The alert's time is copied to the call's alarm time. - The alert's location is copied to the call's location. - The alert's details are appended to the call's description. Any mapped responders responded to this alert, they are added as attendees on the *Apparatus/Personnel* tab.You can link multiple alerts to the same call. Alert information will **not** overwrite existing information entered on the call. However, the alert's details will always be appended to the call's description so you can manually copy information. Once an alert is linked to a call, it will not appear in the list to be selected again. If a call is deleted, any alerts will be unlinked and will appear in the list again.
[](https://docs.firestationsoftware.com/uploads/images/gallery/2024-09/zA64-details-copied.png) [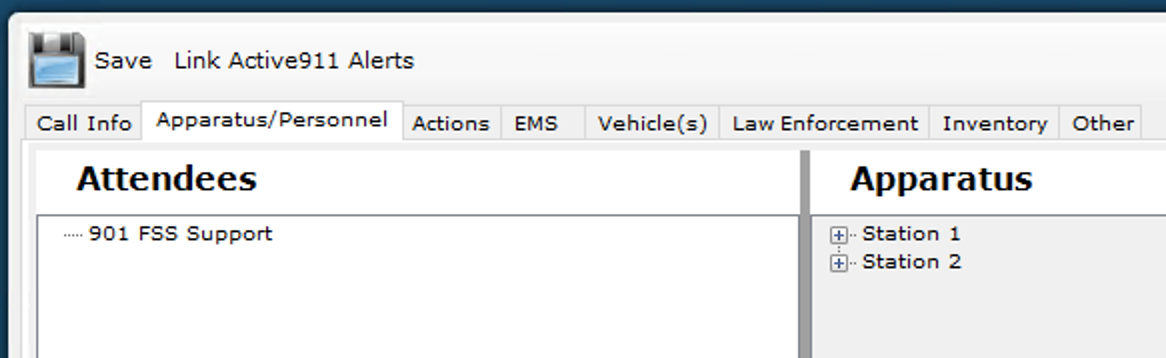](https://docs.firestationsoftware.com/uploads/images/gallery/2024-09/5-attendees-copied.png) # Appendix # Security Requirements This article provides a summary of the security requirements necessary when using Fire Station Desktop. ### Networking Requirements The following network services are used by Fire Station Desktop: - TCP port 80 and TCP port 443 to: - hub.firestationsoftware.com - id.firestationsoftware.com - apparatus-checks.platform.firestationsoftware.com - field-reports.firestationsoftware.com - TCP port 3306 to: - fss1.firestationhost.com - fss2.firestationhost.com - fss3.firestationhost.com - fss4.firestationhost.com - fss5.firestationhost.comThis list is subject to change.