Conduct a Check
You must have Apparatus Checks Participant or Apparatus Checks Coordinator permissions to conduct a check, and you must have Apparatus Checks Coordinator permissions to start a brand new check.
Start a Check
You must have Apparatus Checks Coordinator permissions to start a new check.
After you configure your apparatus, you can conduct a check for it.
- On a browser, go to https://apparatus-checks.platform.firestationsoftware.com/select-apparatus. You may need to sign in.
- Select the apparatus you want to check.
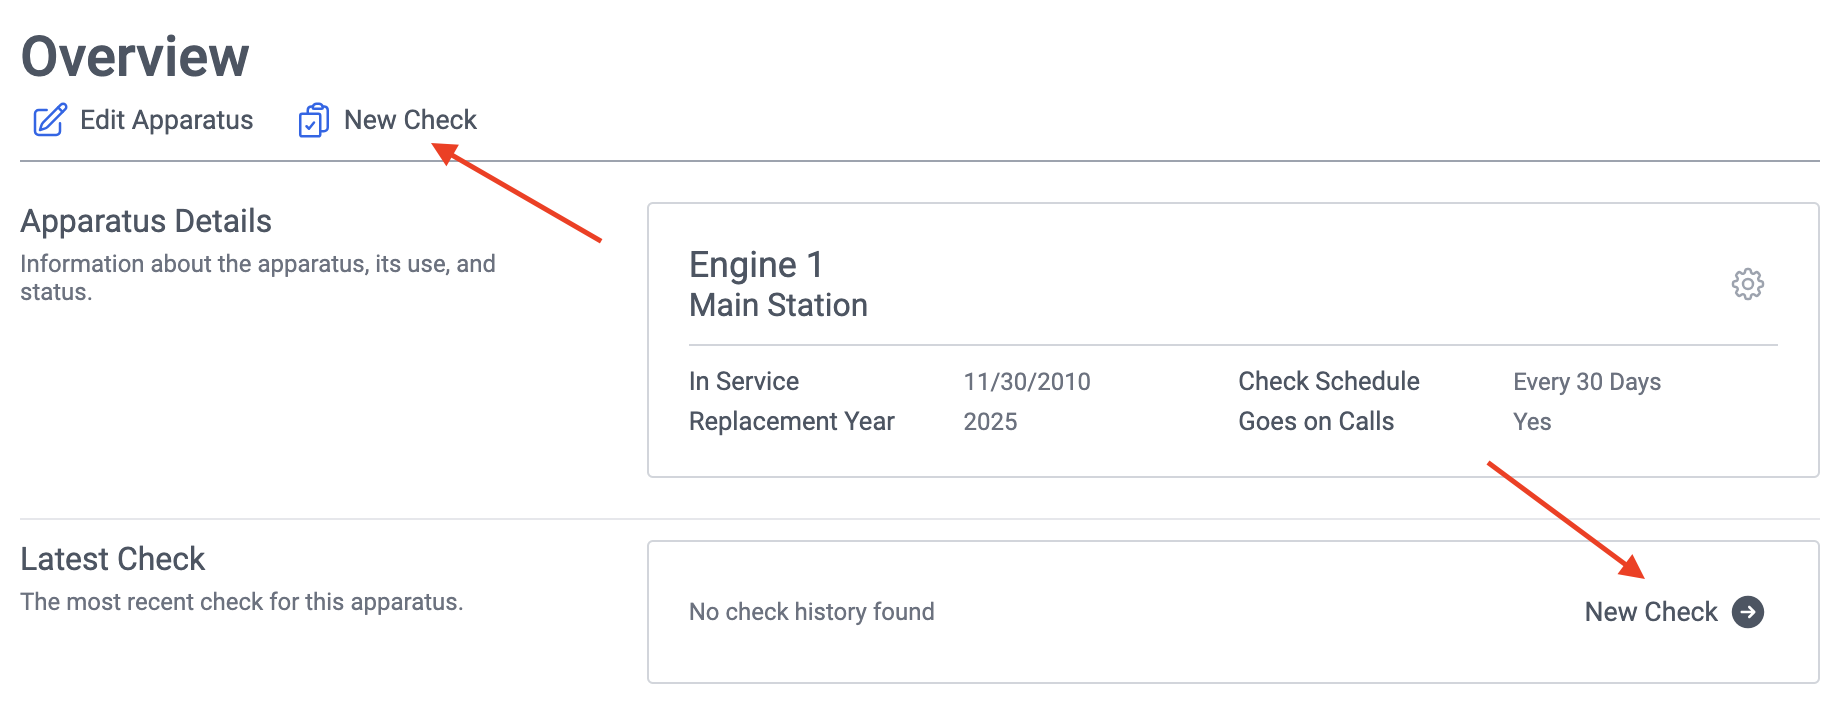
- Click the "New Check" button at the top of the page or on the right side of the box in the Latest Check section.
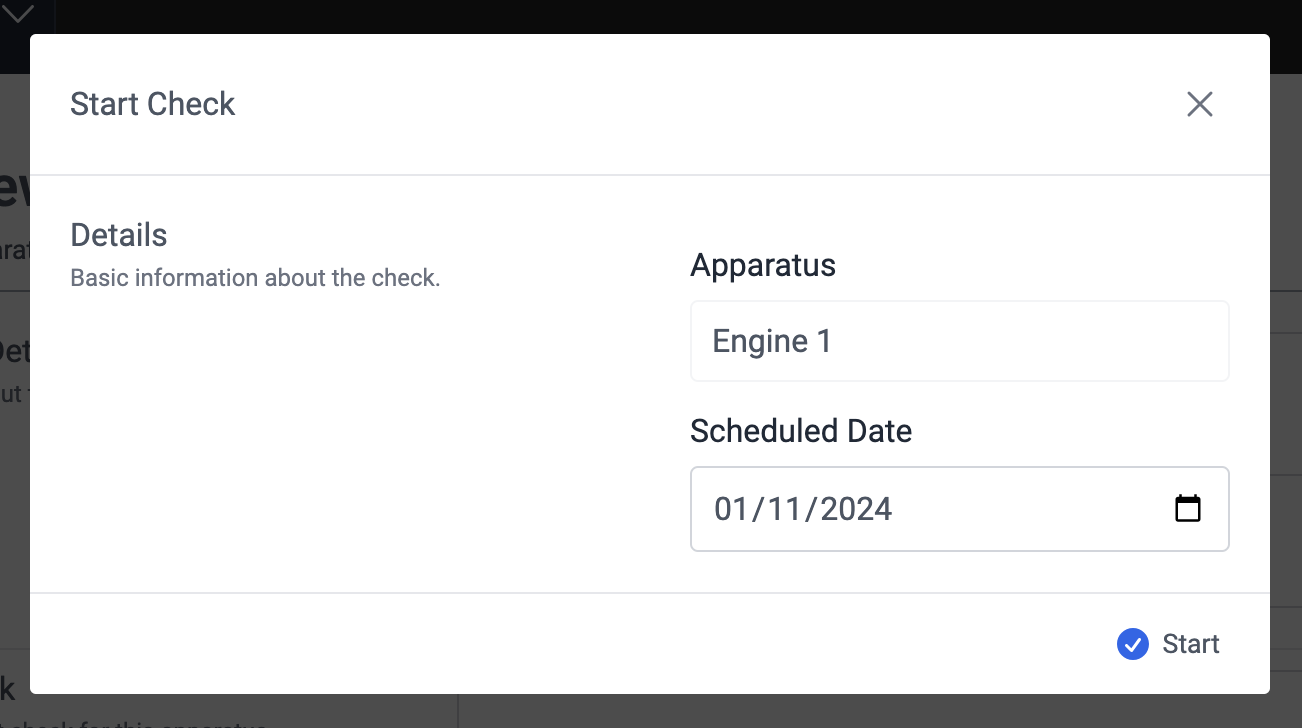
- Pick the date the check is scheduled for.
- Click "Start" at the bottom of the modal dialog.
Resume a Check
You must have Apparatus Checks Participant or Apparatus Checks Coordinator permissions to resume a check.
- On a browser, go to https://apparatus-checks.platform.firestationsoftware.com/select-apparatus. You may need to sign in.
- Select the apparatus you want to check.
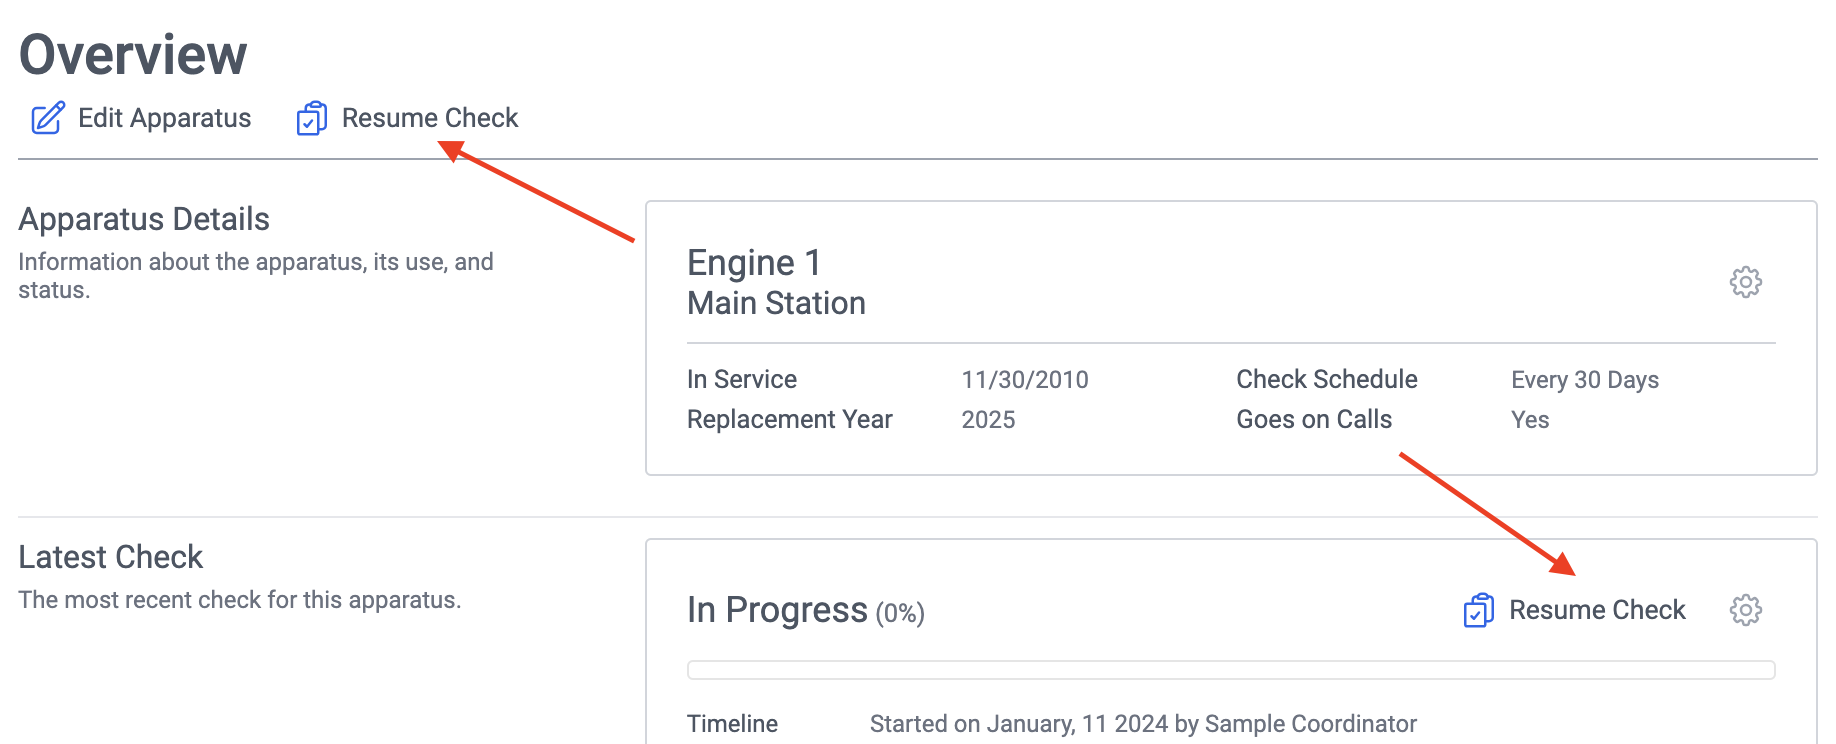
- If a check has been started, click the "Resume Check" button at the top of the page or on the right side of the box in the Latest Check section.
You can also resume a check by clicking the "Resume Check" button on the in-progress check on the Check History page.
Understanding the Check Interface
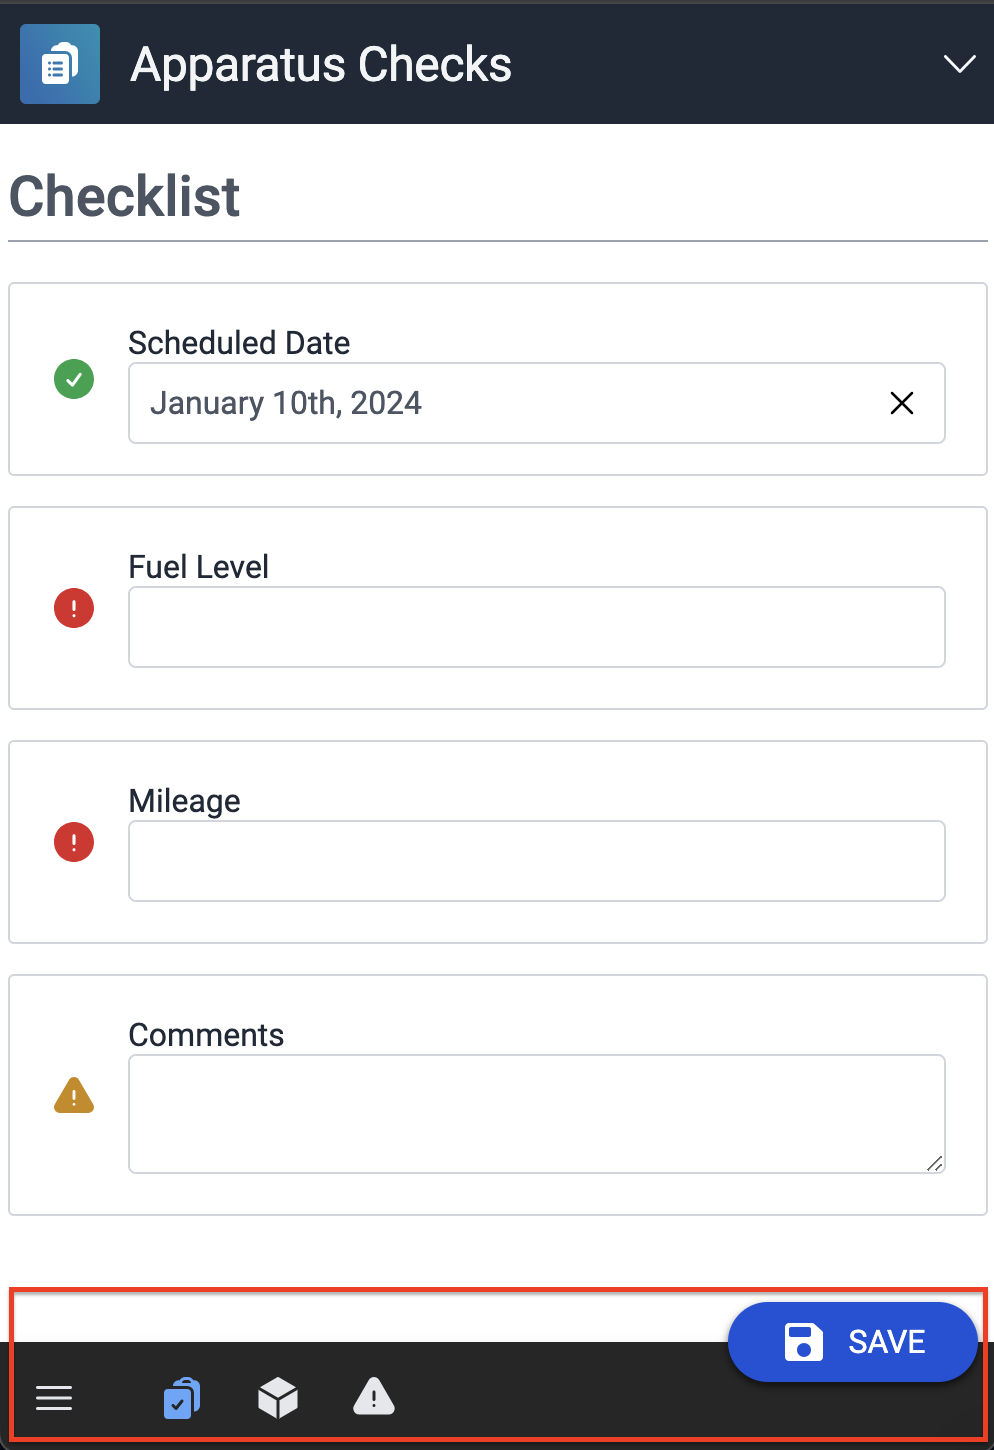
Saving
The system will auto-save any changes when you navigate between screens. You can save manually at any time when the Save button is present on the screen.

Navigation
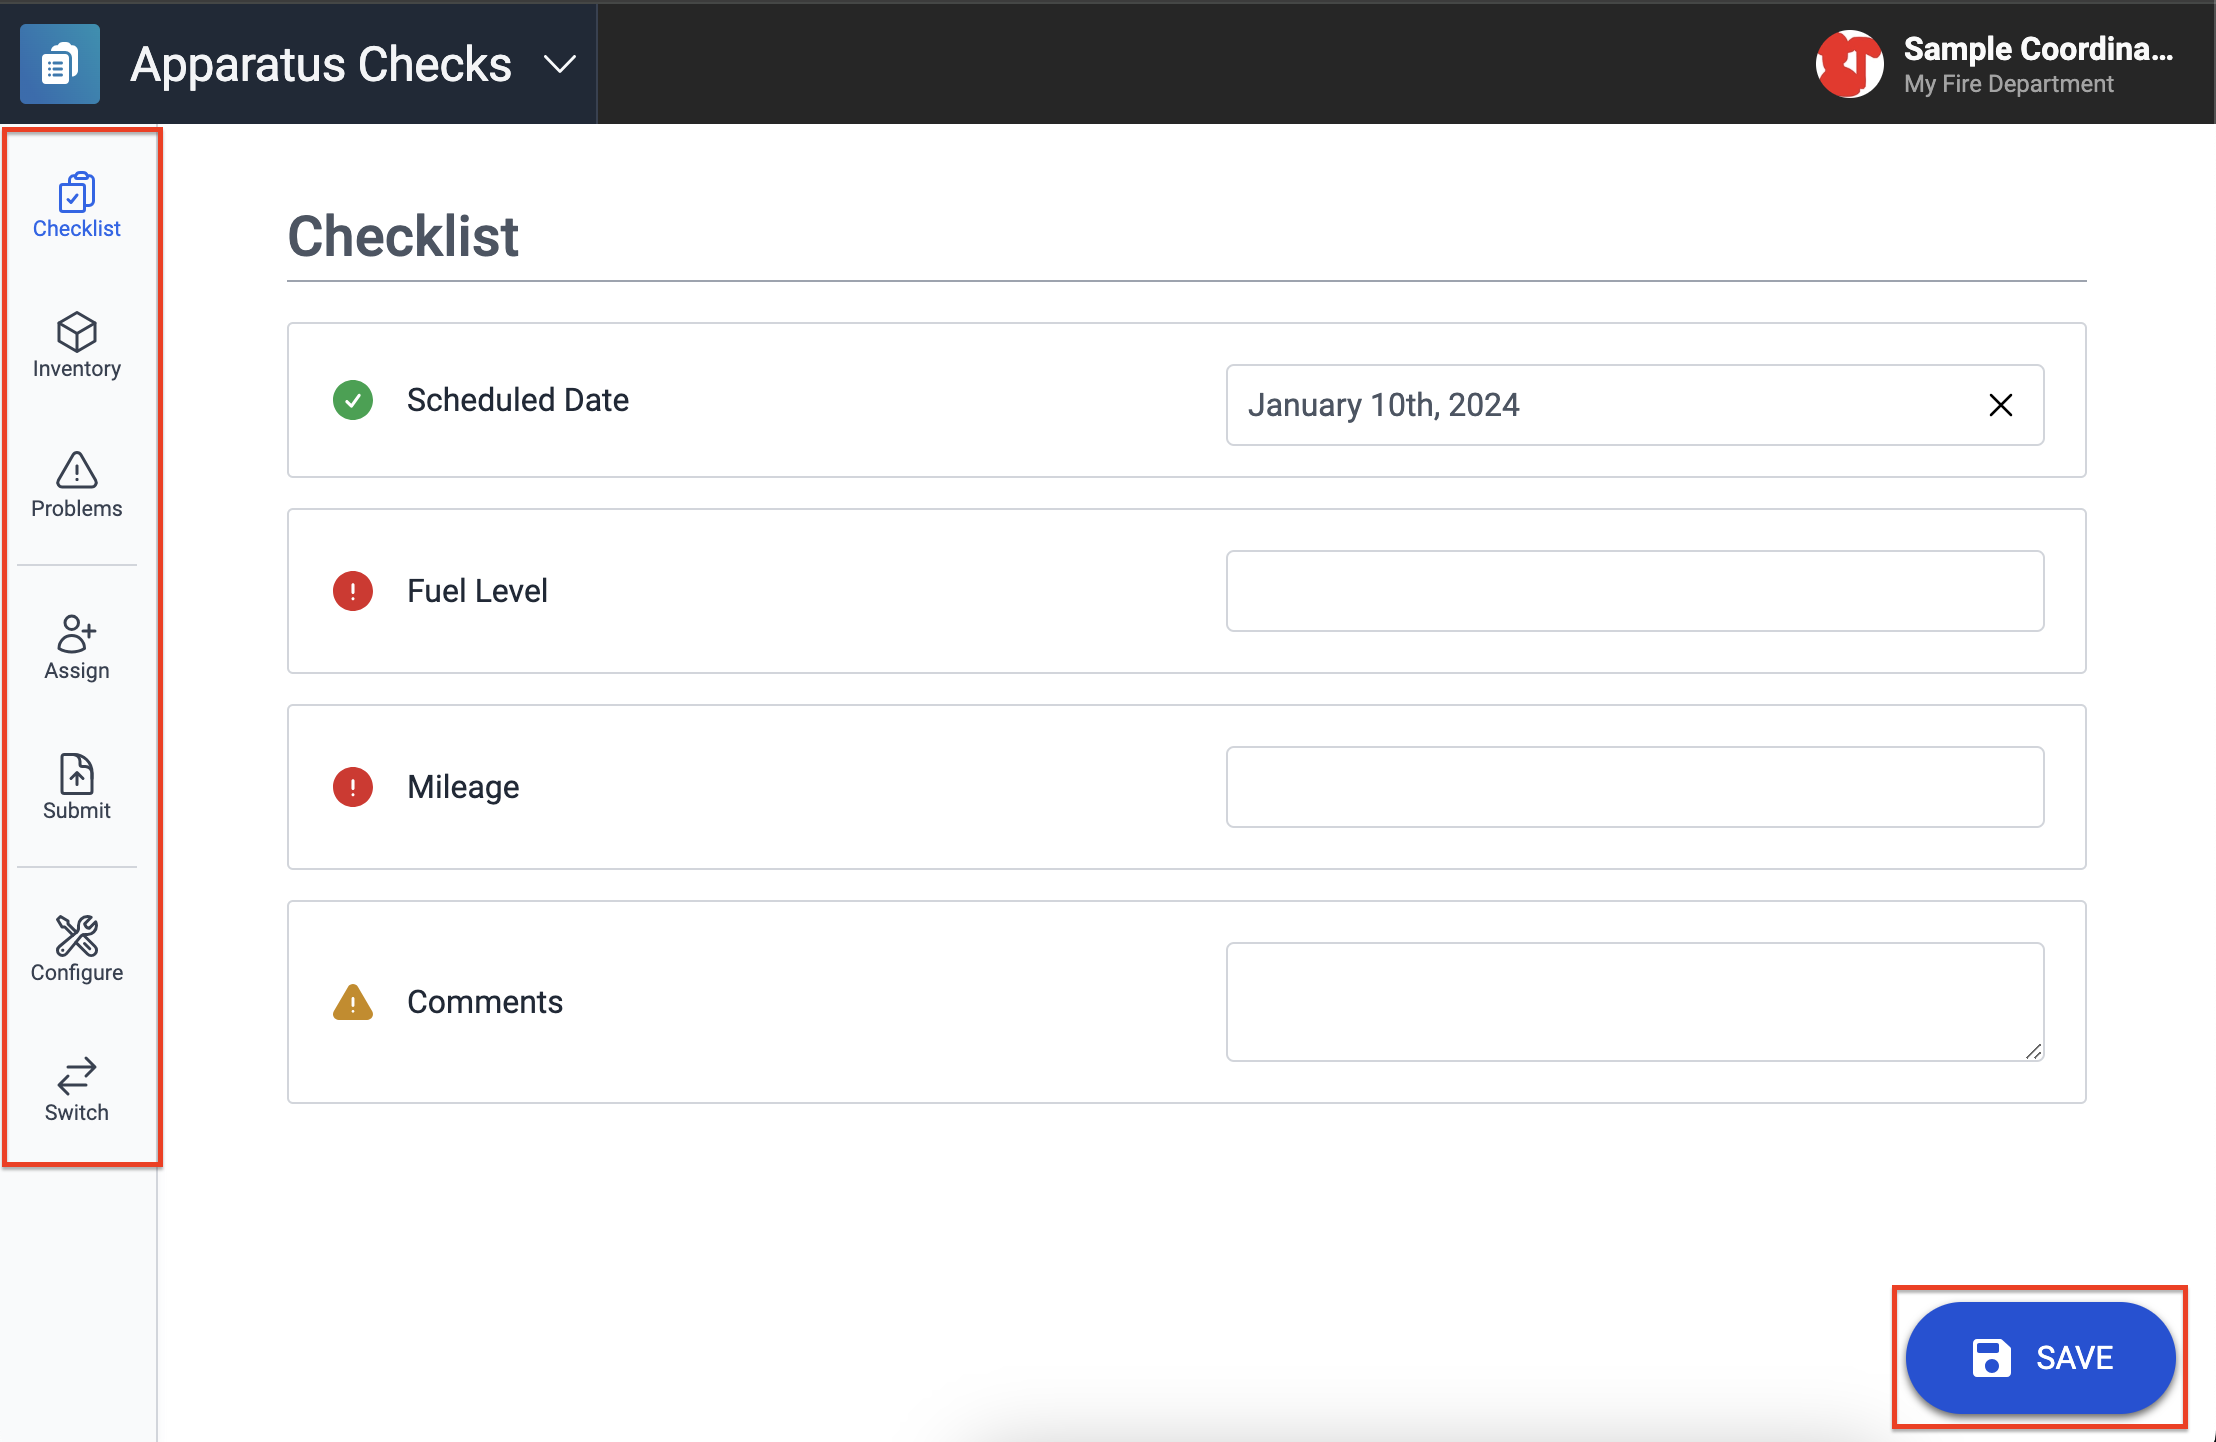
An apparatus check is broken out into 3 main steps:
- Checklist - answer general questions (i.e. indicate the fuel level)
- Inventory - check items stored on the apparatus
- Problems - entering problems noted with the apparatus
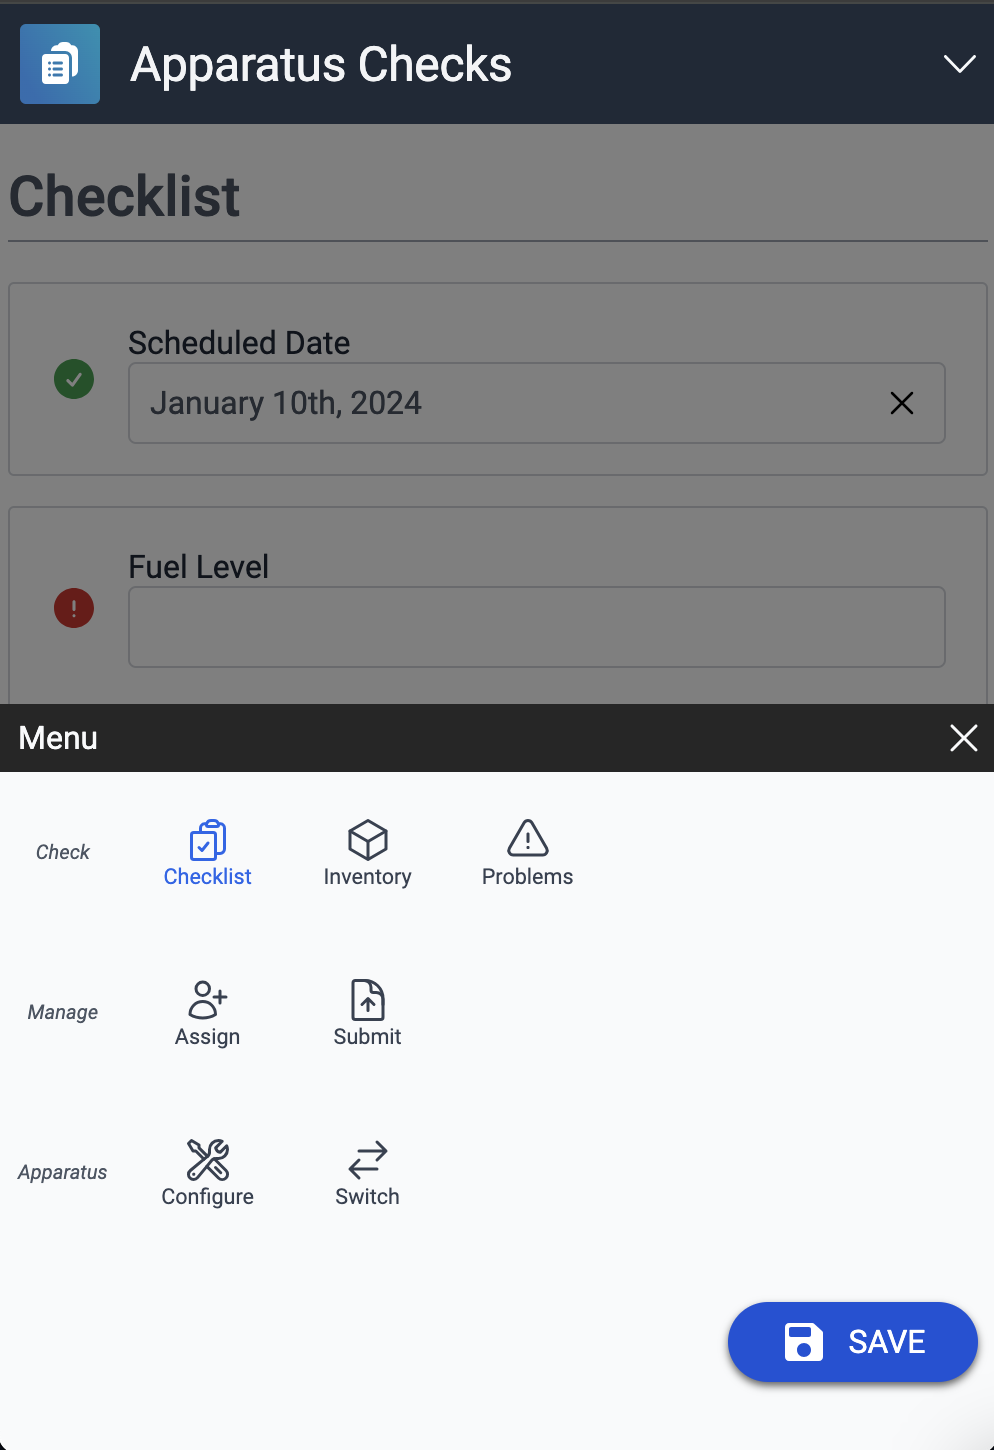
You can also perform these additional actions on a check:
- Assign - view and edit the apparatus and compartment assignments
- Submit - review and complete the check
- Configure - exit the check and return to the apparatus configuration
- Switch - exit the check and return to the apparatus selection
You can access each step and actions directly from the sidebar menu.
On devices with small screens, the menu is collapsed and appears on the bottom bar instead. You can expand the menu to reveal all navigation options.
Manage Check Assignments
You must have Apparatus Checks Coordinator permissions to make these changes.
- On a browser, go to https://apparatus-checks.platform.firestationsoftware.com/select-apparatus. You may need to sign in.
- Select the apparatus you want to check.
- Start or resume a check.
- Select "Assign" from the navigation menu.
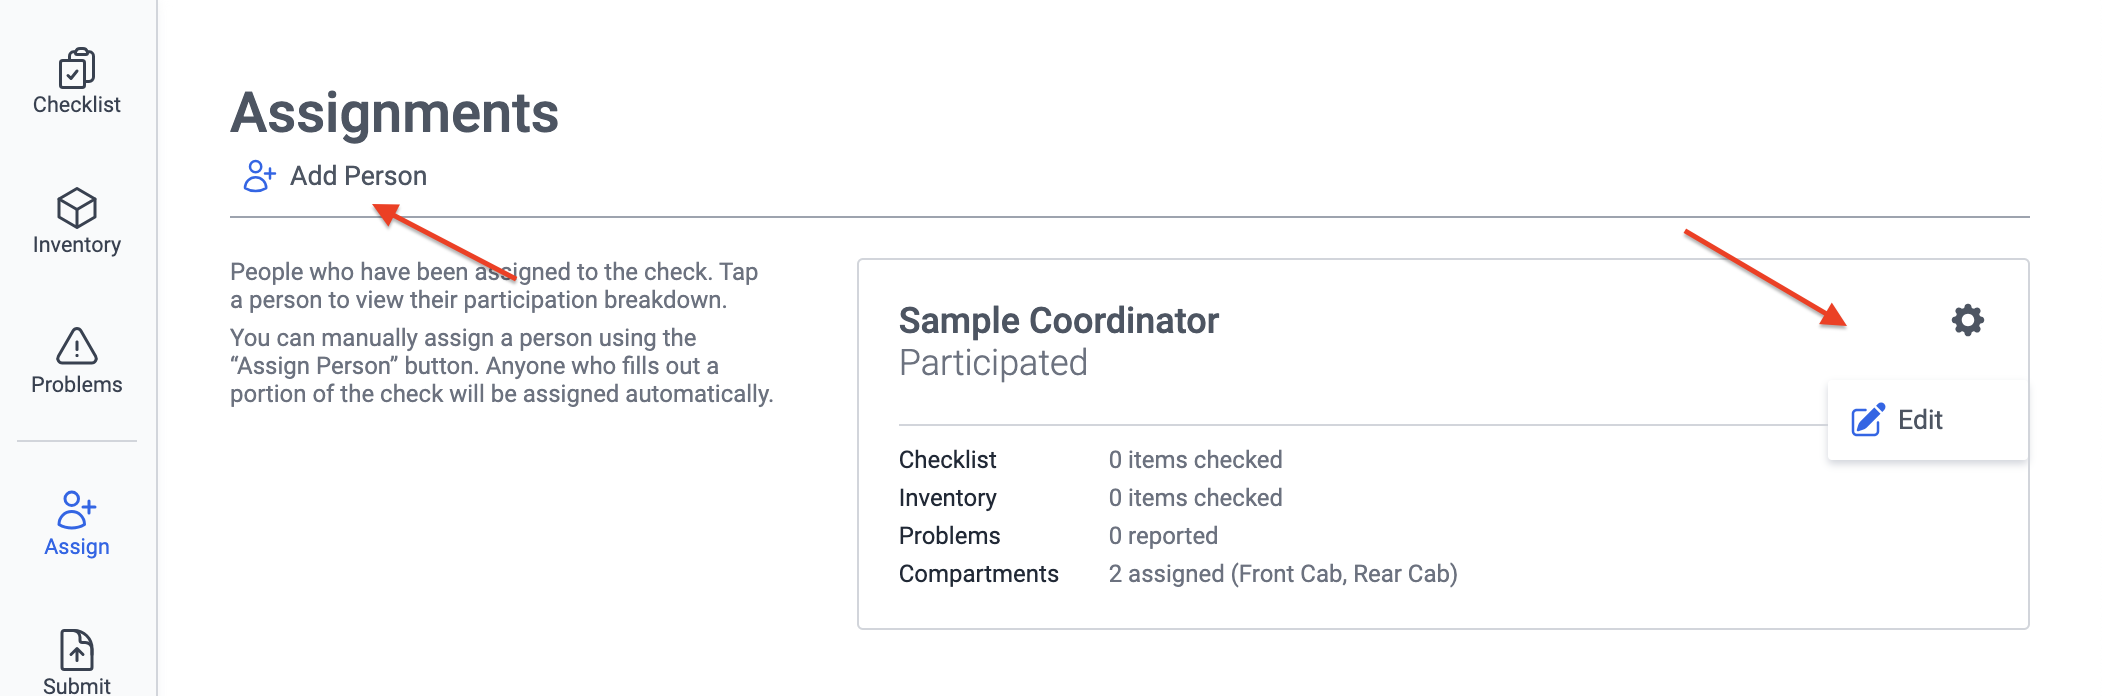
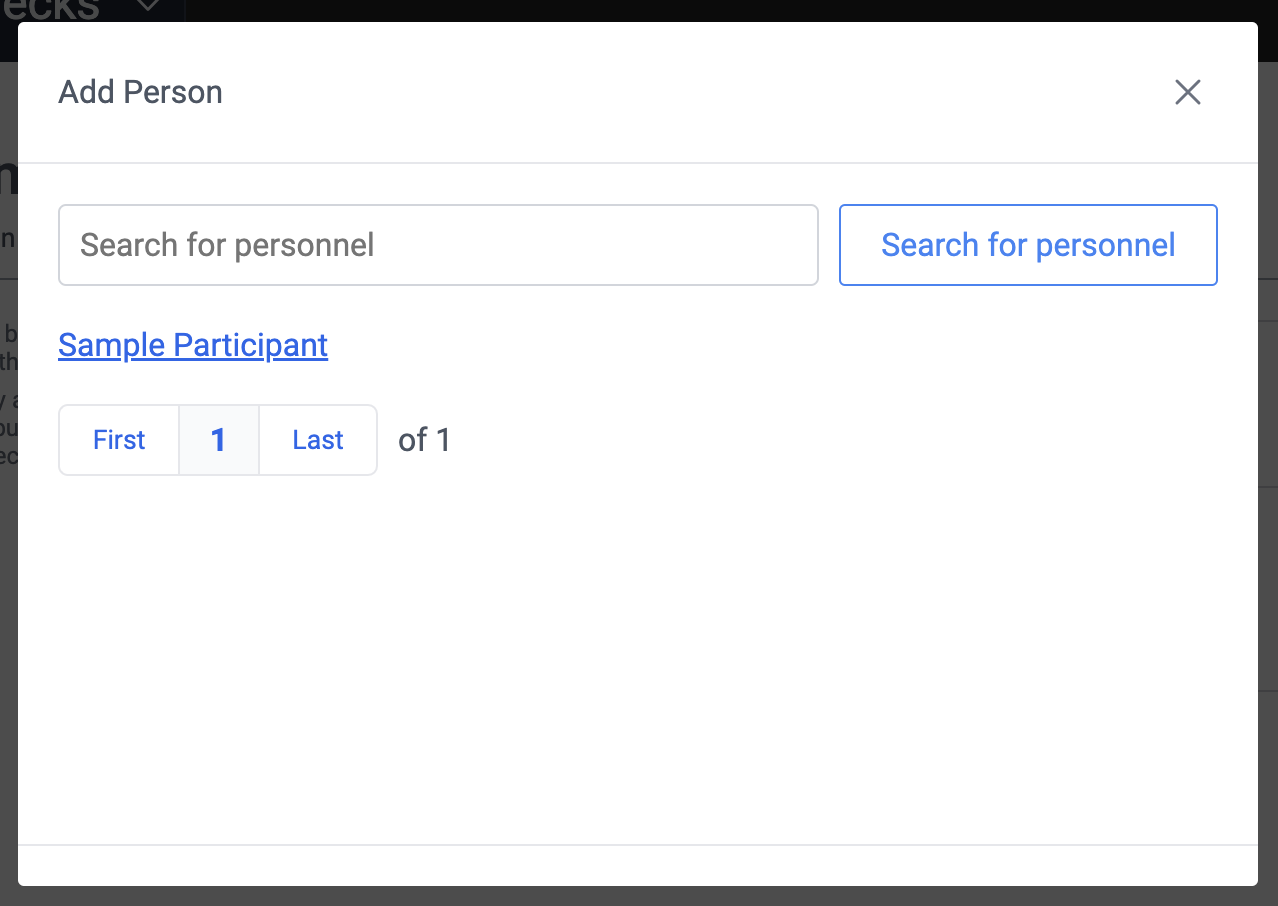
- Click the "Add Person" button at the top of the page, and select the person you want to add.
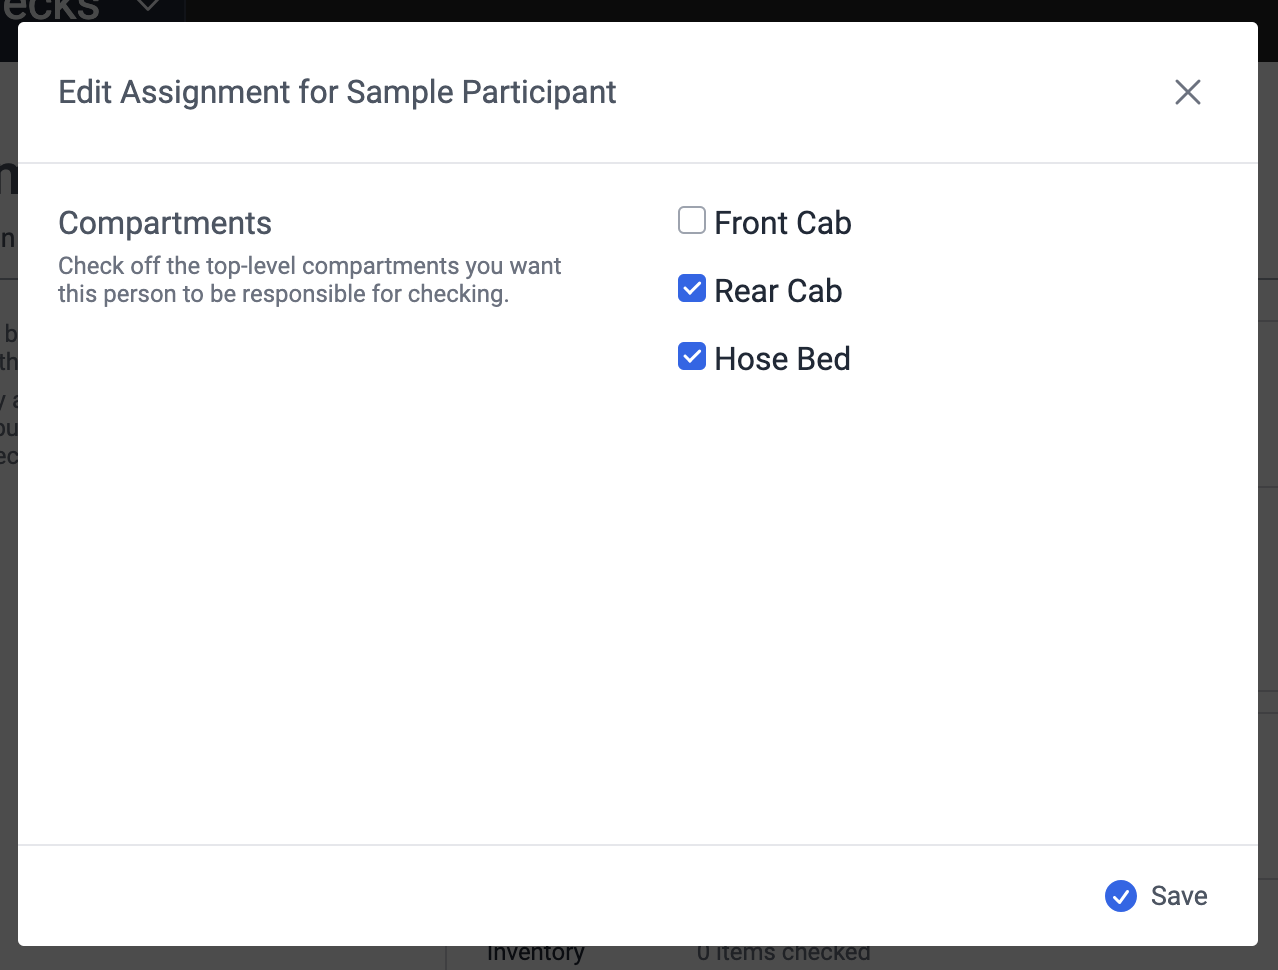
- To edit an assignment, click the gear button to the right of their name and select "Edit".
- Check off any compartments you want to assign to this person.
- Click "Save" at the bottom of the modal dialog.
You can assign any person from the active personnel list in Fire Station desktop, even if they do not have an FSSID. However, they must have an FSSID to sign in to the Apparatus Checks app and save changes on the check to receive credit for participating.
The person who starts the check, or anyone that enters information on the check, will be added to the check automatically, and the system will indicate that they have participated.
People who have participated in a check cannot have their assignment removed.
Complete the Checklist
You must have Apparatus Check Coordinator permissions to change the Scheduled Date for a check.
- On a browser, go to https://apparatus-checks.platform.firestationsoftware.com/select-apparatus. You may need to sign in.
- Select the apparatus you want to check.
- Start or resume a check.
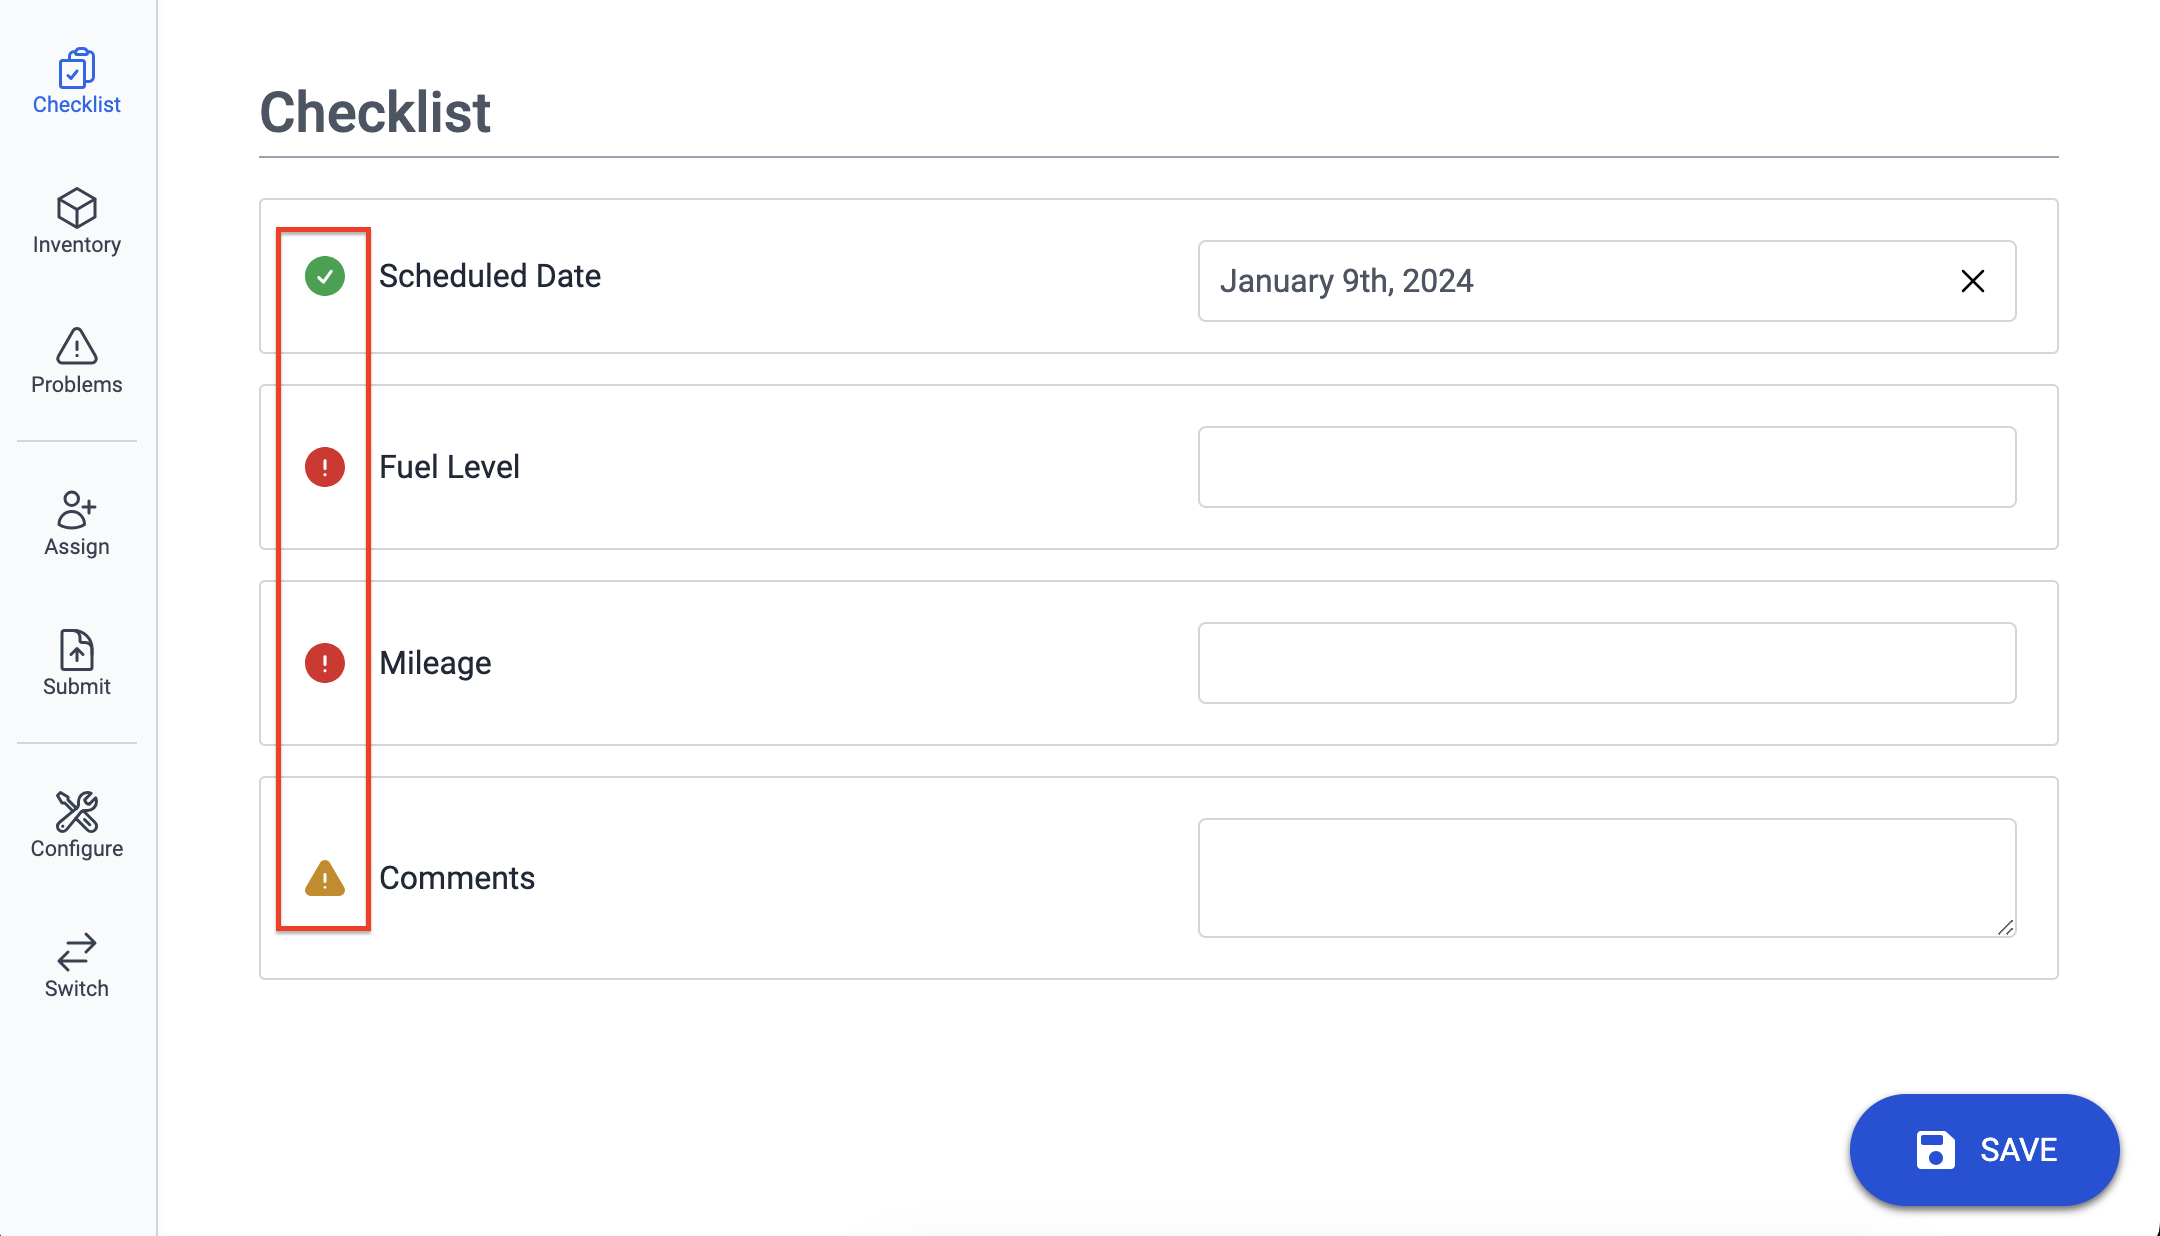
- Select "Checklist" from the navigation menu.
- Edit the answers to checklist items.
- Click "Save" at the bottom of the modal dialog.
Each checklist item has an icon to indicate the validation status:
- Green Checkbox - indicates the item is complete
- Red Exclamation Mark - indicates the item is not complete and is required
- Yellow Exclamation Mark - indicates the item is not complete, but it is optional
Check the Inventory
Select a Compartment
The Inventory screen is organized by top-level compartments. Each compartment lists anyassignees person who is assigned along withand the overall progress of theitem checks for that compartment check.and sub-compartments.
- On a browser, go to https://apparatus-checks.platform.firestationsoftware.com/select-apparatus. You may need to sign in.
- Select the apparatus you want to check.
- Start or resume a check.
- Select "Inventory" from the navigation menu.
- Click the "Check" button on the right side of a compartment.

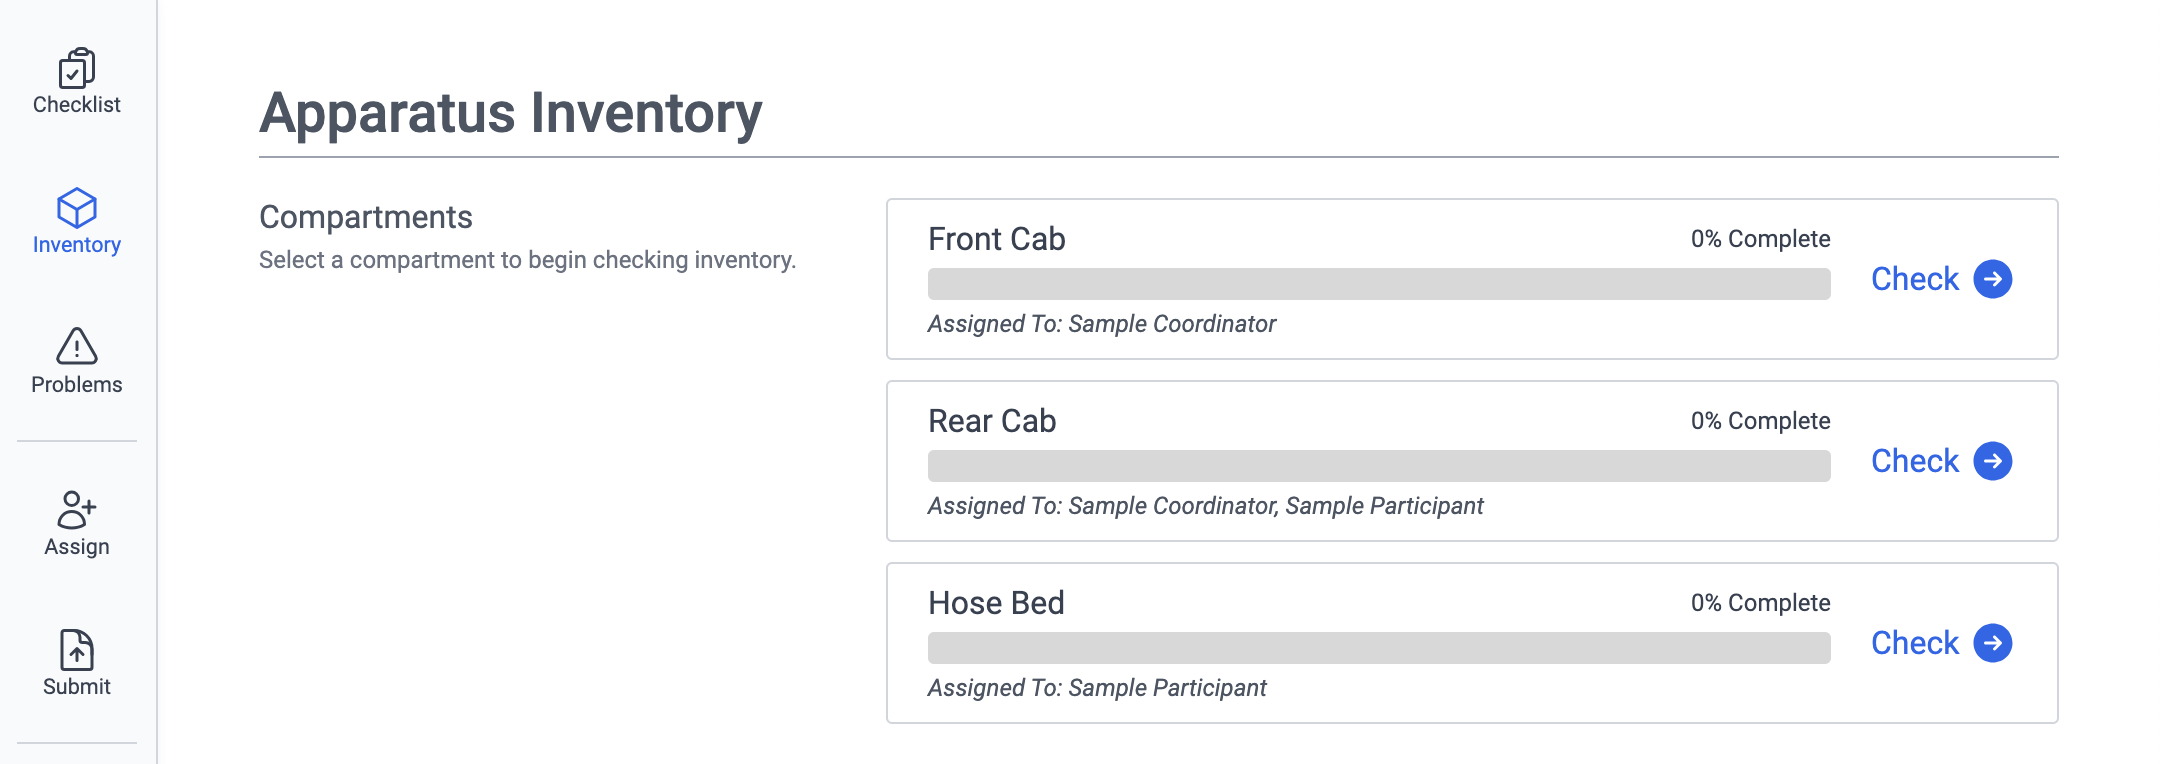
Click the "Check"All onCompartments" abutton compartment to open it up and view allat the sub-compartmentstop andof itemsthe itpage contains.
Navigating Between Compartments
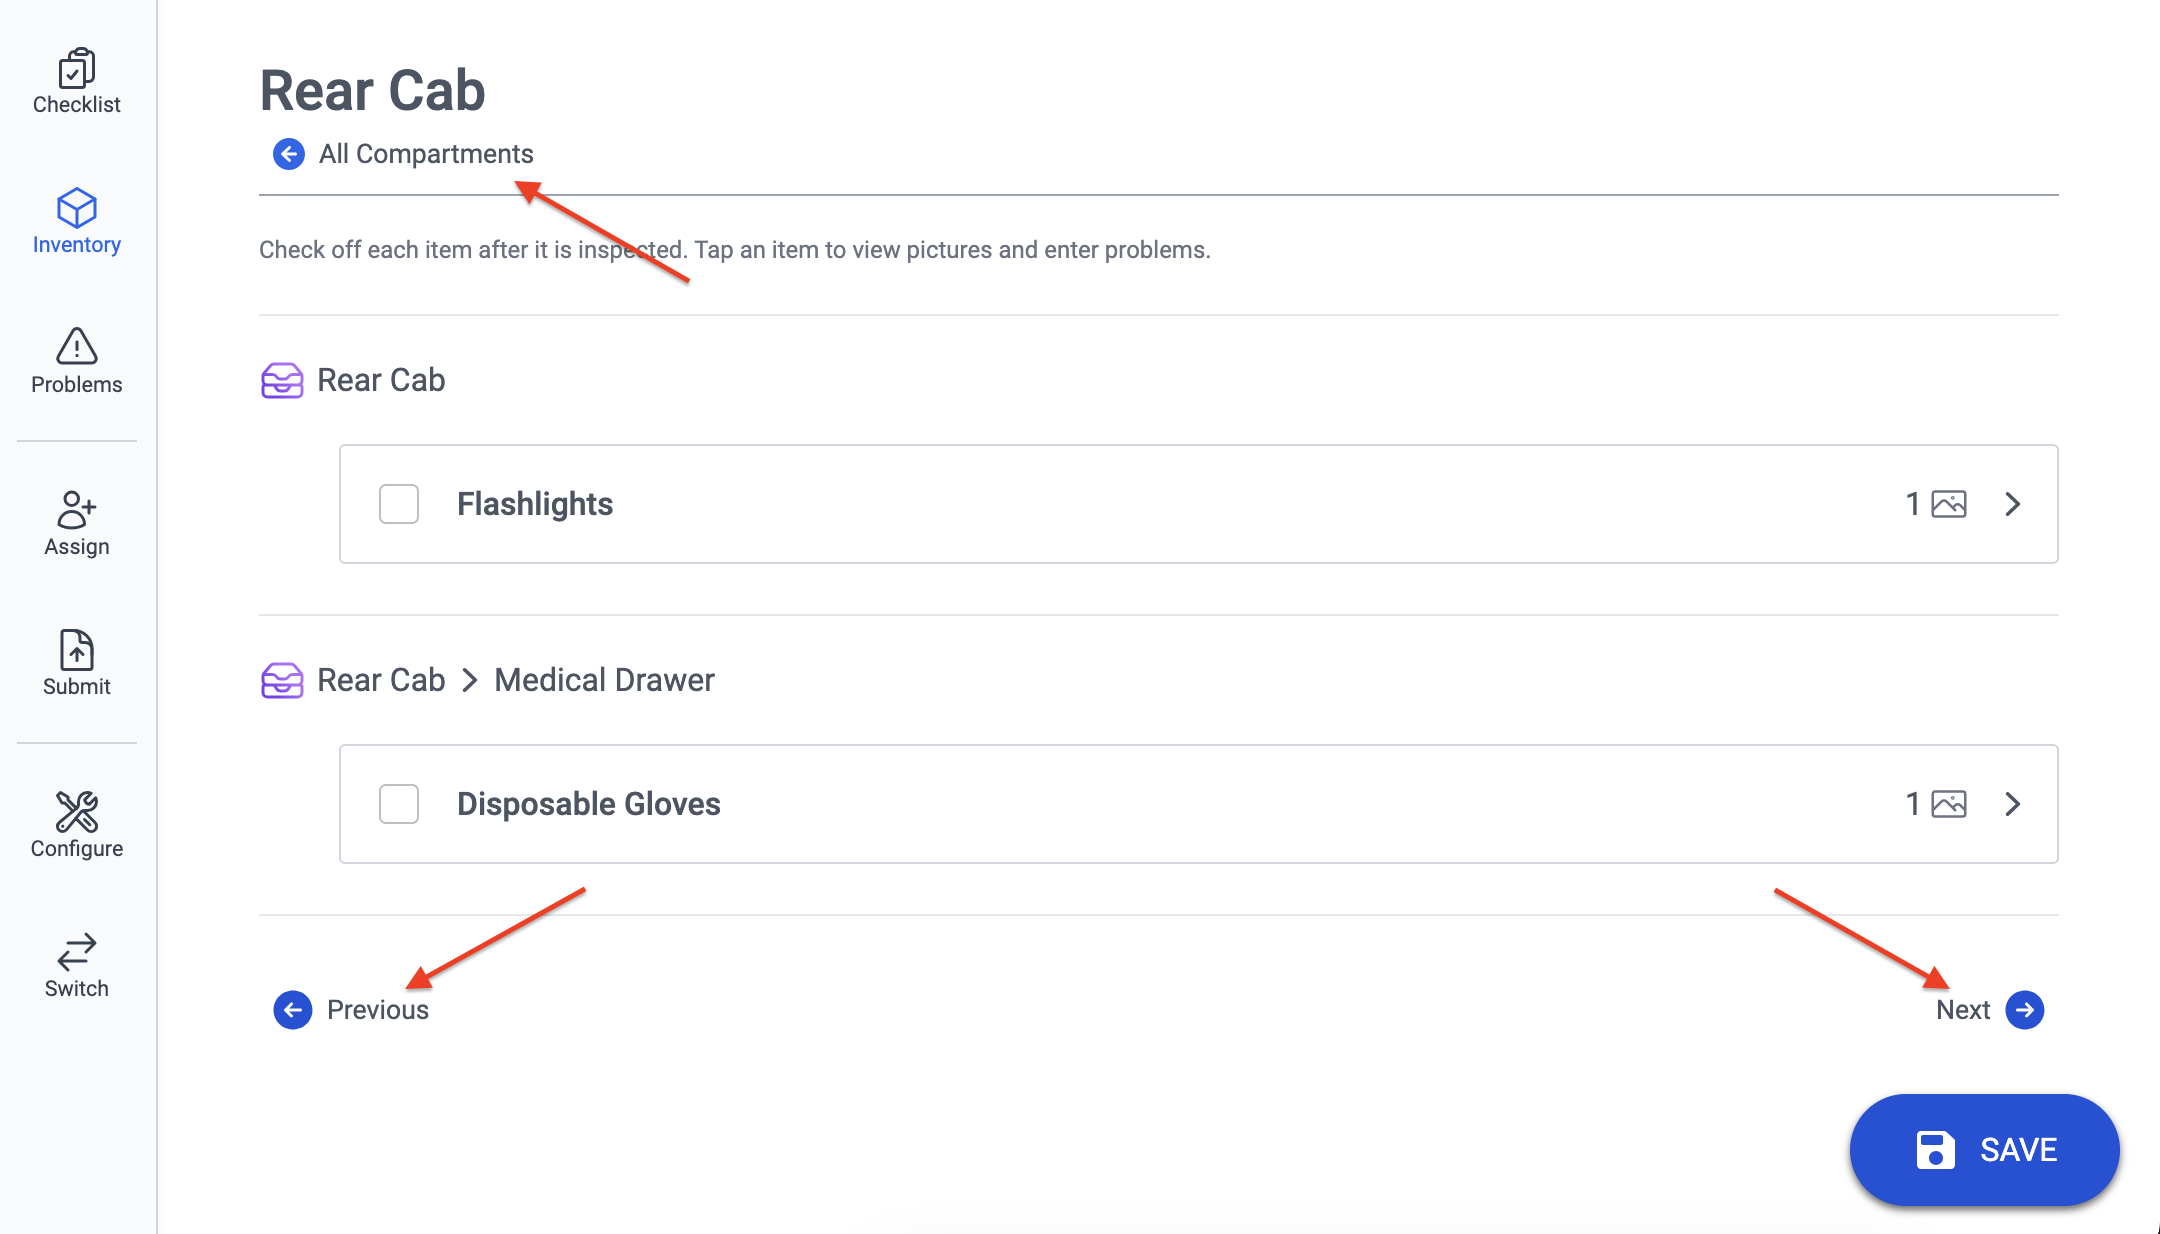
When checking a compartment, you canto return to the listcompartment bylist. clickingClick "All Compartments". Clickingthe "Previous" or "Next" willbuttons navigationat youthe bottom of the page to navigate between top-level compartments in the list.compartments.
Note:If you click "Previous" on the first top-level compartment, you will be taken to the Checklist screen, and if you click "Next" on the last top-level compartment, you will be taken to the Problems screen.

Check
Checking Items in a Compartment
Item
All items are grouped under the top-level compartment and any sub-compartments. OnceTo you have checkedcheck an item,item:
- Follow the steps in above to select a compartment.
- Select the checkbox to the left of the item name to indicate it is complete.
- Click the "Save" button at the bottom of the page.

View

If you see the photo icon, that means that the item has one or more pictures available to assist in the check.expanded view. Click anywhere onin the itemitem's box (except the checkbox) to expand it and view the photos.pictures.
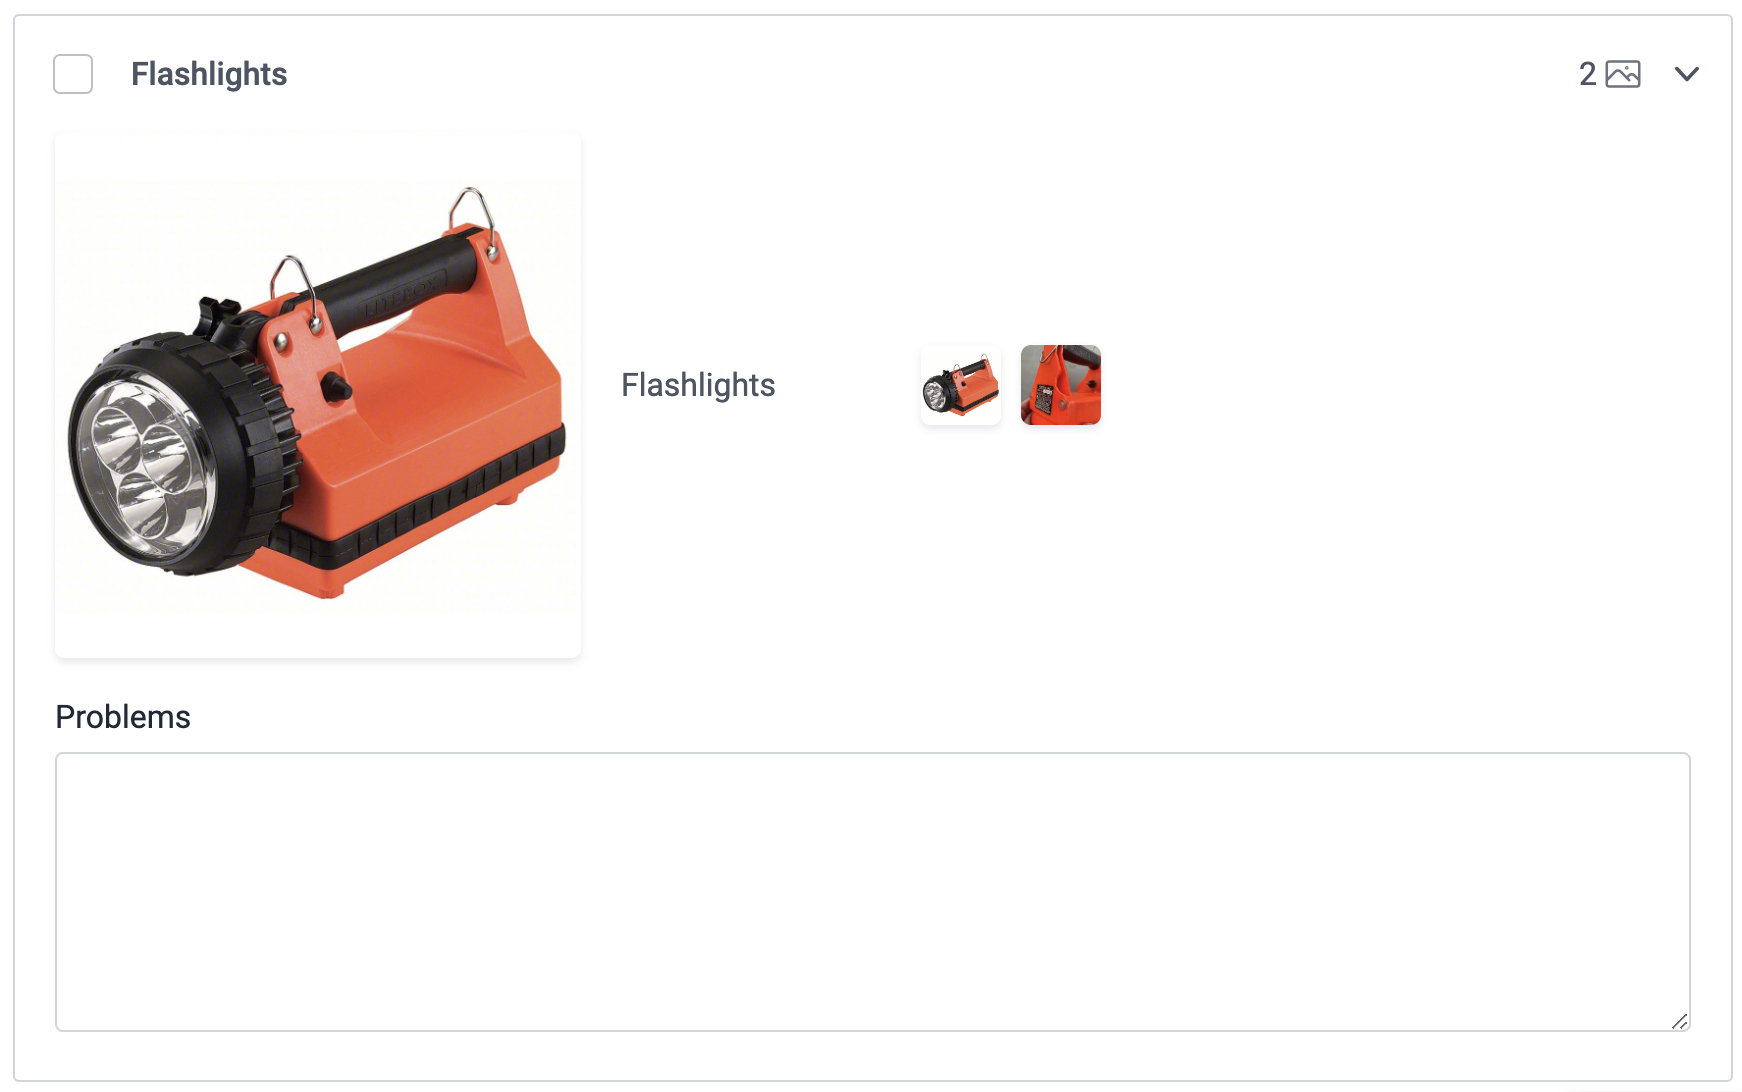

Note Item Problems
When an item is expanded, youYou can also enter any problems youspecific notice.to that item in the expanded view. Any problems entered for an item will be visible when the item is collapsed. To enter an item problem:
- Follow the steps in above to select a compartment.
- Click the item to expand it.
- Enter the problem details in the text area.
- Click the "Save" button at the bottom of the page.


Note ApparatusReport Problems
View Problems
- On a browser, go to https://apparatus-checks.platform.firestationsoftware.com/select-apparatus. You may need to sign in.
- Select the apparatus you want to check.
- Start or resume a check.
- Select "Problems" from the navigation menu.
This screen lists out all problems, including ones entered during inventory checks.
Report Additional Problems
- Click the "Report Problem" button at the bottom of the page.
- Enter the problem description.
- Click "Save" at the bottom of the modal dialog.
Edit a Problem
- Modify the problems description in the text box.
- Click the "Save" button at the bottom of the page.
Delete a Problem
The Problems screen will list any problems that were entered during the Inventory checks. You can also enter additional problems that are not related to equipment by clicking "Report Problem". Problems can also be edited or removed


Submit the Check
The Submit Check screen shows a summary of the check's progress and indicates the validation status of each item:
- Green Checkbox - indicates the item is complete
- Red Exclamation Mark - indicates the item is not complete and is required
- Yellow Exclamation Mark - indicates the item is not complete, but it is optional
If there are any validation errors, the "Submit" button will be grayed out. Once all errors are resolved, the button will turn blue and the check can be submitted.
Warning: When a check is submitted, it will be saved and copied over to Fire Station Desktop, and you will not be able to edit the check further in Fire Station+ .

