Manage the Apparatus Checklist
Saving Changes
You need Apparatus Manager permissions to make these changes.
You can pick the questions that appear on the checklist when conducting an apparatus check. You can also add custom items to the checklist.
- On a browser, go to https://apparatus-checks.platform.firestationsoftware.com/select-apparatus. You may need to sign in.
- Select the apparatus you want to view.
- In the left menu select Checklist.
- Toggle, add or remove items.
- Click "Save Items" at the top of the page.
You must click "Save Items" to save your changes before leaving the page. If you do not click this button, your changes will be lost.
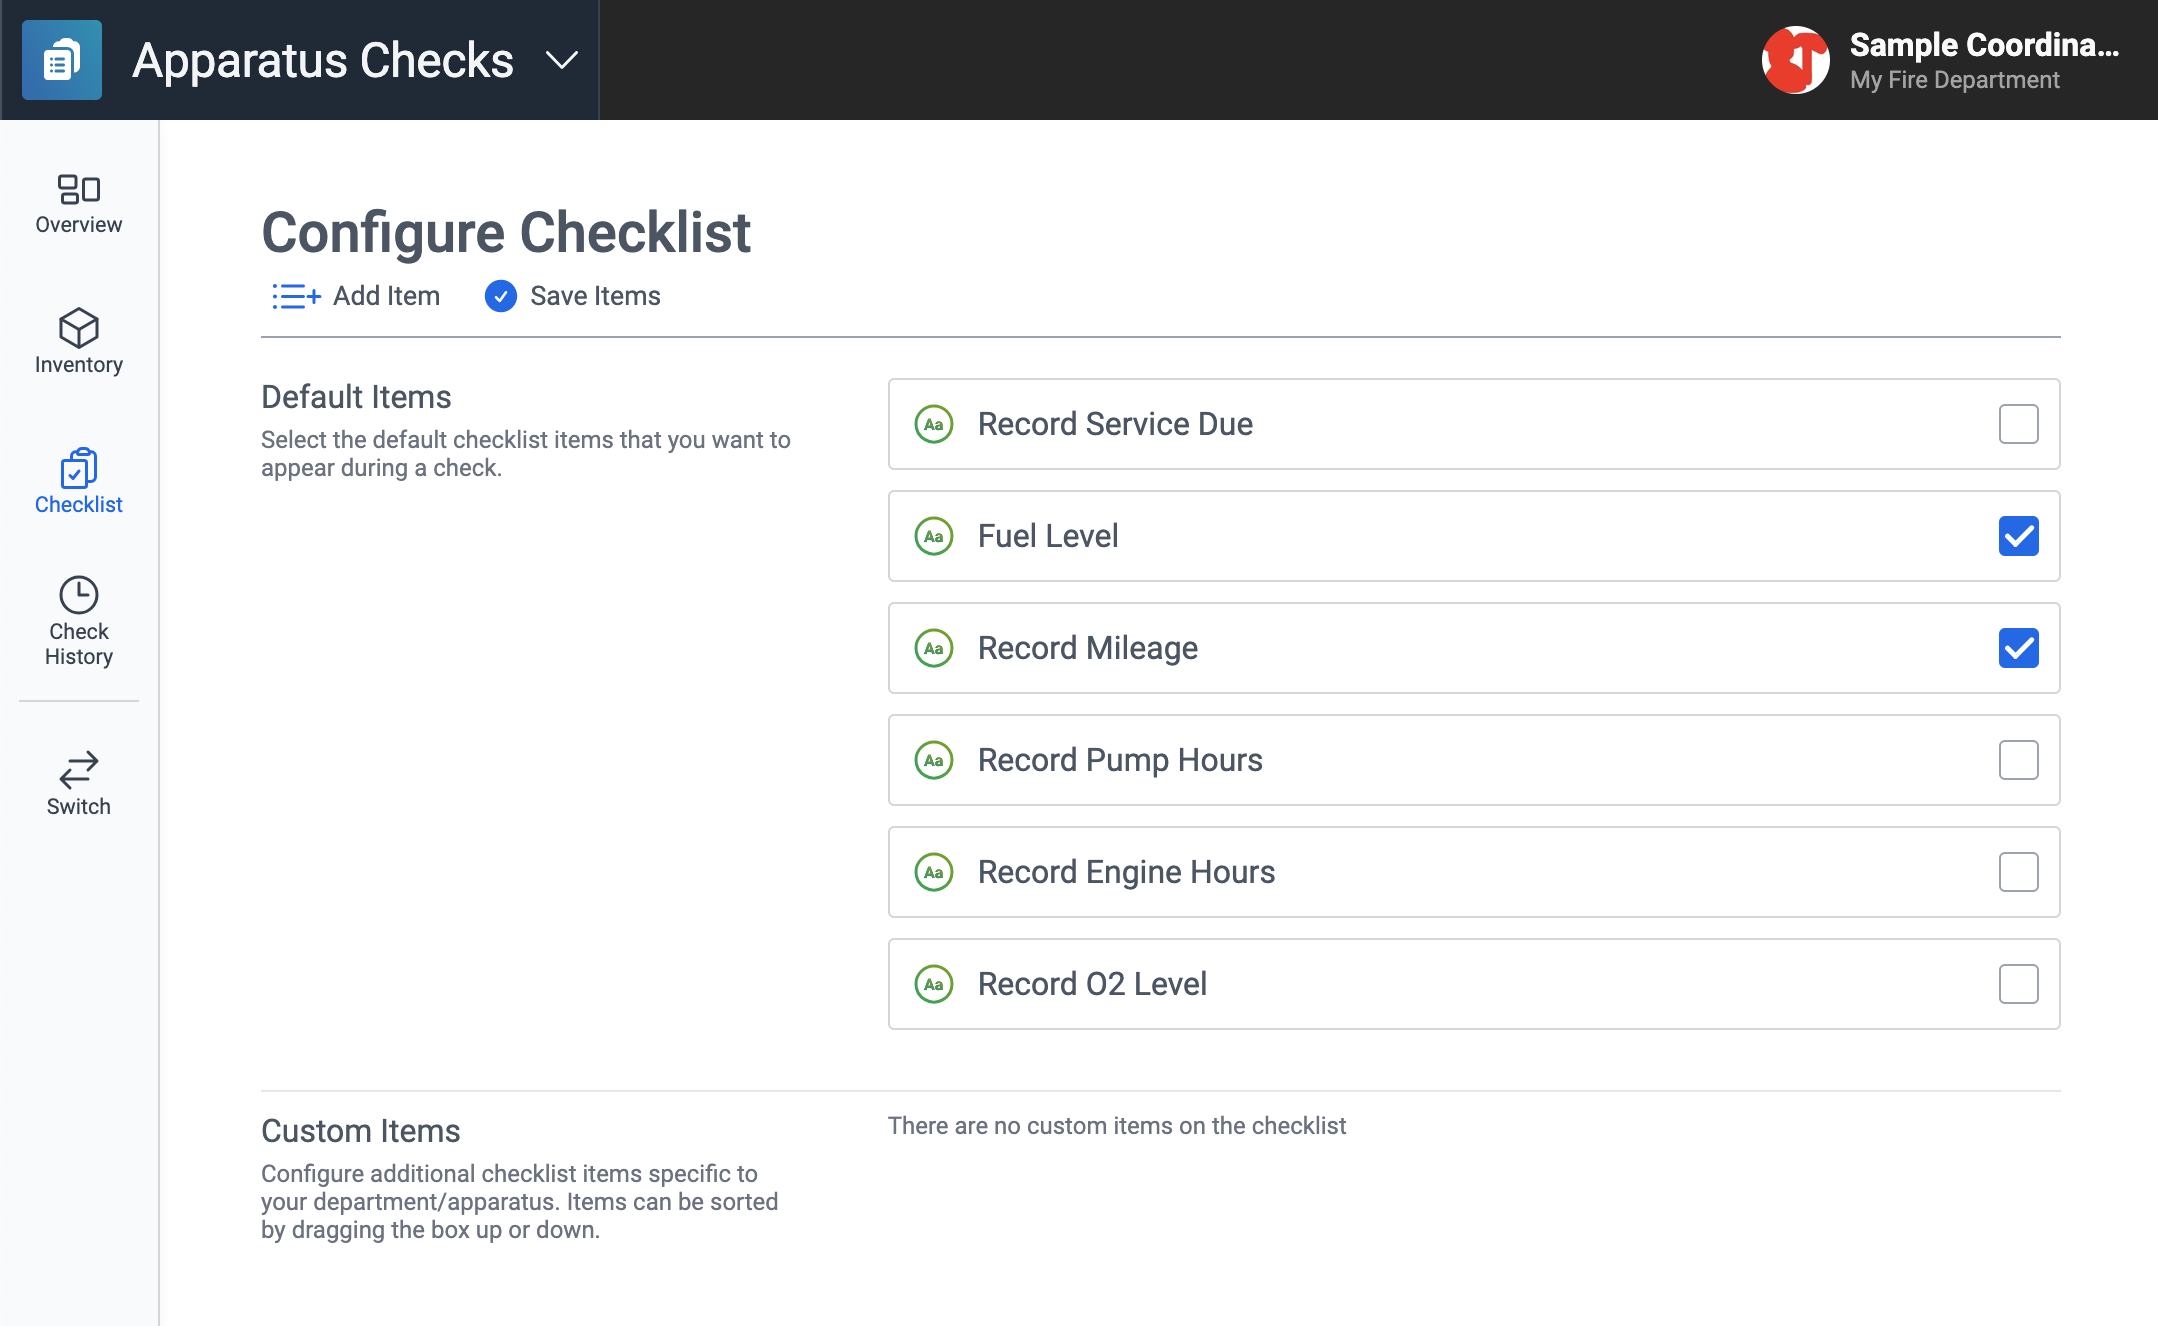
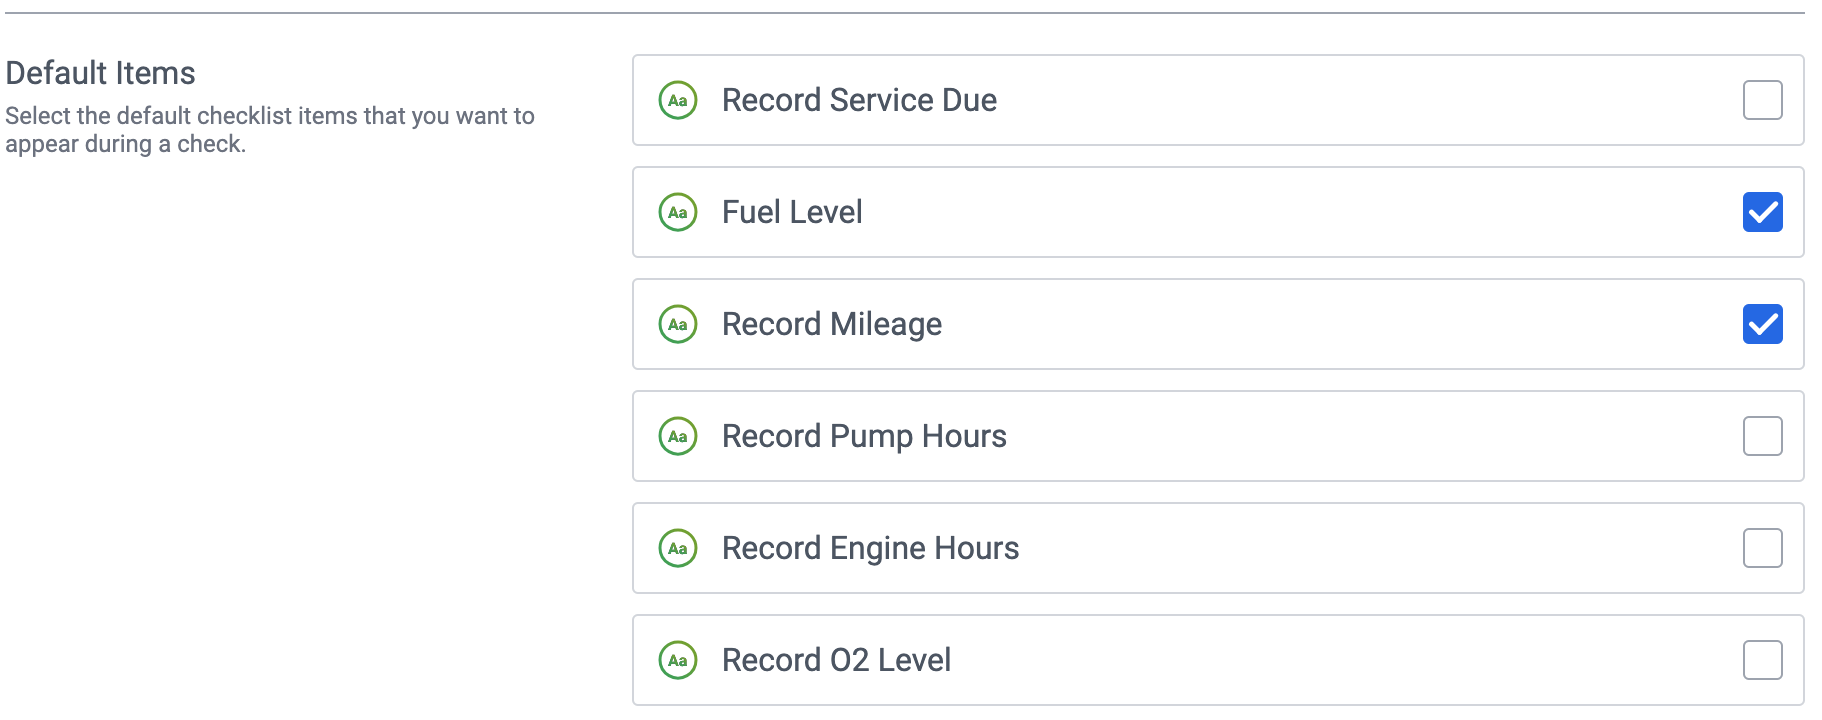
Select Default Items
There are six preconfigured items for an apparatus checklist. You cannot modify these items, but you can enable or disable them.
- Record Service Due
- Fuel Level
- Record Mileage
- Record Pump Hours
- Record Engine Hours
- Record O2 Level
To do this:
- Check or uncheck the checkbox on the right side of a default item.
- Click "Save Items" at the top of the page.
Add Custom Items
You can add custom items to the checklist:
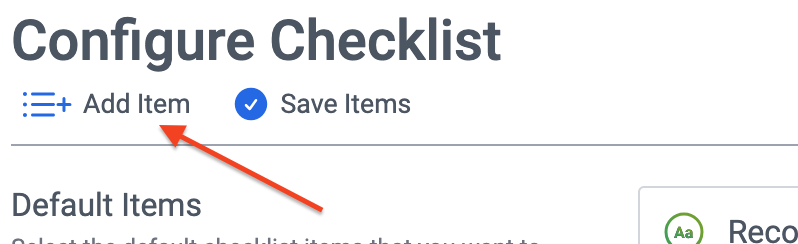
- At the top of the Checklist page, click the "Add Item" button.
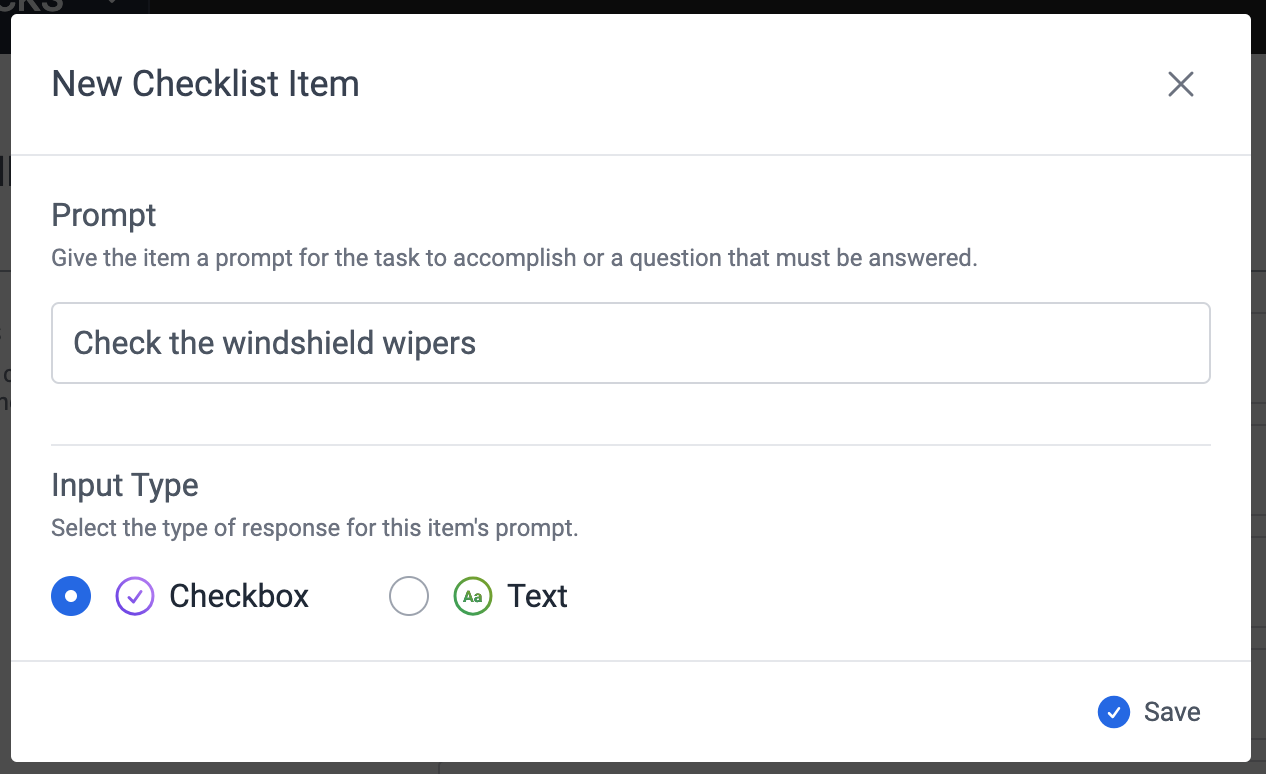
- Fill out the form details.
- Click "Save" at the bottom of the modal dialog.
- Click "Save Items" at the top of the page.
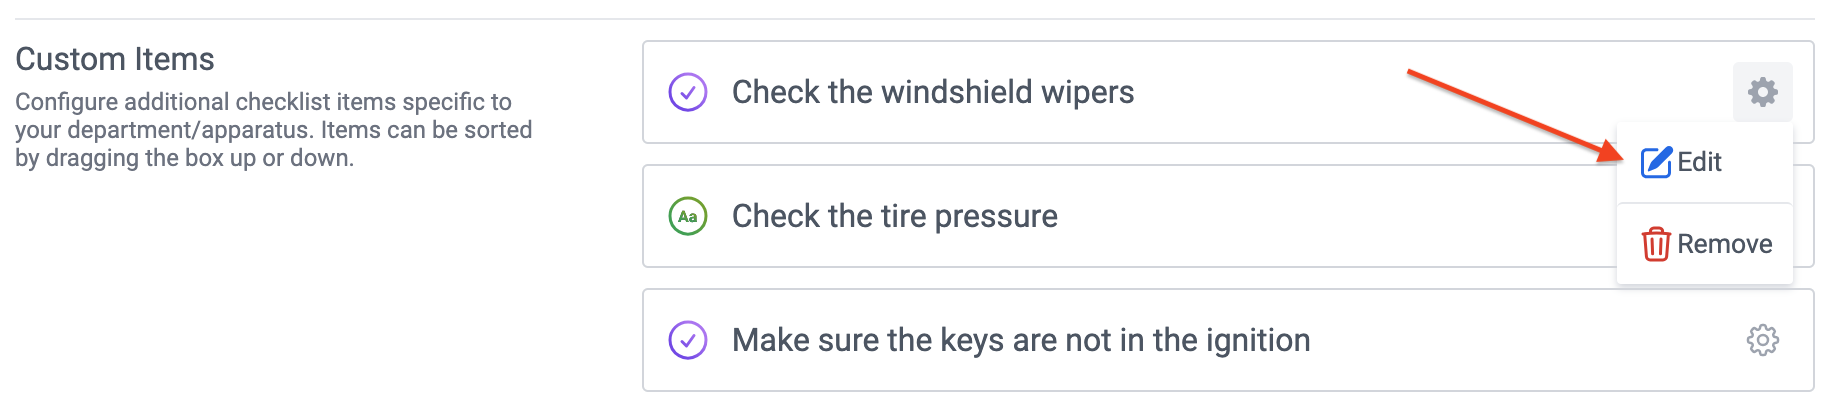
Edit Custom Items
- Click the gear button on the right side of the item.
- Select "Edit".
- Update the form details.
- Click "Save" at the bottom of the modal dialog.
- Click "Save Items" at the top of the page.
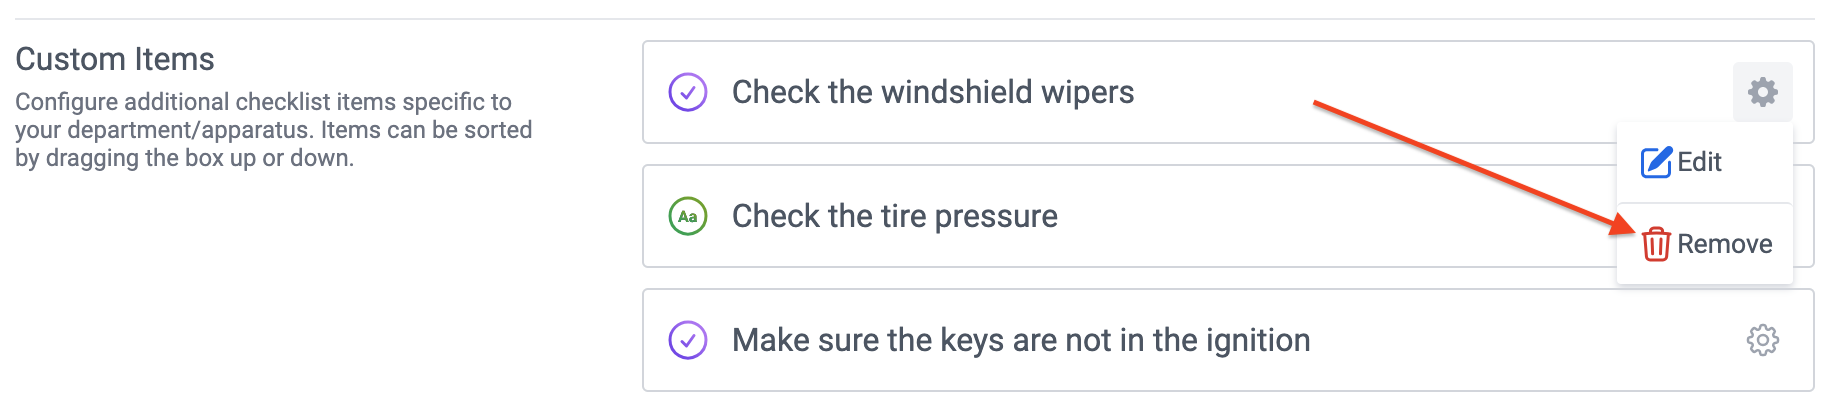
Delete Custom Items
- Click the gear button on the right side of the item.
- Select "Edit".
- Update the form details.
- Click "Confirm" at the bottom of the modal dialog.
- Click "Save Items" at the top of the page.
Organize Custom Items
You can reorder custom items:
- Click and hold on the icon or name of the item row to begin dragging it.
- Drag the row up and down and release your mouse to move the row to a new location.
- When you are done, click "Save Items" at the top of the page.