Manage Apparatus Inventory
Configure and Save Inventory Changes
You need Apparatus Manager permissions to make these changes.
You can set up and configure compartments and items stored on an apparatus. Additionally, you can upload photos of compartments and items for reference when conducting an apparatus check.
- On a browser, go to https://apparatus-checks.platform.firestationsoftware.com/select-apparatus. You may need to sign in.
- Select the apparatus you want to view.
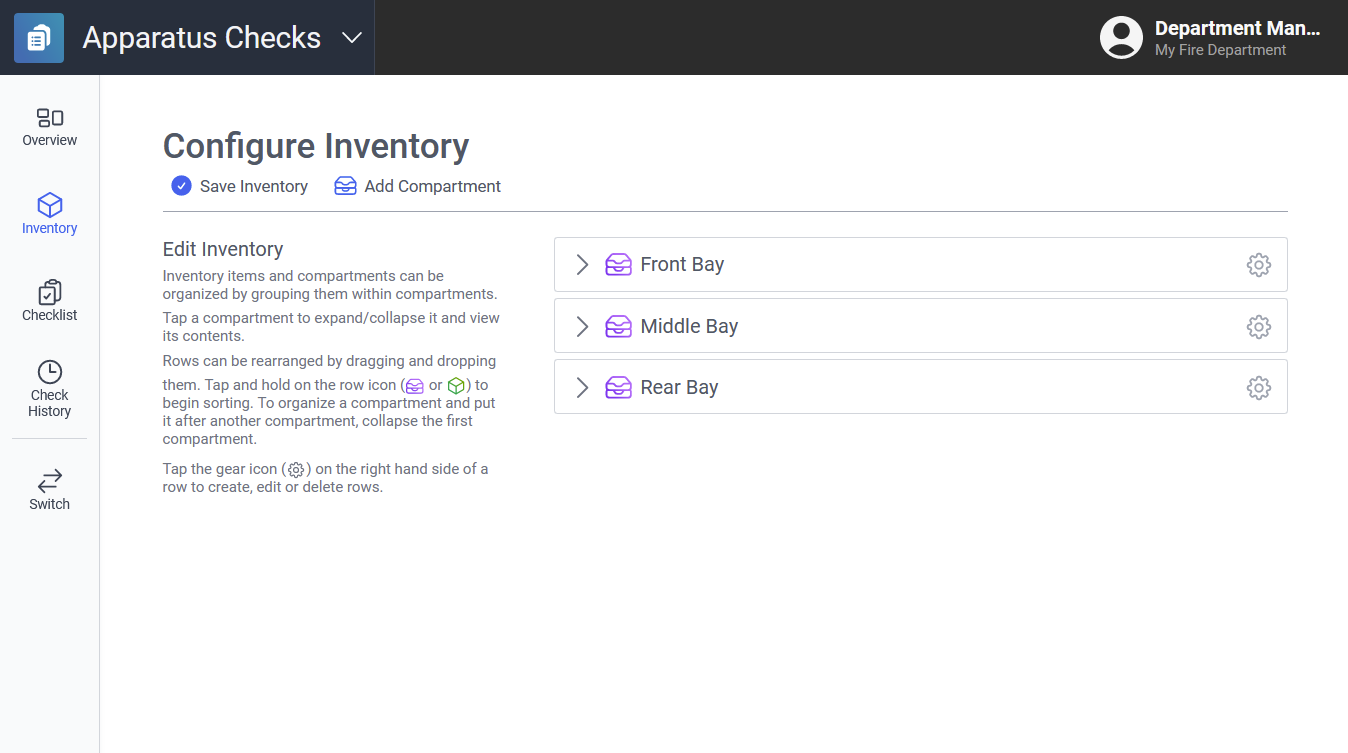
- In the left menu select Inventory.
- Add, update or remove components and items.
- Click "Save Inventory" at the top of the page.
You must click "Save Inventory" to save your changes before leaving the page. If you do not click this button, your changes will be lost.
Add Inventory
Create Compartments
There are two types of compartments: top-level compartments and sub-compartments. Top-level compartments are listed directly under the apparatus. These compartments show up for assignment when conducting an apparatus check. Sub-compartments go inside other compartments and help you organize complex inventory hierarchies.
Remember to click the "Save Inventory" button after creating an item. The new item is not saved until the "Save Inventory" button is clicked.
Create a Top-Level CompartmentCompartments
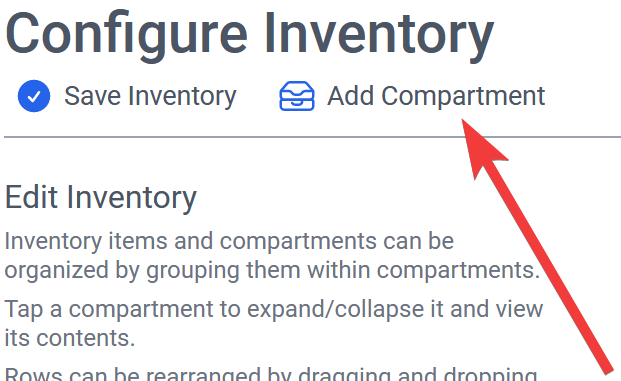
- At the top of the Inventory page, click the "Add Compartment" button.
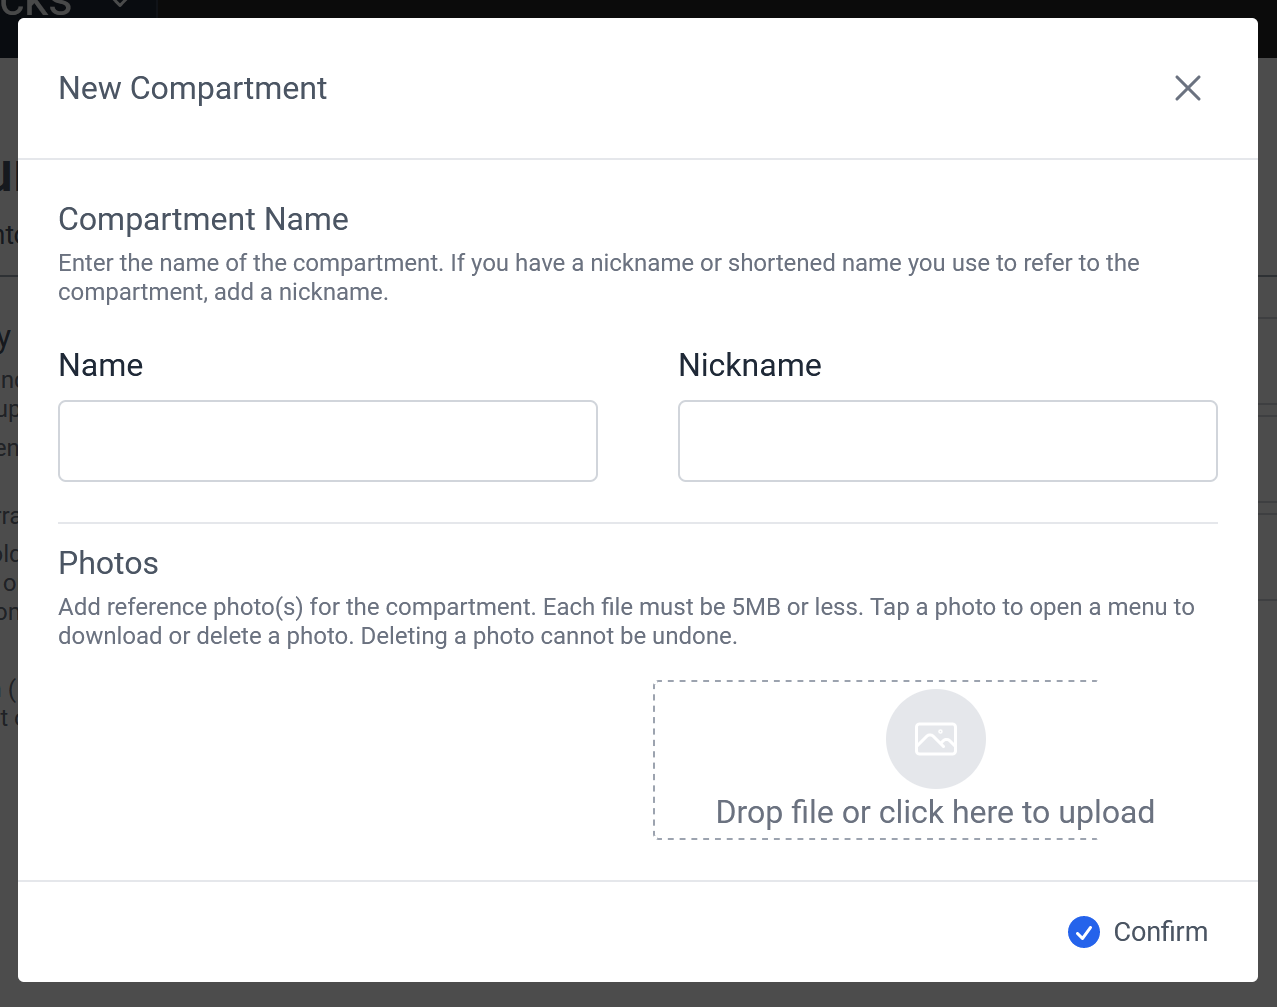
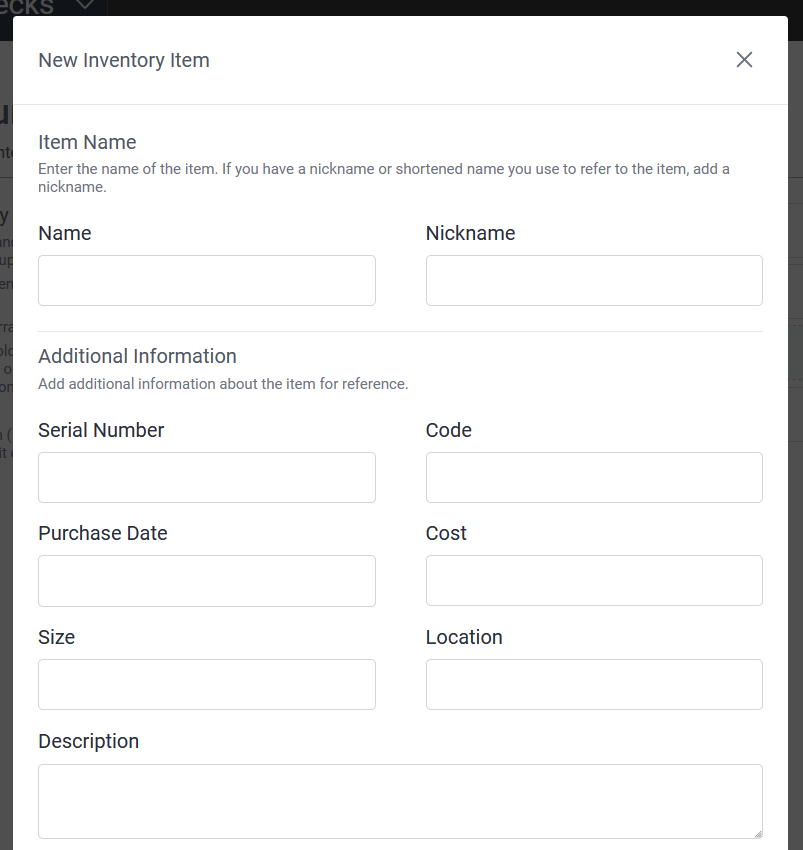
- Fill out the form details.
- Click "Confirm".
Create a Sub-CompartmentCompartments
- Follow the steps above to create at least one
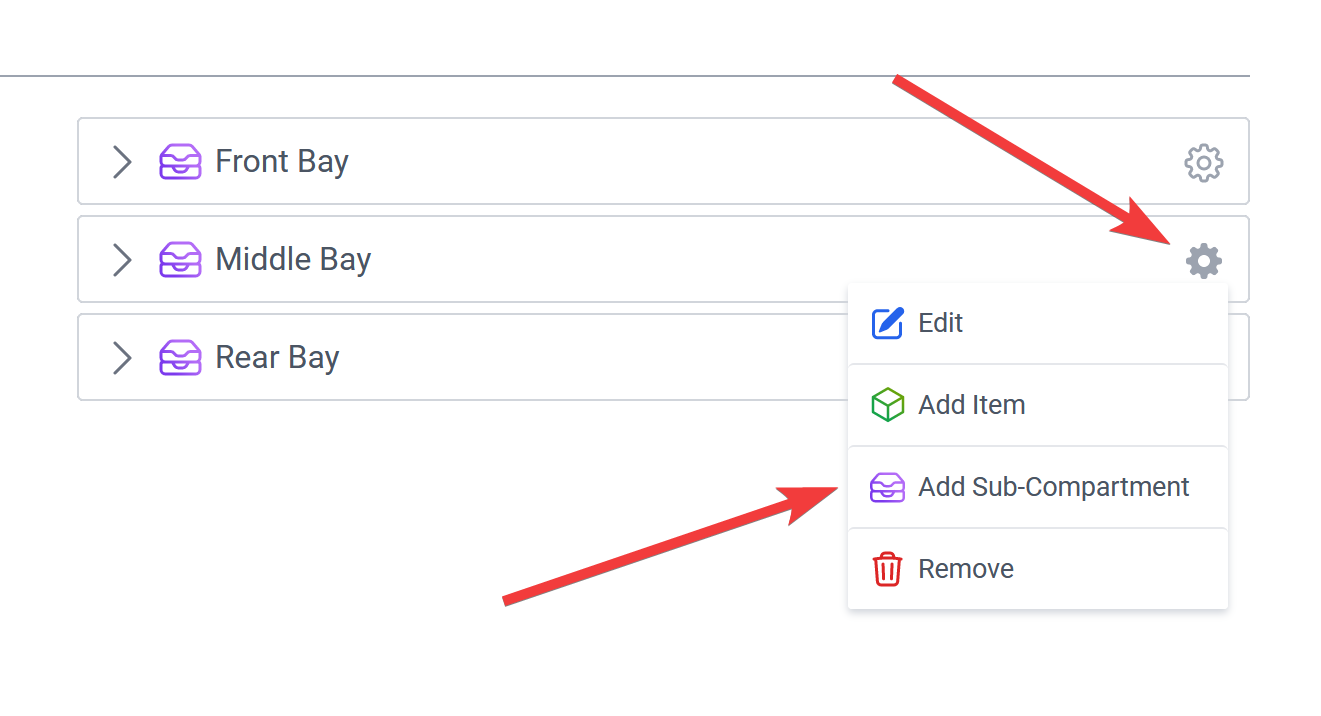
top-levelcompartment. - Click the gear button on the right side of a
top-levelcompartment. - Select "Add Sub-Compartment"
- Fill out the form details.
- Click "Confirm".
Create Items (Equipment)
Items
- Follow
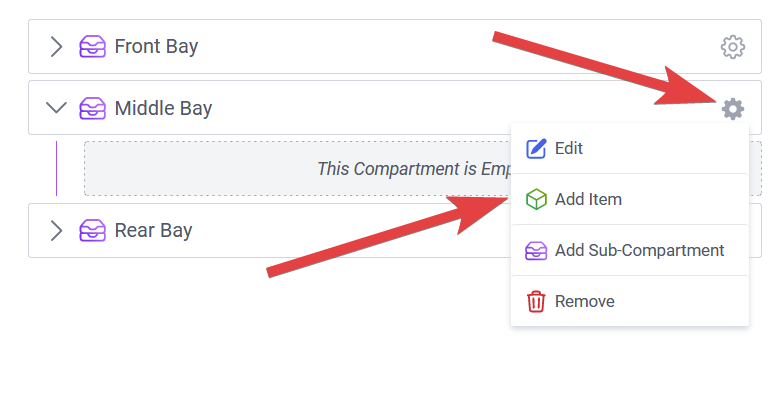
addedthe steps above tocompartmentscreatebyatclickingleast one compartment. - Click the gear button on the
right-right side of acompartment,compartment. - Select "Add Item"
- Fill out the
compartmentformdetailsdetails. - Click "Confirm".


Important Note: Remember to click the "Save Inventory" button after creating newan inventory items.item. The new itemsitem areis not saved until the "Save Inventory" button is clicked.
AboutNicknames Namefor &Compartments Nicknameand Items
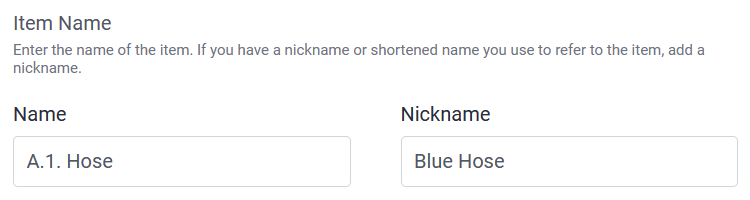
Inventory itemscompartments and compartmentsitems have both a Name field and a Nickname field. The Name field is required on both compartmentrequired, and item,we therecommend Nicknamethat field is optional. These fields are used toyou enter a fully descriptive namename. The Nickname field is not required and we recommend you enter an abbreviated or shortenedcommonly used name.
Compatibility with Fire Station Desktop
Names and Nicknames
The Name field is used as the name of the compartment/item in both the Fire Station+ Apparatus Checks and the Fire Station DesktopDesktop, app.but Ifthe you choose to enter a nickname, thisNickname is only used only in the Fire Station+ Apparatus. Checks.
For example, an item with the name "A.1. Hose" butand with the nickname "Hose" will show up as "Hose" in the Fire Station+ Apparatus Checks but will show up as "A.1. Hose" in the Fire Station DesktopDesktop.

Sub-Compartments

Note: Because the Fire Station Desktop app does not support sub-compartments,compartments. allAll compartments and sub-compartments on an apparatus show up asappear top-level compartments in the Fire Station DesktopDesktop.
For this reason, we recommend you use a naming pattern for sub-compartments that indicates it is contained in another compartment. You can be helpful to useenter the name field to indicate which compartment a sub-compartment is in, then enter simply the sub-compartment name as the nickname.Nickname in Fire Station+ . This makes it possible to indicate where a sub-compartment is locatedhierarchies in the Fire Station Desktop app while stillkeeping havingnames simple compartmentin namesFire toStation+ make the process of running a check easy..
Example:
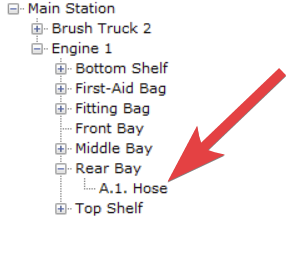
For example, thisThis sub-compartment is nicknamed "First-Aid Bag" and is located inside the "Rear Bay" compartment.
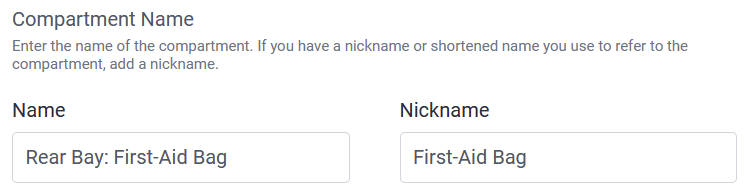

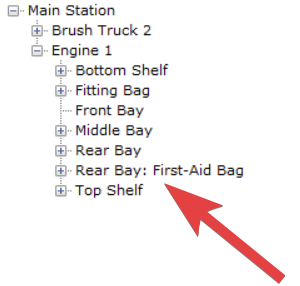
By giving the sub-compartment the name "Rear Bay: First-Aid Bag" and a nickname of simply "First-Aid Bag", the compartment heirarchy is represented in the Fire Station Desktop app.

ThisHere is how the compartment shows upappears in theFire Station+ vs Fire Station Desktop app.Desktop:


Organize Inventory
Inventory items and compartments can be viewed and re-organized using drag-and-drop. You can move items and compartments using this method.
To view the contents of a compartment, click the arrow on the left-side of a compratment.compartment.

To drag-and-drop a compartment, or an inventory item, click and hold the item's name then move your mouse to put it in its new location. A red line will indicate where the dragging item/compartment will be placed.

When moving an item or a compartment into another compartment, be sure to open the compartment that you want to drop into. When a compartment is closed nothing can be dropped inside of it. Instead, dropping below a closed compartment will place the dropped compartment/item below the compartment instead of inside the compartment.
Important Note: Be sure to click the "Save Inventory" button after organizing the inventory. The re-organized inventory is not saved until the "Save Inventory" button is clicked.
Upload Photos
Photos may be uploaded for both inventory items and compartments. Photos are uploaded when creating a new item/compartment or by editing an existing item/compartment. To edit an item or a compartment click the gear on the ride-side of the item/compartment, then select the "Edit" option.

On both the edit compartment and item modal boxes there is a photos section at the bottom. Click the photo section or drag-and-drop a photo file onto the area indicated with dotted lines.

Once uploaded, the photos for a compartment or an item are displayed in the photos section.

Important Note: You must click "Save Inventory" after uploading photos for the inventory photos to be saved. The photos are not saved until the inventory is saved.
Deleting Inventory
To delete a compartment or inventory item, click the gear on the right-side of the compartment/item then select the "Remove" option.

Important Note: After deleting items or compartments, you must click the "Save Inventory" button to save the changes.
Start a New Check
When there is no apparatus check currently in progress, click the "New Check" button to begin the apparatus check. You must have the Apparatus Check Coordinator permission assigned to your user for this button to be available.

Fill out the details in the Start Check modal, then click "Start" to begin the apparatus check. Enter a scheduled date indicating when the apparatus check should begin. The scheduled date defaults to today.

After clicking "Start", you will be redirected to the new apparatus check.
Resuming a Check
When viewing the Overview screen of an apparatus that already has an apparatus check in progress, the status of the apparatus check is displayed. Click either of the "Resume Check" buttons to return to the current apparatus check.
